MANUZOID
Explore
Explore
Bookmarks
Lexmark
X544 models
Lexmark X544 models Administrator's Manual
Type
Administrator's Manual
Brand
Lexmark
Size
874.08 KB
Category
Networking
Pages
79
Language
English
Table of contents
Contents
2
Devices covered in this guide
4
Simple-security devices
4
Advanced-security devices
4
Managing authentication and authorization methods
5
Understanding the basics
5
Authentication and authorization
5
Groups
7
Access Controls
7
Security Templates
7
Accessing the Embedded Web Server
7
Simple-security device access controls
8
Creating a Web page password and applying access control restrictions
8
Creating a PIN and applying access control restriction
9
Limiting access using basic security setup
10
Advanced-security building blocks
10
Configuring advanced building blocks from the control panel
10
Creating a password building block for advanced security setup
11
Creating a PIN building block for advanced security setup
11
Setting up internal accounts
12
Connecting your printer to an Active Directory domain
14
Using LDAP
15
Using LDAP+GSSAPI
17
Configuring Kerberos 5 for use with LDAP+GSSAPI
19
Using a security template to control function access
20
Managing certificates and other settings
24
Installing a Certificate Authority certificate on the device
24
Configuring the device for certificate information
24
Sample certificate request data
25
Creating a new device certificate
26
Viewing, downloading, and deleting a certificate
26
Setting certificate defaults
27
Managing devices remotely
28
Using HTTPS for device management
28
Setting a backup password
28
Setting up SNMP
29
Configuring security audit log settings
30
Updating firmware
31
Managing other access functions
33
Configuring confidential printing
33
Setting login restrictions
34
Enabling and disabling USB host ports
34
Enabling the security reset jumper
35
Enabling holding faxes
36
Enabling Operator Panel Lock
36
Securing network connections
38
Configuring 802.1X authentication
38
Configuring IP security settings
39
Configuring the TCP/IP port access setting
41
Setting the restricted server list
41
Securing data
42
Physical lock
42
Disk encryption
43
Checking disk encryption status
44
Erasing settings (non-volatile memory)
44
Disk file wiping
46
Erasing hard disk data
48
Out-of-service wiping
49
Statement of volatility
50
Disposing of a hard disk
51
Erasing volatile memory
51
Erasing non-volatile memory
51
Security solutions
52
Print Release
52
Secure Held Print Jobs
52
Card Authentication
52
Smart Card authentication
52
Security scenarios
54
Scenario: Printer in a public place
54
Scenario: Standalone or small office
55
Scenario: Network running Active Directory
56
Scenario: More security-aware environment (802.1X) and SNMPv3
57
Scenario: Network-based usage restrictions using access card
57
Troubleshooting
59
Login troubleshooting
59
USB device is not supported
59
Make sure that a supported smart card reader is attached
59
Printer home screen fails to return to a locked state when not in use
59
Make sure that the authentication token is installed and running
59
Make sure that PKI Authentication is installed and running
59
Login screen does not appear when a smart card is inserted
59
Make sure that the smart card is recognized by the reader
59
KDC and MFP clocks are out of sync
60
Make sure that the date and time settings on the printer are correct
60
Kerberos configuration file is not uploaded
60
Make sure that the Kerberos file has been uploaded
60
Cannot authenticate users
60
Make sure that the Realm specified in the Kerberos settings is in uppercase
60
Domain controller certificate is not installed
60
Make sure that the correct certificate is installed on the printer
60
KDC does not respond within the required time
61
Make sure that the IP address or host name of the KDC is correct
61
Make sure that the KDC is available
61
Make sure that Port 88 is not blocked by a firewall
61
Cannot find user realm in the Kerberos configuration file
61
Make sure that the Windows Domain is specified in the Kerberos settings
61
Cannot find realm on card in the Kerberos configuration file
61
Upload a Kerberos configuration file and make sure that the realm has been added to the file
61
Client is unknown
62
Make sure that the domain controller information is correct
62
Login does not respond at “Getting User Info”
62
User is logged out automatically
62
Increase the Panel Login Timeout interval
62
LDAP troubleshooting
62
LDAP lookups take a long time and then fail
62
Make sure that Port 389 (non-SSL) and Port 636 (SSL) are not blocked by a firewall
62
Make sure that the LDAP search base is not too broad in scope
62
LDAP lookups fail almost immediately
63
Make sure that the Address Book Setup contains the host name for the LDAP server
63
Make sure that the Address Book Setup settings are correct
63
Narrow the LDAP search base to the lowest possible scope that includes all necessary users
63
Make sure that the LDAP attributes for the user e-mail address and home directory are correct
63
Held Jobs/Print Release Lite troubleshooting
63
Cannot use the Held Jobs feature
63
Add the user to the appropriate Active Directory group
63
Cannot determine Windows user ID
64
Make sure that PKI Authentication sets the user ID for the session
64
No jobs are available for the user
64
Make sure that PKI authentication is set to the correct user ID
64
Make sure that the jobs were sent to the correct printer and were printed
64
Jobs are printing immediately
64
Make sure that PKI Held Jobs is installed and running
64
Make sure that all jobs are required to be held
65
Appendix
66
Appendix A: CA file creation
66
Appendix B: CA-Signed Device Certificate creation
66
Appendix C: Access controls
66
Glossary of Security Terms
76
Index
77
View document
Lexmark X544 models Compatibility Manual
Type
Compatibility Manual
Brand
Lexmark
Size
3.08 MB
Category
Laser/LED printers
Pages
179
Language
English
Table of contents
Contents
3
Overview
7
Introduction
7
General information
8
Paper and label industry
8
Printing volumes
8
Testing print material
8
Design factors
9
Pick roller technology
11
Maintenance procedures
14
Troubleshooting
14
Card stock
16
Weight
16
Grain orientation
17
Coatings
18
Offset powders
19
Labels
20
Label characteristics
20
Printing on labels
20
Duplexing paper labels
20
Primary rib pattern design guidelines for reference edge alignment
22
Label components
23
Label design guidelines
25
Printer specifications
32
Lexmark C500n
32
Lexmark C510
33
Lexmark C520, C522, and C524
34
Lexmark C530, C532, and C534
36
Lexmark C540, C543, C544, and C546dtn
38
Lexmark C720
40
Lexmark C734 and C736
42
Lexmark C746 and C748
44
Lexmark C750
46
Lexmark C752
48
Lexmark C760 and C762
51
Lexmark C770, C772, C780, and C782
53
Lexmark C792e, C792de, C792dte, and C792dhe
54
Lexmark C910
56
Lexmark C912
58
Lexmark C920
59
Lexmark C925
61
Lexmark C935
62
Lexmark C950
64
Lexmark CS310n, CS310dn, CS410n, CS410dn, and CS510de
65
Lexmark CX310n, CX310dn, CX410e, CX410de, CX410dte, CX510de, CX510dhe, and CX510dthe
67
Lexmark E120
69
Lexmark E220
70
Lexmark E230, E232, E234(n), E330, and E332n
71
Lexmark E238, E240, E240n, E340, and E342n
72
Lexmark E250, E350, and E450n
73
Lexmark E260, E260d, E260dn, E360d, E360dn, E460dn, E460dw, and E462dtn
74
Lexmark E320, E322
75
Lexmark E321, E323
76
Lexmark MS310d, MS310dn, MS410d, MS410dn, MS510dn, MS610dn, and MS610de
77
Lexmark MS710 and MS711
79
Lexmark MS810, MS811, and MS812
82
Lexmark MX310dn, MX410de, MX510de, MX511de, MX511dhe, MX610de, MX611de, and MX611dhe
84
Lexmark MX710, MX711, MX810, MX811, and MX812
86
Lexmark T420
89
Lexmark T430
91
Lexmark T520, T522
93
Lexmark T620, T622
96
Lexmark T630, T632, T634
99
Lexmark T640, T642, T644
102
Lexmark T650, T652, T654, and T656dne
104
Lexmark W812
107
Lexmark W820
108
Lexmark W840
109
Lexmark W850
111
Lexmark X203n and X204n
113
Lexmark X215
114
Lexmark X264dn, X363dn, X364dn, and X364dw
116
Lexmark X422
118
Lexmark X463de, X464de, X466dte, and X466dtwe
119
Lexmark X500 and X502n
121
Lexmark X543, X544, and X546dtn
122
Lexmark X548
124
Lexmark X560
125
Lexmark X642e
127
Lexmark X644e, X646e
129
Lexmark X651de, X652de, X654de, X656de, and X658de
132
Lexmark X734, X736, and X738
135
Lexmark X746 and X748
137
Lexmark X782
139
Lexmark X792de, X792dte, X792dtfe, X792dtpe, X792dtme, and X792dtse
141
Lexmark X850, X852e, and X854e
143
Lexmark X860e, X862e, and X864e
145
Lexmark X925
147
Lexmark X940 and X945
149
Lexmark X950
150
Optra plus, 4039, 4029, 4019, WinWriter 600 printers
151
Optra C
155
Optra C710
155
Optra Color 1200
157
Optra E, Ep
158
Optra E310, E312
159
Optra Es special media printer
160
Optra K 1220
161
Optra M410, M412
162
Optra N
164
Optra S
165
Optra SC 1275
168
Optra T
169
Optra W810
172
Glossary
174
Index
178
View document
Lexmark X544 models Fax Manual
Type
Fax Manual
Brand
Lexmark
Size
66.59 KB
Pages
4
Language
English
View document
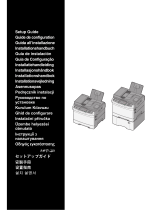
Lexmark X544 models Installation guide
Type
Installation guide
Brand
Lexmark
Size
1.21 MB
Category
Networking
Pages
36
Language
English
View document
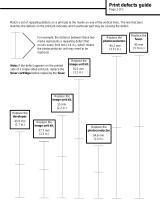
Lexmark X544 models Maintenance Manual
Type
Maintenance Manual
Brand
Lexmark
Size
588.52 KB
Category
Print & Scan
Pages
30
Language
English
Table of contents
Contents
2
Maintaining the printer
3
Storing supplies
3
Checking the status of supplies
3
Checking the status of supplies from the printer control panel
3
Checking the status of supplies from a network computer
3
Ordering supplies
4
Ordering toner cartridges
4
Ordering imaging kits
5
Ordering a waste toner bottle
5
Replacing supplies
6
Replacing the waste toner bottle
6
Replacing a black imaging kit
9
Replacing a black and color imaging kit
15
Replacing a toner cartridge
21
Replacing a developer unit
22
Cleaning the exterior of the printer
28
Cleaning the scanner glass
29
Moving the printer
29
Before moving the printer
29
Moving the printer to another location
30
Shipping the printer
30
View document
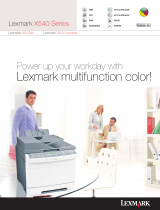
Lexmark X544 models Supplementary Manual
Type
Supplementary Manual
Brand
Lexmark
Size
6.32 KB
Pages
1
Language
English
View document
Lexmark X544 models User manual
Type
User manual
Brand
Lexmark
Size
162.23 KB
Pages
12
Language
English
View document
Lexmark X544 models User manual
Type
User manual
Brand
Lexmark
Size
11.18 MB
Category
Laser/LED printers
Pages
359
Language
English
View document
Lexmark X544 models User manual
Type
User manual
Brand
Lexmark
Size
4.24 MB
Pages
34
Language
English, Spanish, Estonian, French, Italian, Japanese, Korean, Dutch, Norwegian, Romanian, Swedish
View document
Lexmark X544 models User manual
Type
User manual
Brand
Lexmark
Size
4.15 MB
Category
Multifunctionals
Pages
245
Language
English
Table of contents
Contents
2
Safety information
11
Learning about the printer
13
Finding information about the printer
13
Selecting a location for the printer
14
Printer configurations
16
Basic functions of the scanner
16
Understanding the ADF and scanner glass
17
Understanding the printer control panel
17
Additional printer setup
23
Installing internal options
23
Available options
23
Installing a memory card
23
Installing a flash memory or font card
27
Installing hardware options
30
Installing a 650-sheet duo drawer
30
Attaching cables
32
Verifying printer setup
33
Printing menu settings pages
33
Printing a network setup page
33
Setting up the printer software
34
Installing printer software
34
Updating available options in the printer driver
34
Loading paper and specialty media
36
Linking and unlinking trays
36
Linking trays
36
Unlinking trays
36
Assigning a Custom Type <x> name
36
Setting the Paper Size and Paper Type
37
Configuring Universal paper settings
37
Loading the standard 250-sheet tray
38
Loading the optional 650-sheet duo drawer
40
Using the multipurpose feeder
41
Using the manual feeder
43
Paper and specialty media guide
45
Paper guidelines
45
Paper characteristics
45
Unacceptable paper
46
Selecting paper
46
Selecting preprinted forms and letterhead
46
Storing paper
47
Supported paper sizes, types, and weights
47
Paper sizes supported by the printer
47
Paper types supported by the printer
48
Paper types and weights supported by the printer
49
Paper capacities
50
Using recycled paper and other office papers
51
Printing
52
Printing a document
52
Printing on specialty media
53
Tips on using letterhead
53
Tips on using transparencies
54
Tips on using envelopes
54
Tips on using paper labels
55
Tips on using card stock
56
Printing from a flash drive
56
Printing photos from a PictBridge-enabled digital camera
58
Printing information pages
58
Printing a font sample list
58
Printing a directory list
59
Printing the print quality test pages
59
Canceling a print job
59
Canceling a print job from the printer control panel
59
Canceling a print job from the computer
59
Copying
61
Making copies
61
Making a quick copy
61
Copying using the ADF
61
Copying using the scanner glass
62
Copying photos
62
Copying on specialty media
62
Copying to transparencies
62
Copying to letterhead
63
Customizing copy settings
63
Copying from one size to another
63
Making copies using paper from a selected tray
64
Copying on both sides of the paper (duplexing)
64
Reducing or enlarging copies
65
Making a copy lighter or darker
65
Adjusting copy quality
66
Collating copies
66
Placing separator sheets between copies
67
Copying multiple pages onto a single sheet
67
Canceling a copy job
68
Improving copy quality
68
E-mailing
69
Getting ready to e-mail
69
Setting up the e-mail function
69
Setting up the address book
70
Creating an e-mail shortcut using the Embedded Web Server
70
E-mailing a document
70
Sending an e-mail using the keypad
70
Sending an e-mail using a shortcut number
71
Sending an e-mail using the address book
72
Canceling an e-mail
72
Faxing
73
Getting the printer ready to fax
73
Initial fax setup
74
Choosing a fax connection
75
Connecting to an analog telephone line
76
Connecting to a DSL service
76
Connecting to a PBX or ISDN system
77
Connecting to a Distinctive Ring Service
78
Connecting a telephone or answering machine to the same telephone line
79
Connecting to an adapter for your country or region
81
Connecting to a computer with a modem
85
Setting the outgoing fax name and number
87
Setting the date and time
87
Turning daylight saving time on or off
88
Sending a fax
88
Sending a fax using the printer control panel
88
Sending a fax using the computer
89
Creating shortcuts
89
Creating a fax destination shortcut using the Embedded Web Server
89
Creating a fax destination shortcut using the printer control panel
90
Using shortcuts and the address book
91
Using fax destination shortcuts
91
Using the address book
91
Customizing fax settings
91
Changing the fax resolution
91
Making a fax lighter or darker
92
Sending a fax at a scheduled time
92
Viewing a fax log
92
Canceling an outgoing fax
93
Understanding fax options
93
Original Size
93
Content
93
Sides (Duplex)
93
Resolution
94
Darkness
94
Improving fax quality
94
Holding and forwarding faxes
94
Holding faxes
94
Forwarding a fax
95
Scanning to a computer or USB flash memory device
96
Scanning to a computer
96
Scanning to a USB flash memory device
97
Understanding scan to computer options
98
Sides (Duplex)
98
Darkness
98
Improving scan quality
98
Using the Scan Center software
98
Understanding the Scan Center features
98
Using the ScanBack utility
99
Using the ScanBack Utility
99
Clearing jams
100
Avoiding jams
100
Understanding jam numbers and locations
101
200 paper jam
102
201 paper jam
102
202 paper jam
103
230 paper jam
105
235 paper jam
105
242 paper jam
105
250 paper jam
106
290 paper jam
106
Understanding printer menus
108
Menus list
108
Supplies menu
109
Paper menu
109
Default Source menu
109
Size/Type menu
110
Paper Texture menu
112
Paper Weight menu
114
Paper Loading menu
115
Custom Types menu
116
Custom Scan Sizes menu
117
Universal Setup menu
117
Reports menu
118
Reports menu
118
Network/Ports
119
Active NIC menu
119
Network menu
119
Wireless menu
120
USB menu
121
Settings menu
123
General Settings menu
123
Copy Settings menu
126
Fax Settings menu
128
Flash Drive menu
134
Print Settings
137
Set Date and Time
146
Understanding printer messages
148
List of status and error messages
148
Access USB after scan
148
Access USB now
148
Busy
148
Calibrating
148
Call complete
148
Cancel not available
148
Canceling
148
Check Config ID
148
Clock battery
148
Close door
148
<color> Low
149
Dialing
149
DO NOT TOUCH
149
Fax complete
149
Fax failed
149
Flushing buffer
149
File corrupt
149
Hex Trace
149
Imaging Kit
149
Incoming call
149
Insert Tray <x>
149
Invalid Engine Code
150
Invalid Network Code
150
LADP connection error
150
Line busy
150
Load <src> with <x>
150
Load single sheet feeder with <x>
150
Maintenance
150
Memory full, cannot send faxes
150
Menus disabled
151
No analog phone line
151
No answer
151
No dial tone
151
No recognized file types
151
PC Kit Life Warning
151
Phone in Use
151
Picture too large
151
Power Saver
151
Printing error
152
Programming Code
152
Reading data
152
Reading error (Remove drive)
152
Ready
152
Receiving pXX
152
Reload printed pages in Tray <x>
152
Remote Management Active
152
Remove originals from the scanner ADF
152
Remove packaging material
152
Remove paper from standard output bin
152
Replace <color> cartridge
153
Replace PC Kit
153
Scan Document Too Long
153
Scan to USB failed
153
Scanner ADF Cover Open
153
Sending pXX
153
Standard Exit Bin Full
153
Tray <x> Empty
153
Tray <x> Low
153
Tray <x> Missing
154
Unsupported USB device, please remove
154
Unsupported USB hub, please remove
154
Unsupported Mode
154
USB drive disabled
154
Use camera controls to print
154
Waiting
154
Waiting, too many events
154
30.yy <color> cartridge missing
154
31.yy Defective <color> Cartridge
154
31 Defective Imaging Kit
154
32.yy Replace Unsupported <color> Cartridge
155
34 Short paper
155
35 Insufficient memory to support Resource Save feature
155
37 Insufficient memory to collate job
155
38 Memory Full
155
39 Complex page, some data may not have printed
155
40 <color> Invalid refill, change cartridge
155
50 PPDS Font Error
155
51 Defective flash detected
156
52 Not enough free space in flash memory for resources
156
53 Unformatted flash detected
156
54 Network <x> Software Error
156
56 Standard USB Port Disabled
156
58 Too many flash options installed
156
58 Too many trays attached
157
59 Incompatible tray <x>
157
82 Replace waste toner box
157
82.yy Waste toner box missing
157
88.yy <color> Cartridge is low
157
88.yy Replace <color> Cartridge
157
150 displayed
157
200.yy Paper jam <area name>
158
201.yy Paper jam <area name>
158
202.yy Paper jam <area name>
158
230.yy Paper jam <area name>
158
235 Paper Jam Check Duplex
158
24x Paper Jam Check Tray <x>
158
250.yy Paper jam <area name>
159
290–292 ADF Scanning Jams
159
293 Paper Missing
159
293.02 Flatbed Cover Open
159
294 ADF Jam
159
840.01 Scanner Disabled
160
840.02 Scanner Auto Disabled
160
940.01
160
941.01
160
942.01
160
943.01
160
940.02
160
941.02
160
942.02
161
943.02
161
900–999 Service <message>
161
Maintaining the printer
162
Storing supplies
162
Checking the status of supplies
162
Checking the status of supplies from the printer control panel
162
Checking the status of supplies from a network computer
162
Conserving supplies
162
Ordering supplies
163
Ordering toner cartridges
163
Ordering imaging kits
164
Ordering a waste toner bottle
164
Replacing supplies
165
Replacing the waste toner bottle
165
Replacing a black imaging kit
168
Replacing a black and color imaging kit
174
Replacing a toner cartridge
179
Replacing a developer unit
181
Recycling Lexmark products
187
Cleaning the exterior of the printer
187
Cleaning the scanner glass
188
Moving the printer
188
Before moving the printer
188
Moving the printer to another location
189
Shipping the printer
189
Administrative support
190
Finding advanced networking and administrator information
190
Restoring the factory default settings
190
Adjusting Power Saver
190
Using the Embedded Web Server
191
Setting up e-mail alerts
191
Viewing reports
192
Troubleshooting
193
Solving basic printer problems
193
Solving printing problems
193
Multiple-language PDFs do not print
193
Printer control panel display is blank or displays only diamonds
193
Error message about reading USB drive appears
193
Jobs do not print
194
Job takes longer than expected to print
194
Job prints from the wrong tray or on the wrong paper
195
Incorrect characters print
195
Tray linking does not work
195
Large jobs do not collate
195
Unexpected page breaks occur
196
Solving copy problems
196
Copier does not respond
196
Scanner unit does not close
196
Poor copy quality
197
Partial document or photo copies
198
Solving scanner problems
198
Checking an unresponsive scanner
198
Scan was not successful
199
Scanning takes too long or freezes the computer
199
Poor scanned image quality
199
Partial document or photo scans
200
Cannot scan from a computer
200
Solving fax problems
200
Caller ID is not shown
200
Cannot send or receive a fax
201
Can send but not receive faxes
202
Can receive but not send faxes
203
Received fax has poor print quality
203
Blocking junk faxes
204
Solving option problems
204
Option does not operate correctly or quits after it is installed
204
Drawers
205
Multipurpose feeder
205
Memory card
206
Solving paper feed problems
206
Paper frequently jams
206
Paper jam message remains after jam is cleared
206
Page that jammed does not reprint after you clear the jam
206
Solving print quality problems
207
Blank pages
207
Characters have jagged or uneven edges
207
Clipped images
208
Dark lines
208
Gray background
208
Incorrect margins
209
Light colored line, white line, or incorrectly colored line
209
Paper curl
210
Print irregularities
210
Repeating defects
211
Skewed print
211
Print is too light
211
Print is too dark
213
Solid color pages
214
Toner fog or background shading appears on the page
214
Toner rubs off
214
Toner specks
215
Transparency print quality is poor
215
Uneven print density
216
Solving color quality problems
216
Color misregistration
216
FAQ about color printing
217
Embedded Web Server does not open
220
Check the network connections
220
Check the network settings
220
Contacting Customer Support
220
Notices
221
Product information
221
Edition notice
221
UNITED STATES GOVERNMENT RIGHTS
222
Trademarks
222
Federal Communications Commission (FCC) compliance information statement
222
European Community (EC) directives conformity
223
Exposure to radio frequency radiation
223
Industry Canada notice
223
European Community (EC) directives conformity statement for radio products
224
Noise emission levels
226
Temperature information
226
Federal Communications Commission (FCC) compliance information statement
226
Notice to users of the Canadian telephone network
227
Notice to users of the New Zealand telephone network
228
South Africa telecommunications notice
228
Waste from Electrical and Electronic Equipment (WEEE) directive
229
Mercury statement
229
Product disposal
230
Static sensitivity notice
230
ENERGY STAR
230
Laser notice
230
Laser advisory label
231
Power consumption
231
Product power consumption
231
Power Saver
231
Off mode
232
Total energy usage
232
Statement of Limited Warranty
232
DEVICE PATENT LICENSE
234
LEXMARK SOFTWARE LIMITED WARRANTY AND LICENSE AGREEMENTS
234
Index
239
View document
Lexmark X544 models User manual
Type
User manual
Brand
Lexmark
Size
3.80 MB
Category
Multifunctionals
Pages
6
Language
English
View document
Lexmark X544 models User manual
Type
User manual
Brand
Lexmark
Size
4.10 MB
Category
Multifunctionals
Pages
245
Language
English
Table of contents
Contents
2
Safety information
11
Learning about the printer
13
Finding information about the printer
13
Selecting a location for the printer
14
Printer configurations
16
Basic functions of the scanner
16
Understanding the ADF and scanner glass
17
Understanding the printer control panel
17
Additional printer setup
23
Installing internal options
23
Available options
23
Installing a memory card
23
Installing a flash memory or font card
27
Installing hardware options
31
Installing a 650-sheet duo drawer
31
Attaching cables
33
Verifying printer setup
34
Printing menu settings pages
34
Printing a network setup page
34
Setting up the printer software
35
Installing printer software
35
Updating available options in the printer driver
35
Loading paper and specialty media
37
Linking and unlinking trays
37
Linking trays
37
Unlinking trays
37
Assigning a Custom Type <x> name
37
Setting the Paper Size and Paper Type
38
Configuring Universal paper settings
38
Loading the standard 250-sheet tray
39
Loading the optional 650-sheet duo drawer
41
Using the multipurpose feeder
42
Using the manual feeder
44
Paper and specialty media guide
46
Paper guidelines
46
Paper characteristics
46
Unacceptable paper
47
Selecting paper
47
Selecting preprinted forms and letterhead
47
Storing paper
48
Supported paper sizes, types, and weights
48
Paper sizes supported by the printer
48
Paper types supported by the printer
49
Paper types and weights supported by the printer
50
Paper capacities
51
Using recycled paper and other office papers
52
Printing
53
Printing a document
53
Printing on specialty media
54
Tips on using letterhead
54
Tips on using transparencies
55
Tips on using envelopes
55
Tips on using paper labels
56
Tips on using card stock
57
Printing from a flash drive
57
Printing photos from a PictBridge-enabled digital camera
59
Printing information pages
59
Printing a font sample list
59
Printing a directory list
60
Printing the print quality test pages
60
Canceling a print job
60
Canceling a print job from the printer control panel
60
Canceling a print job from the computer
60
Copying
62
Making copies
62
Making a quick copy
62
Copying using the ADF
62
Copying using the scanner glass
63
Copying photos
63
Copying on specialty media
63
Copying to transparencies
63
Copying to letterhead
64
Customizing copy settings
64
Copying from one size to another
64
Making copies using paper from a selected tray
65
Copying on both sides of the paper (duplexing)
65
Reducing or enlarging copies
66
Making a copy lighter or darker
66
Adjusting copy quality
67
Collating copies
67
Placing separator sheets between copies
68
Copying multiple pages onto a single sheet
68
Canceling a copy job
69
Improving copy quality
69
E-mailing
70
Getting ready to e-mail
70
Setting up the e-mail function
70
Setting up the address book
71
Creating an e-mail shortcut using the Embedded Web Server
71
E-mailing a document
71
Sending an e-mail using the keypad
71
Sending an e-mail using a shortcut number
72
Sending an e-mail using the address book
73
Canceling an e-mail
73
Faxing
74
Getting the printer ready to fax
74
Initial fax setup
75
Choosing a fax connection
76
Connecting to an analog telephone line
77
Connecting to a DSL service
77
Connecting to a PBX or ISDN system
78
Connecting to a Distinctive Ring Service
79
Connecting a telephone or answering machine to the same telephone line
80
Connecting to an adapter for your country or region
82
Connecting to a computer with a modem
86
Setting the outgoing fax name and number
88
Setting the date and time
88
Turning daylight saving time on or off
89
Sending a fax
89
Sending a fax using the printer control panel
89
Sending a fax using the computer
90
Creating shortcuts
90
Creating a fax destination shortcut using the Embedded Web Server
90
Creating a fax destination shortcut using the printer control panel
91
Using shortcuts and the address book
92
Using fax destination shortcuts
92
Using the address book
92
Customizing fax settings
92
Changing the fax resolution
92
Making a fax lighter or darker
93
Sending a fax at a scheduled time
93
Viewing a fax log
93
Canceling an outgoing fax
94
Understanding fax options
94
Original Size
94
Content
94
Sides (Duplex)
94
Resolution
95
Darkness
95
Improving fax quality
95
Holding and forwarding faxes
95
Holding faxes
95
Forwarding a fax
96
Scanning to a computer or USB flash memory device
97
Scanning to a computer
97
Scanning to a USB flash memory device
98
Understanding scan to computer options
99
Sides (Duplex)
99
Darkness
99
Improving scan quality
99
Using the Scan Center software
99
Understanding the Scan Center features
99
Using the ScanBack utility
100
Using the ScanBack Utility
100
Clearing jams
101
Avoiding jams
101
Understanding jam numbers and locations
102
200 paper jam
103
201 paper jam
103
202 paper jam
104
230 paper jam
106
235 paper jam
106
242 paper jam
106
250 paper jam
107
290 paper jam
107
Understanding printer menus
109
Menus list
109
Supplies menu
110
Paper menu
110
Default Source menu
110
Size/Type menu
111
Paper Texture menu
113
Paper Weight menu
115
Paper Loading menu
116
Custom Types menu
117
Custom Scan Sizes menu
118
Universal Setup menu
118
Reports menu
119
Reports menu
119
Network/Ports
120
Active NIC menu
120
Network menu
120
Wireless menu
121
USB menu
122
Settings menu
124
General Settings menu
124
Copy Settings menu
127
Fax Settings menu
129
Flash Drive menu
135
Print Settings
138
Set Date and Time
147
Understanding printer messages
149
List of status and error messages
149
Access USB after scan
149
Access USB now
149
Busy
149
Calibrating
149
Call complete
149
Cancel not available
149
Canceling
149
Check Config ID
149
Clock battery
149
Close door
149
<color> Low
150
Dialing
150
DO NOT TOUCH
150
Fax complete
150
Fax failed
150
Flushing buffer
150
File corrupt
150
Hex Trace
150
Imaging Kit
150
Incoming call
150
Insert Tray <x>
150
Invalid Engine Code
151
Invalid Network Code
151
LADP connection error
151
Line busy
151
Load <src> with <x>
151
Load single sheet feeder with <x>
151
Maintenance
151
Memory full, cannot send faxes
151
Menus disabled
152
No analog phone line
152
No answer
152
No dial tone
152
No recognized file types
152
PC Kit Life Warning
152
Phone in Use
152
Picture too large
152
Power Saver
152
Printing error
153
Programming Code
153
Reading data
153
Reading error (Remove drive)
153
Ready
153
Receiving pXX
153
Reload printed pages in Tray <x>
153
Remote Management Active
153
Remove originals from the scanner ADF
153
Remove packaging material
153
Remove paper from standard output bin
153
Replace <color> cartridge
154
Replace PC Kit
154
Scan Document Too Long
154
Scan to USB failed
154
Scanner ADF Cover Open
154
Sending pXX
154
Standard Exit Bin Full
154
Tray <x> Empty
154
Tray <x> Low
154
Tray <x> Missing
155
Unsupported USB device, please remove
155
Unsupported USB hub, please remove
155
Unsupported Mode
155
USB drive disabled
155
Use camera controls to print
155
Waiting
155
Waiting, too many events
155
30.yy <color> cartridge missing
155
31.yy Defective <color> Cartridge
155
31 Defective Imaging Kit
155
32.yy Replace Unsupported <color> Cartridge
156
34 Short paper
156
35 Insufficient memory to support Resource Save feature
156
37 Insufficient memory to collate job
156
38 Memory Full
156
39 Complex page, some data may not have printed
156
40 <color> Invalid refill, change cartridge
156
50 PPDS Font Error
156
51 Defective flash detected
157
52 Not enough free space in flash memory for resources
157
53 Unformatted flash detected
157
54 Network <x> Software Error
157
56 Standard USB Port Disabled
157
58 Too many flash options installed
157
58 Too many trays attached
158
59 Incompatible tray <x>
158
82 Replace waste toner box
158
82.yy Waste toner box missing
158
88.yy <color> Cartridge is low
158
88.yy Replace <color> Cartridge
158
150 displayed
158
200.yy Paper jam <area name>
159
201.yy Paper jam <area name>
159
202.yy Paper jam <area name>
159
230.yy Paper jam <area name>
159
235 Paper Jam Check Duplex
159
24x Paper Jam Check Tray <x>
159
250.yy Paper jam <area name>
160
290–292 ADF Scanning Jams
160
293 Paper Missing
160
293.02 Flatbed Cover Open
160
294 ADF Jam
160
840.01 Scanner Disabled
161
840.02 Scanner Auto Disabled
161
940.01
161
941.01
161
942.01
161
943.01
161
940.02
161
941.02
161
942.02
162
943.02
162
900–999 Service <message>
162
Maintaining the printer
163
Storing supplies
163
Checking the status of supplies
163
Checking the status of supplies from the printer control panel
163
Checking the status of supplies from a network computer
163
Conserving supplies
163
Ordering supplies
164
Ordering toner cartridges
164
Ordering imaging kits
165
Ordering a waste toner bottle
165
Replacing supplies
166
Replacing the waste toner bottle
166
Replacing a black imaging kit
169
Replacing a black and color imaging kit
175
Replacing a toner cartridge
180
Replacing a developer unit
182
Recycling Lexmark products
188
Cleaning the exterior of the printer
188
Cleaning the scanner glass
189
Moving the printer
189
Before moving the printer
189
Moving the printer to another location
190
Shipping the printer
190
Administrative support
191
Finding advanced networking and administrator information
191
Restoring the factory default settings
191
Adjusting Power Saver
191
Using the Embedded Web Server
192
Setting up e-mail alerts
192
Viewing reports
193
Troubleshooting
194
Solving basic printer problems
194
Solving printing problems
194
Multiple-language PDFs do not print
194
Printer control panel display is blank or displays only diamonds
194
Error message about reading USB drive appears
194
Jobs do not print
195
Job takes longer than expected to print
195
Job prints from the wrong tray or on the wrong paper
196
Incorrect characters print
196
Tray linking does not work
196
Large jobs do not collate
196
Unexpected page breaks occur
197
Solving copy problems
197
Copier does not respond
197
Scanner unit does not close
197
Poor copy quality
198
Partial document or photo copies
199
Solving scanner problems
199
Checking an unresponsive scanner
199
Scan was not successful
200
Scanning takes too long or freezes the computer
200
Poor scanned image quality
200
Partial document or photo scans
201
Cannot scan from a computer
201
Solving fax problems
201
Caller ID is not shown
201
Cannot send or receive a fax
202
Can send but not receive faxes
203
Can receive but not send faxes
204
Received fax has poor print quality
204
Blocking junk faxes
205
Solving option problems
205
Option does not operate correctly or quits after it is installed
205
Drawers
206
Multipurpose feeder
206
Memory card
207
Solving paper feed problems
207
Paper frequently jams
207
Paper jam message remains after jam is cleared
207
Page that jammed does not reprint after you clear the jam
207
Solving print quality problems
208
Blank pages
208
Characters have jagged or uneven edges
208
Clipped images
209
Dark lines
209
Gray background
209
Incorrect margins
210
Light colored line, white line, or incorrectly colored line
210
Paper curl
211
Print irregularities
211
Repeating defects
212
Skewed print
212
Print is too light
212
Print is too dark
214
Solid color pages
215
Toner fog or background shading appears on the page
215
Toner rubs off
215
Toner specks
216
Transparency print quality is poor
216
Uneven print density
217
Solving color quality problems
217
Color misregistration
217
FAQ about color printing
218
Embedded Web Server does not open
221
Check the network connections
221
Check the network settings
221
Contacting Customer Support
221
Notices
222
Product information
222
Edition notice
222
UNITED STATES GOVERNMENT RIGHTS
223
Trademarks
223
Federal Communications Commission (FCC) compliance information statement
223
European Community (EC) directives conformity
224
Exposure to radio frequency radiation
224
Industry Canada notice
224
European Community (EC) directives conformity statement for radio products
225
Noise emission levels
227
Temperature information
227
Federal Communications Commission (FCC) compliance information statement
227
Notice to users of the Canadian telephone network
228
Notice to users of the New Zealand telephone network
229
South Africa telecommunications notice
229
Waste from Electrical and Electronic Equipment (WEEE) directive
230
Product disposal
230
Static sensitivity notice
231
ENERGY STAR
231
Laser notice
231
Laser advisory label
231
Power consumption
231
Product power consumption
231
Power Saver
232
Off mode
232
Total energy usage
232
Statement of Limited Warranty
232
DEVICE PATENT LICENSE
234
LEXMARK SOFTWARE LIMITED WARRANTY AND LICENSE AGREEMENTS
235
Index
239
View document
Lexmark X544 models User manual
Type
User manual
Brand
Lexmark
Size
1.20 MB
Category
Multifunctionals
Pages
6
Language
English
View document
Lexmark X544 models User manual
Type
User manual
Brand
Lexmark
Size
3.16 MB
Category
Multifunctionals
Pages
258
Language
English
View document
Lexmark X544 models User manual
Type
User manual
Brand
Lexmark
Size
1.37 MB
Category
Multifunctionals
Pages
6
Language
English
View document
Lexmark X544 models User manual
Type
User manual
Brand
Lexmark
Size
3.06 MB
Category
Laser/LED printers
Pages
170
Language
English
Table of contents
Contents
3
Overview
7
Introduction
7
General information
8
Paper and label industry
8
Printing volumes
8
Testing print material
8
Design factors
9
Pick roller technology
11
Maintenance procedures
14
Troubleshooting
14
Card stock
16
Weight
16
Grain orientation
17
Coatings
18
Offset powders
19
Labels
20
Label characteristics
20
Printing on labels
20
Duplexing paper labels
20
Primary rib pattern design guidelines for reference edge alignment
22
Label components
23
Label design guidelines
25
Printer specifications
32
Lexmark C500n
32
Lexmark C510
33
Lexmark C520, C522, and C524
34
Lexmark C530, C532, and C534
36
Lexmark C540, C543, C544, and C546dtn
38
Lexmark C720
39
Lexmark C734 and C736
41
Lexmark C746 and C748
43
Lexmark C750
45
Lexmark C752
47
Lexmark C760 and C762
49
Lexmark C770, C772, C780, and C782
51
Lexmark C792e, C792de, C792dte, and C792dhe
53
Lexmark C910
54
Lexmark C912
56
Lexmark C920
57
Lexmark C925
59
Lexmark C935
60
Lexmark C950
62
Lexmark CS310n, CS310dn, CS410n, CS410dn, and CS510de
63
Lexmark CX310n, CX310dn, CX410e, CX410de, CX410dte, CX510de, CX510dhe, and CX510dthe
65
Lexmark E120
66
Lexmark E220
67
Lexmark E230, E232, E234(n), E330, and E332n
68
Lexmark E238, E240, E240n, E340, and E342n
69
Lexmark E250, E350, and E450n
70
Lexmark E260, E260d, E260dn, E360d, E360dn, E460dn, E460dw, and E462dtn
71
Lexmark E320, E322
72
Lexmark E321, E323
73
Lexmark MS310d, MS310dn, MS410d, MS410dn, MS510dn, MS610dn, and MS610de
74
Lexmark MS710 and MS711
76
Lexmark MS810, MS811, and MS812
78
Lexmark MX310dn, MX410de, MX510de, MX511de, MX511dhe, MX610de, MX611de, and MX611dhe
80
Lexmark MX710, MX711, MX810, MX811, and MX812
82
Lexmark T420
85
Lexmark T430
87
Lexmark T520, T522
89
Lexmark T620, T622
91
Lexmark T630, T632, T634
94
Lexmark T640, T642, T644
97
Lexmark T650, T652, T654, and T656dne
99
Lexmark W812
102
Lexmark W820
103
Lexmark W840
104
Lexmark W850
106
Lexmark X203n and X204n
107
Lexmark X215
109
Lexmark X264dn, X363dn, X364dn, and X364dw
111
Lexmark X422
112
Lexmark X463de, X464de, X466dte, and X466dtwe
114
Lexmark X500 and X502n
115
Lexmark X543, X544, and X546dtn
116
Lexmark X548
118
Lexmark X560
119
Lexmark X642e
120
Lexmark X644e, X646e
123
Lexmark X651de, X652de, X654de, X656de, and X658de
125
Lexmark X734, X736, and X738
128
Lexmark X746 and X748
130
Lexmark X782
132
Lexmark X792de, X792dte, X792dtfe, X792dtpe, X792dtme, and X792dtse
134
Lexmark X850, X852e, and X854e
136
Lexmark X860e, X862e, and X864e
138
Lexmark X925
140
Lexmark X940 and X945
142
Lexmark X950
143
Optra plus, 4039, 4029, 4019, WinWriter 600 printers
144
Optra C
147
Optra C710
148
Optra Color 1200
149
Optra E, Ep
150
Optra E310, E312
151
Optra Es special media printer
152
Optra K 1220
153
Optra M410, M412
154
Optra N
156
Optra S
157
Optra SC 1275
159
Optra T
160
Optra W810
163
Glossary
165
Index
169
View document
Lexmark X544 models User manual
Type
User manual
Brand
Lexmark
Size
1.37 MB
Category
Multifunctionals
Pages
6
Language
English
View document
Lexmark X544 models User manual
Type
User manual
Brand
Lexmark
Size
19.14 MB
Category
Laser/LED printers
Pages
353
Language
English
Table of contents
Laser notice
11
Laser
11
Avis relatif à l’utilisation de laser
11
Avvertenze sui prodotti laser
11
Avisos sobre el láser
12
Declaração sobre Laser
12
Laserinformatie
12
Lasermeddelelse
12
Laserilmoitus
13
Huomautus laserlaitteesta
13
Laser-notis
13
Laser-melding
13
Avís sobre el Làser
14
Consignes de sécurité
17
Norme di sicurezza
17
Sicherheitshinweise
19
Pautas de Seguridad
19
Informações de Segurança
19
Informació de Seguretat
20
Models
23
Options and features
24
Memory
24
Print quality
25
Connectivity (network support)
25
Operating modes
26
Data streams
26
Dimensions
27
Clearances
27
Power and electrical specifications
28
Acoustics
29
Environment specifications
29
Media handling
30
Input and output sources
30
Duplex capability
31
Media input size specifications
31
Media input type specifications
33
Media output size and type
33
Media guidelines
35
Digital imaging specifications
38
General specifications
38
Scan and copy specific specifications
39
Fax specifications
40
Tools required for service
41
Acronyms.
42
Start
45
POR (Power-On Reset) sequence
46
Symptom tables
47
Printer symptom table
47
Scan / fax / copy symptom table
48
Print quality symptom table
49
Error codes and messages
50
User status and attendance messages
50
Paper Jam messages
57
Service error messages
59
Fax error log codes
71
Service checks
75
90x.xx error
75
925.01—Fan error service check
75
Printhead service check
76
950.xx NVRAM failure service check
77
Autocompensator mechanism service check
77
Bin full sensor service check
78
Dead printer service check
79
Duplex/manual feed sensor (S1) service check
80
Front door sensor or switches service check
81
Fuser exit sensor service check
82
Fuser service check
83
Input sensor (S2) service check
84
Main drive gear assembly (EP drive) service check
85
Operator panel service check
86
Op panel USB cable service check
89
USB service check
89
Networking service check
90
Print quality service check
92
Printhead service check
101
Toner meter cycle (TMC) card
102
Toner sensors (Y, C, M, K) on TMC card
102
Transfer roll service check
103
Tray (x) sensor service check
104
Option trays 2 and 3 service check
105
Scanner / Copy / Fax service checks
107
840.xx service check
107
Black or blank page copy service check
109
CCD service check
109
Flatbed motor service check
109
Flatbed home position service check
110
ADF cover open service check
111
ADF streak service check
111
ADF paper jam service check
112
ADF feed errors service check
113
ADF Duplex service check
114
Modem / fax card service check
115
Fax transmission service check
116
Fax reception service check
118
Escalating a fax issue to second-level support
120
User operator panel, menus and messages
121
Understanding the operator panel
121
Operator panel buttons
121
Menu map
123
Menu key combinations.
125
Diagnostics Menu (Diag Menu)
126
Diagnostics menu structure
126
Available tests
126
Registration
128
Alignment
131
Miscellaneous Tests
134
Print Tests
135
Hardware Tests
137
Duplex Tests
139
Input Tray tests
141
Base Sensor Test
142
Device Tests
142
Printer Setup
143
EP Setup
145
TPS Setup
146
Reports
146
Event Log
147
Scanner Tests
149
EXIT Diags
154
Configuration Menu
155
Available tests
155
USB Scan to Local
155
Prt Quality Pages
155
Color Trapping
155
Reports
156
Panel Menus
156
PPDS Emulation
156
Demo Mode
157
Factory defaults
157
Energy Conserve
157
Min Copy Memory
158
Format Fax Storage
158
Auto Color Adj
158
ADF Edge Erase
158
FB Edge Erase
159
Scanner Manual Registration
159
Disable Scanner
160
Font Sharpening
161
Pel Blurring
161
Exit Config Menu
161
SE Menu
162
Paper jams
163
Avoiding jams
163
Understanding jam numbers and locations
164
Updating printer firmware
170
There are three options to update firmware on your printer. The instructions for all three options are listed below.
170
Updating the firmware using a networked computer
178
Theory of operation
181
Print engine theory
181
Paper path, transport components
190
Scanner theory
193
Color theory
195
Handling ESD-sensitive parts
199
Testing generic FRUs
199
Removal procedures
200
Print engine removal procedures
200
Front cover assembly removal
200
Front middle cover removal
202
Left cover removal
202
Right cover removal
205
Rear shield removal
205
AIO back cable cover removal
206
Top cover assembly removal
207
Autocompensator mechanism (ACM)—standard tray removal
210
Bin full sensor
213
Narrow media sensor flag removal
214
Controller board removal
216
Duplex reference edge removal
218
Duplex sensor removal
221
Fuser assembly removal
223
Fuser drive motor assembly removal
226
Fuser exit sensor removal
227
High-voltage power supply (HVPS) assembly removal
229
Image transfer unit (ITU)
233
Imaging unit (IU) removal
238
Developer unit removal
240
Low-voltage power supply (LVPS) assembly
241
Lower frame removal, right and left
243
Main drive gear assembly with motor removal
251
Pick tires removal—integrated 250-sheet media tray
253
Printhead removal
254
Imaging unit (IU) removal
255
Toner cartridge contacts
257
Toner meter cycle (TMC) card removal
259
Toner density sensor (TPS)—left and right removal
261
Tray present sensor removal
262
USB connector removal
265
Waste toner bottle
265
Waste toner bottle contact block removal
266
Wireless network antenna
267
Wireless network card
269
Scanner component removal procedures
270
Flatbed removal
270
Flatbed pivot link removal
279
Duplex ADF rear cover
280
Duplex ADF removal
281
Simplex ADF rear cover
282
Simplex ADF removal
282
ADF input tray
282
ADF cable removal
283
ADF separator pad
285
ADF separator roll assembly
286
Bezel cover
287
Redrive unit
289
Cover scanner left
290
Cover scanner right
291
AIO release lever
293
AIO link
294
AIO toner cover
295
Operator panel removal
296
Op panel bezel removal
298
Op panel cable
299
Logo cover
299
Fax card removal
300
Fax interface cable
300
Output bin tray
301
Bin full flag removal
301
Exterior views
303
Interior view
305
Printer boards
306
HVPS
317
LVPS
319
Toner meter card
321
Wireless card
322
Safety inspection guide
323
Scheduled maintenance
323
Maintenance kit
323
Lubrication specifications
323
How to use this parts catalog
325
Assembly 1: Covers
328
Assembly 2: Scanner
330
Assembly 3: Paperpath
334
Assembly 4: Electronics 1
336
Assembly 5: Electronics 2
338
Assembly 6: Media drawers and trays
340
Assembly 7: Options
342
View document
Lexmark X544 models User manual
Type
User manual
Brand
Lexmark
Size
2.20 MB
Category
Laser/LED printers
Pages
154
Language
English
View document
Lexmark X544 models User manual
Type
User manual
Brand
Lexmark
Size
2.18 MB
Category
Laser/LED printers
Pages
146
Language
English
Table of contents
Contents
3
Overview
7
Introduction
7
General information
8
Paper and label Industry
8
Print volumes
8
Print material testing
8
Design factors
9
Pick roller technology
11
Maintenance procedures
13
Troubleshooting
13
Card stock
15
Weight
15
Grain orientation
16
Coatings
17
Offset powders
18
Labels
19
Label characteristics
19
Printing on labels
19
Duplexing paper labels
19
Label components
21
Label design guidelines
23
Printer specifications
30
Lexmark C500n
30
Lexmark C510
31
Lexmark C520, C522, C524
32
Lexmark C530, C532, and C534
34
Lexmark C540, C543, C544, and C546dtn
36
Lexmark C720
38
Lexmark C734, C736
40
Lexmark C750
42
Lexmark C752
44
Lexmark C760, C762
47
Lexmark C770, C772, C780, and C782
49
Lexmark C910
51
Lexmark C912
53
Lexmark C920
54
Lexmark C935
56
Lexmark E120
57
Lexmark E220
58
Lexmark E230, E232, E234(n), E330, and E332n
59
Lexmark E238, E240, E240n, E340, E342n
60
Lexmark E250, E350, E450n
61
Lexmark E260, E260d, E260dn, E360d, E360dn, E460dn, E460dw, and E462dtn
62
Lexmark E320, E322
63
Lexmark E321, E323
64
Lexmark T420
66
Lexmark T430
68
Lexmark T520, T522
70
Lexmark T620, T622
72
Lexmark T630, T632, T634
76
Lexmark T640, T642, T644
79
Lexmark T650, T652, T654, and T656dne
81
Lexmark W812
84
Lexmark W820
85
Lexmark W840
86
Lexmark W850
88
Lexmark X203n and X204n
90
Lexmark X215
91
Lexmark X264dn, X363dn, X364dn, and X364dw
94
Lexmark X422
95
Lexmark X463de, X464de, X466dte, and X466dtwe
97
Lexmark X500 and X502n
99
Lexmark X543, X544, and X546dtn
100
Lexmark X560
102
Lexmark X642e
103
Lexmark X644e, X646e
106
Lexmark X651de, X652de, X654de, X656de, and X658de
108
Lexmark X734, X736, and X738
112
Lexmark X850, X852e, and X854e
114
Lexmark X860e, X862e, and X864e
116
Lexmark X940, X945
118
Optra plus, 4039, 4029, 4019, WinWriter 600 printers
119
Optra C
123
Optra C710
123
Optra Color 1200
125
Optra E, Ep
126
Optra E310, E312
127
Optra Es special media printer
128
Optra K 1220
129
Optra M410, M412
130
Optra N
132
Optra S
133
Optra SC 1275
136
Optra T
137
Optra W810
140
Glossary
142
Index
146
View document
Lexmark X544 models User manual
Type
User manual
Brand
Lexmark
Size
7.05 MB
Category
Multifunctionals
Pages
257
Language
English
Table of contents
Contents
2
Safety information
10
Learning about the printer
12
Finding information about the printer
12
Selecting a location for the printer
13
Printer configurations
15
Basic functions of the scanner
15
Understanding the ADF and scanner glass
16
Understanding the printer control panel
16
Additional printer setup
22
Installing internal options
22
Available options
22
Accessing the system board to install internal options
23
Installing a memory card
25
Installing a flash memory card
27
Installing hardware options
29
Installing an optional tray or drawer
29
Attaching cables
30
Verifying printer setup
32
Printing menu settings pages
32
Printing a network setup page
32
Setting up the printer software
33
Installing the printer software
33
Updating available options in the printer driver
33
Setting up wireless printing
34
Preparing to set up the printer on a wireless network
34
Installing the printer on a wireless network (Windows)
35
Installing the printer on a wireless network (Macintosh)
37
Installing the printer on an Ethernet network
40
Minimizing your printer's environmental impact
43
Saving paper and toner
43
Using recycled paper and other office papers
43
Conserving supplies
44
Saving energy
45
Using Eco-Mode
45
Reducing printer noise
45
Adjusting Power Saver
46
Recycling
47
Recycling Lexmark products
47
Recycling Lexmark packaging
47
Returning Lexmark cartridges for reuse or recycling
47
Loading paper and specialty media
48
Linking and unlinking trays
48
Linking trays
48
Unlinking trays
48
Assigning a Custom Type name
48
Setting the Paper Size and Paper Type
49
Configuring Universal paper settings
49
Loading the standard 250-sheet tray and optional 550-sheet tray
50
Loading the 650-sheet duo drawer
53
Using the multipurpose feeder
54
Using the manual feeder
56
Paper and specialty media guide
58
Paper guidelines
58
Paper characteristics
58
Unacceptable paper
59
Selecting paper
59
Selecting preprinted forms and letterhead
59
Storing paper
60
Supported paper sizes, types, and weights
60
Paper sizes supported by the printer
60
Paper types supported by the printer
61
Paper types and weights supported by the printer
62
Paper capacities
64
Printing
65
Printing a document
65
Printing on specialty media
65
Tips on using letterhead
65
Tips on using transparencies
67
Tips on using envelopes
67
Tips on using paper labels
68
Tips on using card stock
68
Printing from a flash drive
69
Supported flash drives and file types
70
Printing photos from a PictBridge-enabled digital camera
71
Printing information pages
71
Printing a font sample list
71
Printing a directory list
72
Printing the print quality test pages
72
Canceling a print job
72
Canceling a print job from the printer control panel
72
Canceling a print job from the computer
72
Copying
74
Making copies
74
Making a quick copy
74
Copying using the ADF
74
Copying using the scanner glass
75
Copying photos
75
Copying on specialty media
75
Copying to transparencies
75
Copying to letterhead
76
Customizing copy settings
76
Copying from one size to another
76
Making copies using paper from a selected tray
77
Copying on both sides of the paper (duplexing)
77
Reducing or enlarging copies
78
Making a copy lighter or darker
78
Adjusting copy quality
79
Collating copies
79
Placing separator sheets between copies
80
Copying multiple pages onto a single sheet
80
Canceling a copy job
81
Improving copy quality
81
E-mailing
82
Getting ready to e-mail
82
Setting up the e-mail function
82
Setting up the address book
83
Creating an e-mail shortcut using the Embedded Web Server
83
E-mailing a document
83
Sending an e-mail using the keypad
83
Sending an e-mail using a shortcut number
84
Sending an e-mail using the address book
85
Canceling an e-mail
85
Faxing
86
Getting the printer ready to fax
86
Initial fax setup
86
Choosing a fax connection
87
Connecting to an analog telephone line
88
Connecting to a DSL service
89
Connecting to a PBX or ISDN system
89
Connecting to a Distinctive Ring Service
90
Connecting a telephone or answering machine to the same telephone line
90
Connecting to an adapter for your country or region
91
Connecting to a computer with a modem
97
Setting the outgoing fax name and number
99
Setting the date and time
99
Turning daylight saving time on or off
99
Sending a fax
100
Sending a fax using the printer control panel
100
Sending a fax using the computer
100
Creating shortcuts
101
Creating a fax destination shortcut using the Embedded Web Server
101
Creating a fax destination shortcut using the printer control panel
101
Using shortcuts and the address book
102
Using fax destination shortcuts
102
Using the address book
102
Customizing fax settings
103
Changing the fax resolution
103
Making a fax lighter or darker
103
Sending a fax at a scheduled time
103
Viewing a fax log
104
Canceling an outgoing fax
104
Understanding fax options
105
Original Size
105
Content
105
Sides (Duplex)
105
Resolution
105
Darkness
105
Improving fax quality
106
Forwarding a fax
106
Scanning to an FTP address
107
Scanning to an FTP address
107
Scanning to an FTP address using the keypad
107
Scanning to an FTP address using a shortcut number
108
Creating an FTP shortcut using the Embedded Web Server
108
Scanning to a computer or USB flash memory device
109
Scanning to a computer
109
Scanning to a USB flash memory device
110
Understanding scan to computer options
111
Sides (Duplex)
111
Darkness
111
Improving scan quality
111
Using the Scan Center software
111
Understanding the Scan Center features
111
Using the ScanBack utility
112
Using the ScanBack Utility
112
Clearing jams
113
Avoiding jams
113
Understanding jam numbers and locations
114
200 paper jam
115
201 paper jam
115
202 paper jam
116
230 paper jam
118
235 paper jam
118
242 and 243 paper jams
118
250 paper jam
119
290 paper jam
119
Understanding printer menus
121
Menus list
121
Supplies menu
122
Paper menu
122
Default Source menu
122
Size/Type menu
123
Paper Texture menu
125
Paper Weight menu
127
Paper Loading menu
128
Custom Types menu
129
Custom Scan Sizes menu
130
Universal Setup menu
130
Reports menu
131
Reports menu
131
Network/Ports
132
Active NIC menu
132
Network menu
132
Wireless menu
134
USB menu
134
Settings menu
136
General Settings menu
136
Copy Settings menu
139
Fax Settings menu
141
Flash Drive menu
147
Flash Drive menu
147
Print Settings
150
Setup menu
150
Finishing menu
150
Quality menu
152
Utilities menu
154
PDF menu
155
PostScript menu
155
PCL Emul menu
155
Image menu
158
PictBridge menu
158
Set Date and Time
159
Understanding printer messages
162
List of status and error messages
162
Access USB after scan
162
Access USB now
162
Busy
162
Calibrating
162
Call complete
162
Cancel not available
162
Canceling
162
Check Config ID
162
Clock battery
162
Close door
163
<color> Low
163
Dialing
163
DO NOT TOUCH
163
Fax complete
163
Fax failed
163
Flushing buffer
163
File corrupt
163
Hex Trace
163
Imaging Kit
163
Incoming call
164
Insert Tray <x>
164
Invalid Engine Code
164
Invalid Network Code
164
LADP connection error
164
Line busy
164
Load <src> with <x>
164
Load single sheet feeder with <x>
164
Maintenance
165
Memory full, cannot send faxes
165
Menus disabled
165
No analog phone line
165
No answer
165
No dial tone
165
No recognized file types
165
PC Kit Life Warning
165
Phone in Use
166
Picture too large
166
Power Saver
166
Printing error
166
Programming Code
166
Reading data
166
Reading error (Remove drive)
166
Ready
166
Receiving pXX
167
Reload printed pages in Tray <x>
167
Remote Management Active
167
Remove originals from the scanner ADF
167
Remove packaging material
167
Remove paper from standard output bin
167
Replace <color> cartridge
167
Replace PC Kit
167
Scan Document Too Long
167
Scan to USB failed
167
Scanner ADF Cover Open
168
Sending pXX
168
Standard Exit Bin Full
168
Tray <x> Empty
168
Tray <x> Low
168
Tray <x> Missing
168
Unsupported USB device, please remove
168
Unsupported USB hub, please remove
168
Unsupported Mode
168
USB drive disabled
169
Use camera controls to print
169
Waiting
169
Waiting, too many events
169
30.yy <color> cartridge missing
169
31.yy Defective <color> Cartridge
169
31 Defective Imaging Kit
169
32.yy Replace Unsupported <color> Cartridge
169
34 Short paper
169
35 Insufficient memory to support Resource Save feature
170
37 Insufficient memory to collate job
170
38 Memory Full
170
39 Complex page, some data may not have printed
170
40 <color> Invalid refill, change cartridge
170
50 PPDS Font Error
170
51 Defective flash detected
170
52 Not enough free space in flash memory for resources
171
53 Unformatted flash detected
171
54 Network <x> Software Error
171
56 Standard USB Port Disabled
171
58 Too many flash options installed
171
58 Too many trays attached
172
58 Input config error
172
59 Incompatible tray <x>
172
82 Replace waste toner box
172
82.yy Waste toner box missing
172
88.yy <color> Cartridge is low
172
88.yy Replace <color> Cartridge
172
150 displayed
173
200.yy Paper jam <area name>
173
201.yy Paper jam <area name>
173
202.yy Paper jam <area name>
173
230.yy Paper jam <area name>
173
235 Paper Jam Check Duplex
173
24x Paper Jam Check Tray <x>
174
250.yy Paper jam <area name>
174
290–292 ADF Scanning Jams
174
293 Paper Missing
174
293.02 Flatbed Cover Open
174
294 ADF Jam
175
840.01 Scanner Disabled
175
840.02 Scanner Auto Disabled
175
940.01
175
941.01
175
942.01
175
943.01
176
940.02
176
941.02
176
942.02
176
943.02
176
900–999 Service <message>
176
Maintaining the printer
177
Storing supplies
177
Checking the status of supplies
177
Checking the status of supplies from the printer control panel
177
Checking the status of supplies from a network computer
177
Ordering supplies
178
Ordering toner cartridges
178
Ordering imaging kits
179
Ordering a waste toner bottle
179
Replacing supplies
180
Replacing the waste toner bottle
180
Replacing a black imaging kit
183
Replacing a black and color imaging kit
189
Replacing a toner cartridge
195
Replacing a developer unit
197
Cleaning the exterior of the printer
203
Cleaning the scanner glass
204
Moving the printer
204
Before moving the printer
204
Moving the printer to another location
205
Shipping the printer
205
Administrative support
206
Finding advanced networking and administrator information
206
Restoring the factory default settings
206
Using the Embedded Web Server
206
Setting up e-mail alerts
207
Viewing reports
207
Troubleshooting
208
Solving basic printer problems
208
Solving printing problems
208
Multiple-language PDFs do not print
208
Printer control panel display is blank or displays only diamonds
208
Error message about reading USB drive appears
208
Jobs do not print
209
Make sure the printer is ready to print
209
Check to see if the standard exit bin is full
209
Check to see if the paper tray is empty
209
Make sure the printer is connected to the network
209
Make sure you are using a recommended USB or Ethernet cable
209
Make sure printer cables are securely connected
209
Job takes longer than expected to print
209
Reduce the complexity of the print job
209
Change the Page Protect setting to Off
209
Job prints from the wrong tray or on the wrong paper
210
Check the Paper Type setting
210
Incorrect or strange characters print
210
Tray linking does not work
210
Load the same size and type of paper
210
Use the same Paper Size and Paper Type settings
210
Large jobs do not collate
210
Make sure Collate is set to On
210
Reduce the complexity of the print job
210
Make sure the printer has enough memory
211
Unexpected page breaks occur
211
Solving copy problems
211
Copier does not respond
211
Check the display for error messages
211
Check the power
211
Scanner unit does not close
211
Poor copy quality
212
Check the display for error messages
212
The toner may be low
212
The scanner glass may be dirty
212
The copy is too light or too dark
212
Check the quality of the original document
212
Check the document placement
213
Unwanted toner is in the background
213
Patterns (moiré) appear in the output
213
Text is light or disappearing
213
The output appears washed out or overexposed
213
Partial document or photo copies
213
Check the document placement
213
Check the Paper Size setting
213
Solving scanner problems
213
Checking an unresponsive scanner
213
Scan was not successful
214
Check the cable connections
214
An error may have occurred in the program
214
Scanning takes too long or freezes the computer
214
Other software programs may be interfering with scanning
214
The scan resolution may be set too high
214
Poor scanned image quality
214
Check the display for error messages
214
The scanner glass may be dirty
214
Adjust the scan resolution
214
Check the quality of the original document
214
Check the document placement
215
Partial document or photo scans
215
Check the document placement
215
Check the paper size setting
215
Cannot scan from a computer
215
Check the display for error messages
215
Check the power
215
Check the cable connections
215
Solving fax problems
215
Caller ID is not shown
215
Cannot send or receive a fax
216
Check the display for error messages
216
Check the power
216
Check the printer connections
216
Check the telephone wall jack
216
Review this digital phone service checklist
216
Check for a dial tone
216
Temporarily disconnect other equipment
217
Check for jams
217
Temporarily disable Call Waiting
217
Voice Mail service may be interfering with the fax transmission
217
The printer memory may be full
217
Can send but not receive faxes
217
Check to see if the paper tray is empty
217
Check the ring count delay settings
217
The toner may be low
218
Can receive but not send faxes
218
Make sure the printer is in Fax mode
218
Make sure the document is loaded properly
218
Make sure the shortcut number is set up properly
218
Received fax has poor print quality
218
Re-send the document
218
The toner may be low
218
Make sure the fax transmission speed is not set too high
218
Blocking junk faxes
219
Solving option problems
219
Option does not operate correctly or quits after it is installed
219
Reset the printer
219
Check to see if the option is connected to the printer
219
Make sure the option is installed correctly
219
Make sure the option is selected
220
Drawers
220
Make sure the paper is loaded correctly
220
Reset the printer
220
Multipurpose feeder
220
Check the multipurpose feeder
220
Clear any jams
220
Check the power cord connection
220
Check the paper
220
Check the paper guides
220
Check for service messages
221
Memory card
221
Solving paper feed problems
221
Paper frequently jams
221
Check the paper
221
Make sure there is not too much paper in the paper tray
221
Check the paper guides
221
The paper may have absorbed moisture due to high humidity
221
Paper jam message remains after jam is cleared
221
Page that jammed does not reprint after you clear the jam
221
Solving print quality problems
222
Blank pages
222
Packing material may be on the print cartridge
222
The toner may be low
222
Characters have jagged or uneven edges
222
Clipped images
223
Check the guides
223
Check the paper size setting
223
Dark lines
223
Gray background
223
Check the Toner Darkness setting
223
Incorrect margins
224
Check the paper guides
224
Check the paper size setting
224
Light colored line, white line, or incorrectly colored line
224
A toner cartridge may be defective
224
The imaging kit may be defective
224
Paper curl
225
Check the Paper Type setting
225
Has the paper absorbed moisture due to high humidity?
225
Print irregularities
225
The paper may have absorbed moisture due to high humidity
225
Check the paper type setting
225
Check the paper
225
The toner may be low
225
The fuser may be worn or defective
225
Repeating defects
226
Repeating marks occur multiple times on a page
226
Skewed print
226
Check the paper guides
226
Check the paper
226
Print is too light
226
Calibrate the color
226
Check the darkness, brightness, and contrast settings
227
The paper may have absorbed moisture due to high humidity
227
Check the paper
227
Check the Paper Type setting
227
Make sure Color Saver is set to Off
227
A toner cartridge may be low
227
A toner cartridge may be defective
227
The imaging kit may be worn or defective
227
Print is too dark
228
Calibrate the color
228
Check the darkness, brightness, and contrast settings
228
A toner cartridge may be defective
228
Solid color pages
229
Make sure the print cartridge is properly installed
229
The print cartridge may be defective or low on toner
229
Toner fog or background shading appears on the page
229
The imaging kit may be worn or defective
229
Is there toner in the paper path?
229
Toner rubs off
230
Check the paper type setting
230
Check the Paper Texture setting
230
Toner specks
230
The print cartridge may be defective
230
There is toner in the paper path
230
Transparency print quality is poor
231
Check the transparencies
231
Check the paper type setting
231
Uneven print density
231
Solving color quality problems
232
Color misregistration
232
A toner cartridge may be defective
232
Calibrate the color
232
FAQ about color printing
232
Embedded Web Server does not open
235
Check the network connections
235
Check the network settings
235
Contacting Customer Support
235
Notices
236
Product information
236
Edition notice
236
GOVERNMENT END USERS
236
Trademarks
237
Federal Communications Commission (FCC) compliance information statement
237
Modular component notice
237
Noise emission levels
238
Waste from Electrical and Electronic Equipment (WEEE) directive
238
Static sensitivity notice
238
ENERGY STAR
239
Mercury statement
239
Temperature information
239
Laser notice
239
Laser advisory label
239
Power consumption
240
Product power consumption
240
Power Saver
240
Off mode
241
Total energy usage
241
Notice to users of the US telephone network: FCC requirements
241
Notice to users of the Canadian telephone network
242
Notice to users of the New Zealand telephone network
243
South Africa telecommunications notice
243
European Community (EC) directives conformity
244
Regulatory notices for wireless products
244
Exposure to radio frequency radiation
245
Industry Canada (Canada)
245
Notice to users in the European Union
246
STATEMENT OF LIMITED WARRANTY FOR LEXMARK LASER PRINTERS, LEXMARK LED PRINTERS, AND LEXMARK MULTIFUN ...
248
Patent acknowledgment
250
Index
251
View document