
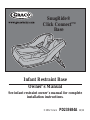
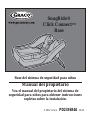
Infant Restraint Base
Owner’s Manual
© 2012 Graco PD233684A 12/12
SnugRide®
Click Connect
TM
Base
See infant restraint owner’s manual for complete
installation instructions.

2
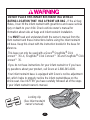
DO NOT PLACE THIS INFANT RESTRAINT IN A VEHICLE
SEATING LOCATION THAT HAS A FRONT AIR BAG . If the air bag
inflates, it can hit the infant restraint with great force and cause serious
injury or death to your child. Check vehicle owner’s manual for
information about side air bags and infant restraint installation.
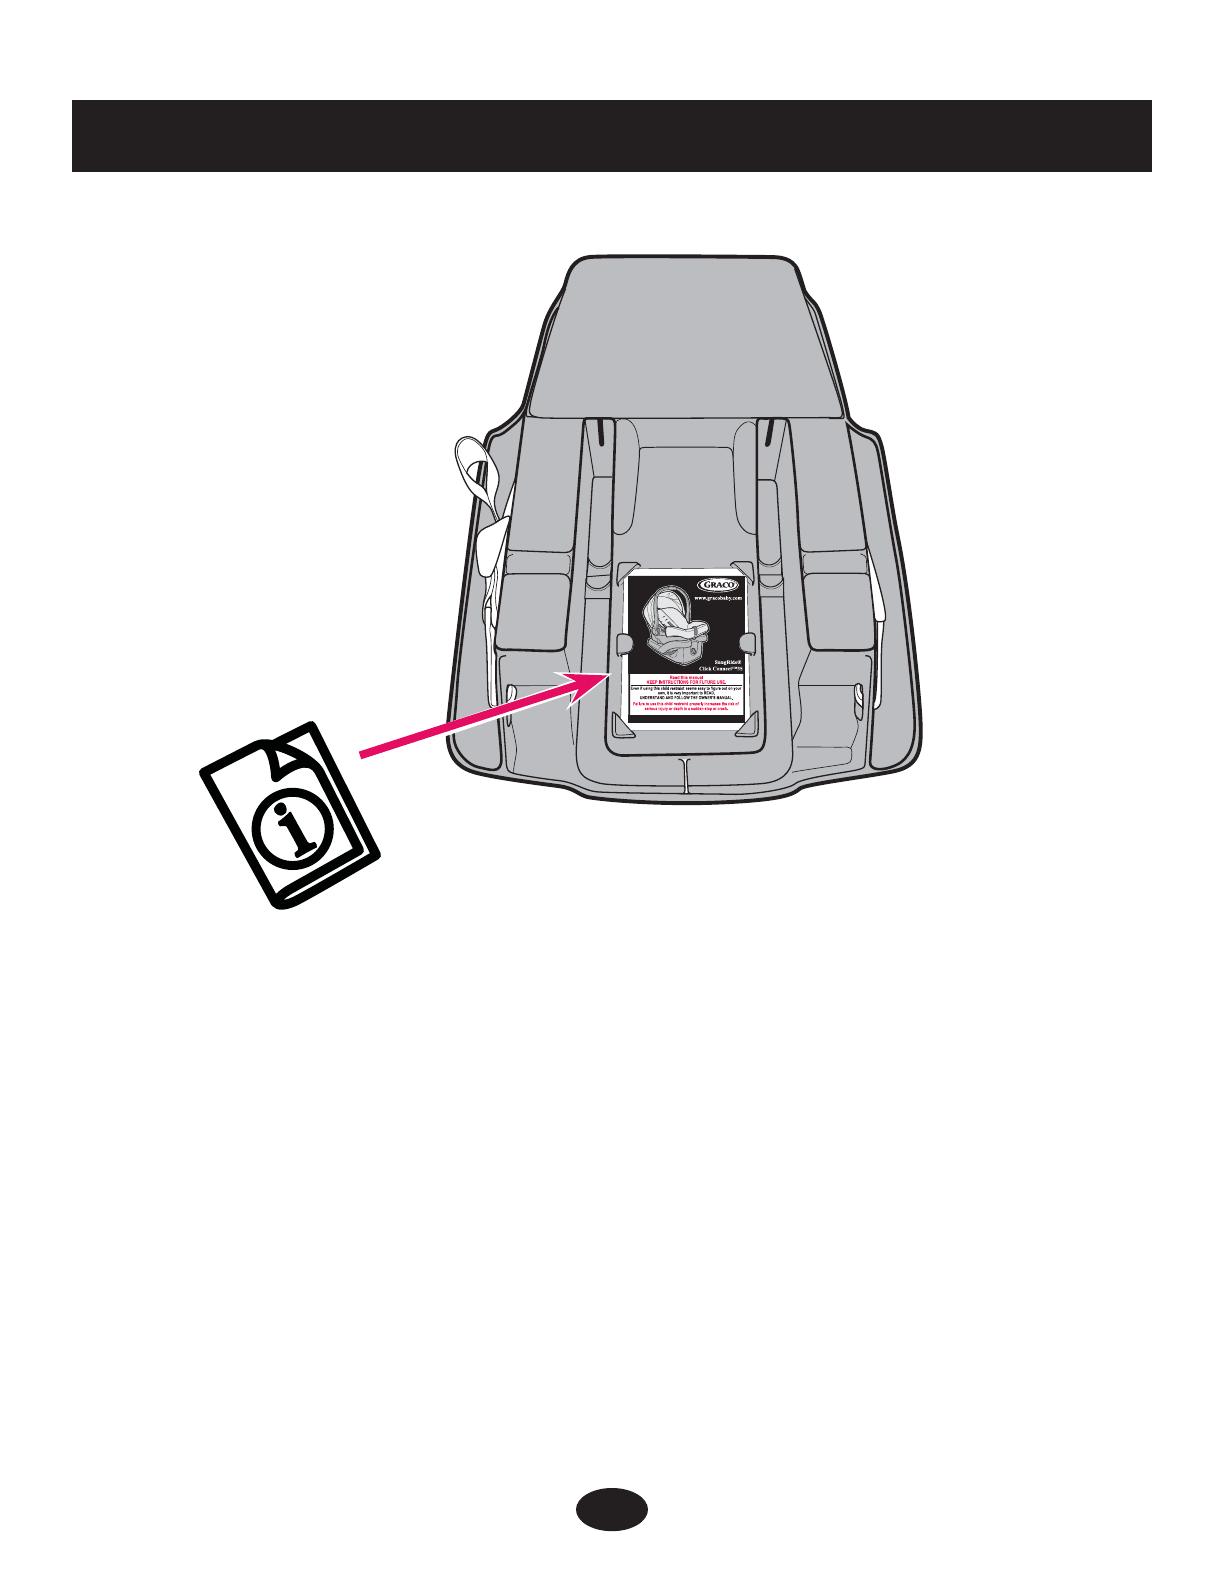
You MUST read and understand both the owner’s manual from the
infant restraint and these instructions before using the infant restraint
and base. Keep this sheet with the instruction booklet in the base for
reference.
This base can only be used with a Graco
®
SnugRide
®
Click
Connect™ 35 LX, SnugRide
®
Click Connect™ 30 and SnugRide
®
Click
Connect™ 35.
If you do not have instructions for your infant restraint or if you have
any questions about your product, call Graco at 1-800-345-4109.
Your infant restraint base is equipped with Graco’s recline adjustment
foot, which helps to properly recline the infant restraint/base on the
vehicle seat. Use it AFTER you have carefully followed all of the steps
in your infant restraint owner’s manual.
Locking clip
(See infant restraint
owner’s manual)

3
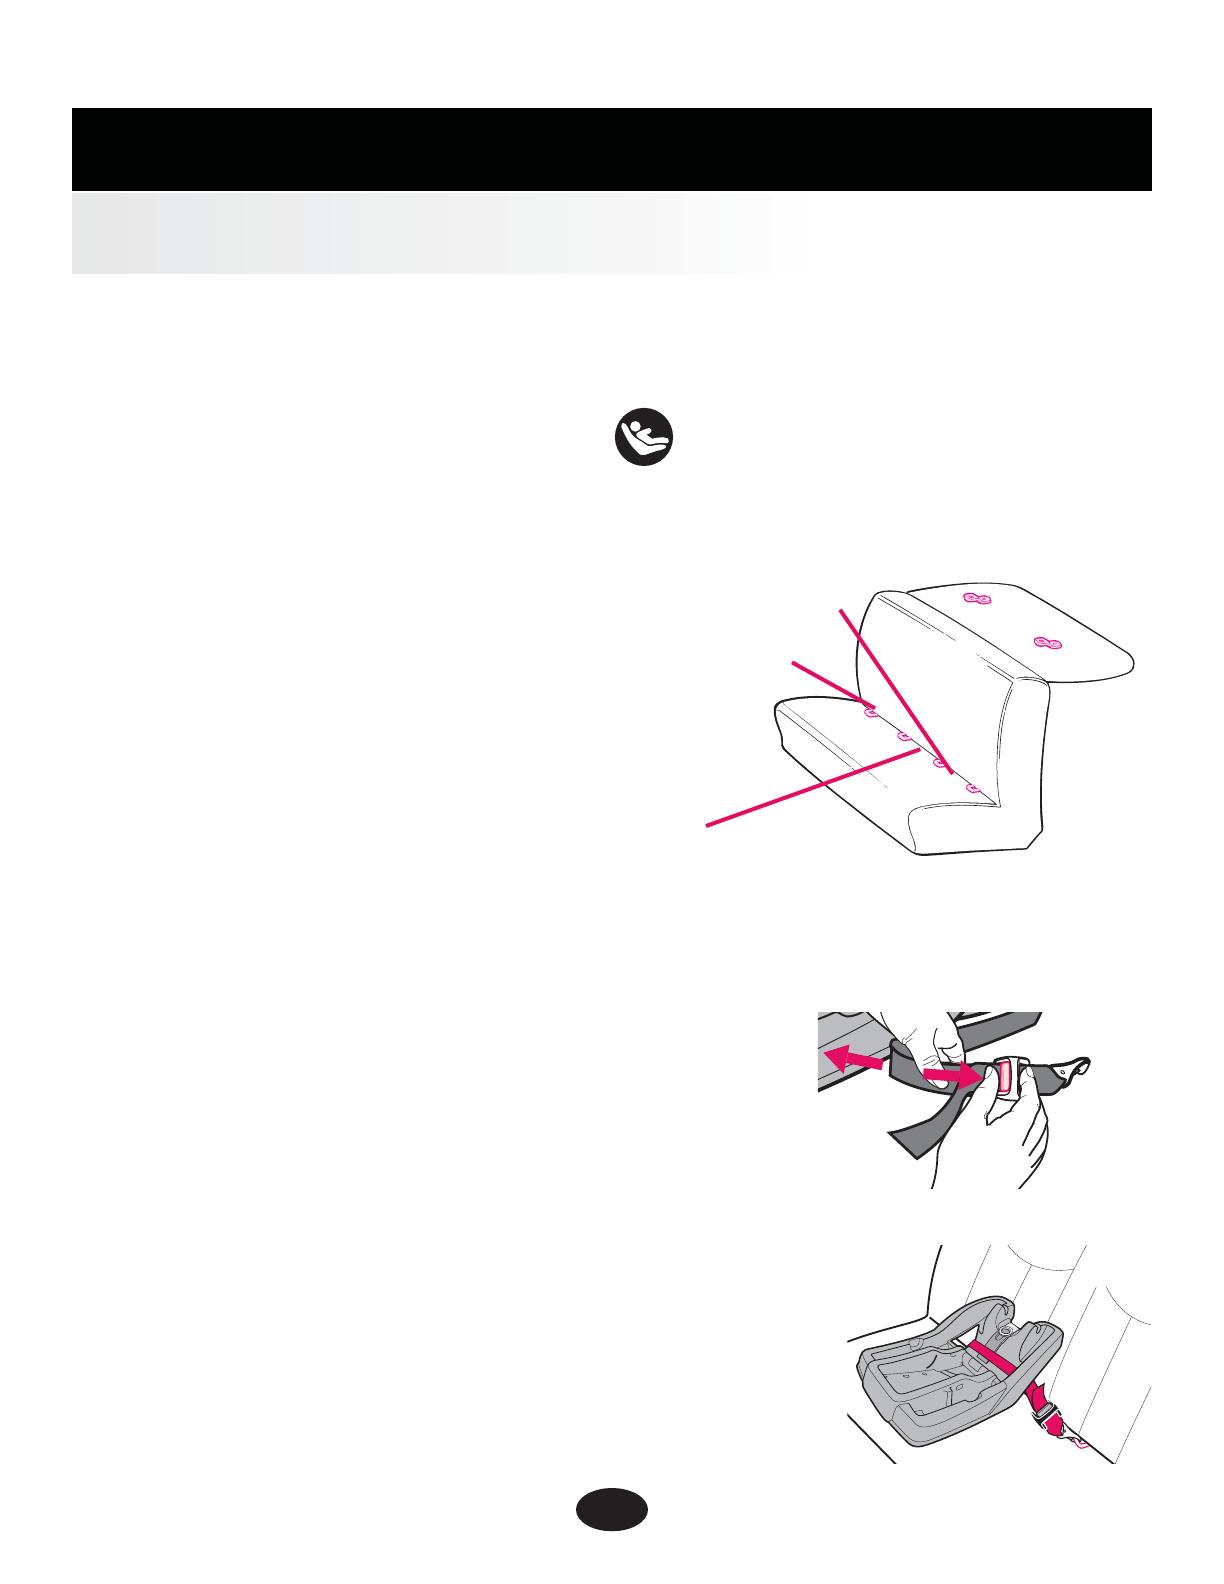
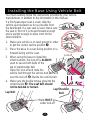
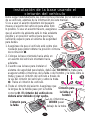
Installing the Base Using Vehicle Belt
You must carefully follow the instructions provided by your vehicle
manufacturer, in addition to the information in this manual.
If a front passenger seat is used, slide the
vehicle seat rearward as far as possible from
the dashboard. If a rear seat is used, make sure
the seat in front of it is moved forward enough
and is upright enough to allow room for the
infant restraint.
1. Make sure vehicle is on level ground in order
to get the correct recline position
.
2. Place the base in a rear-facing position on a
forward-facing vehicle seat.
3. When using the base to install the
infant restraint, the lock-off is ALWAYS
used to secure both belts of the
lap or lap/shoulder belt.
Open the lock-off and route the
vehicle belt through the vehicle belt path and
over the lock-off
. Buckle the vehicle belt.
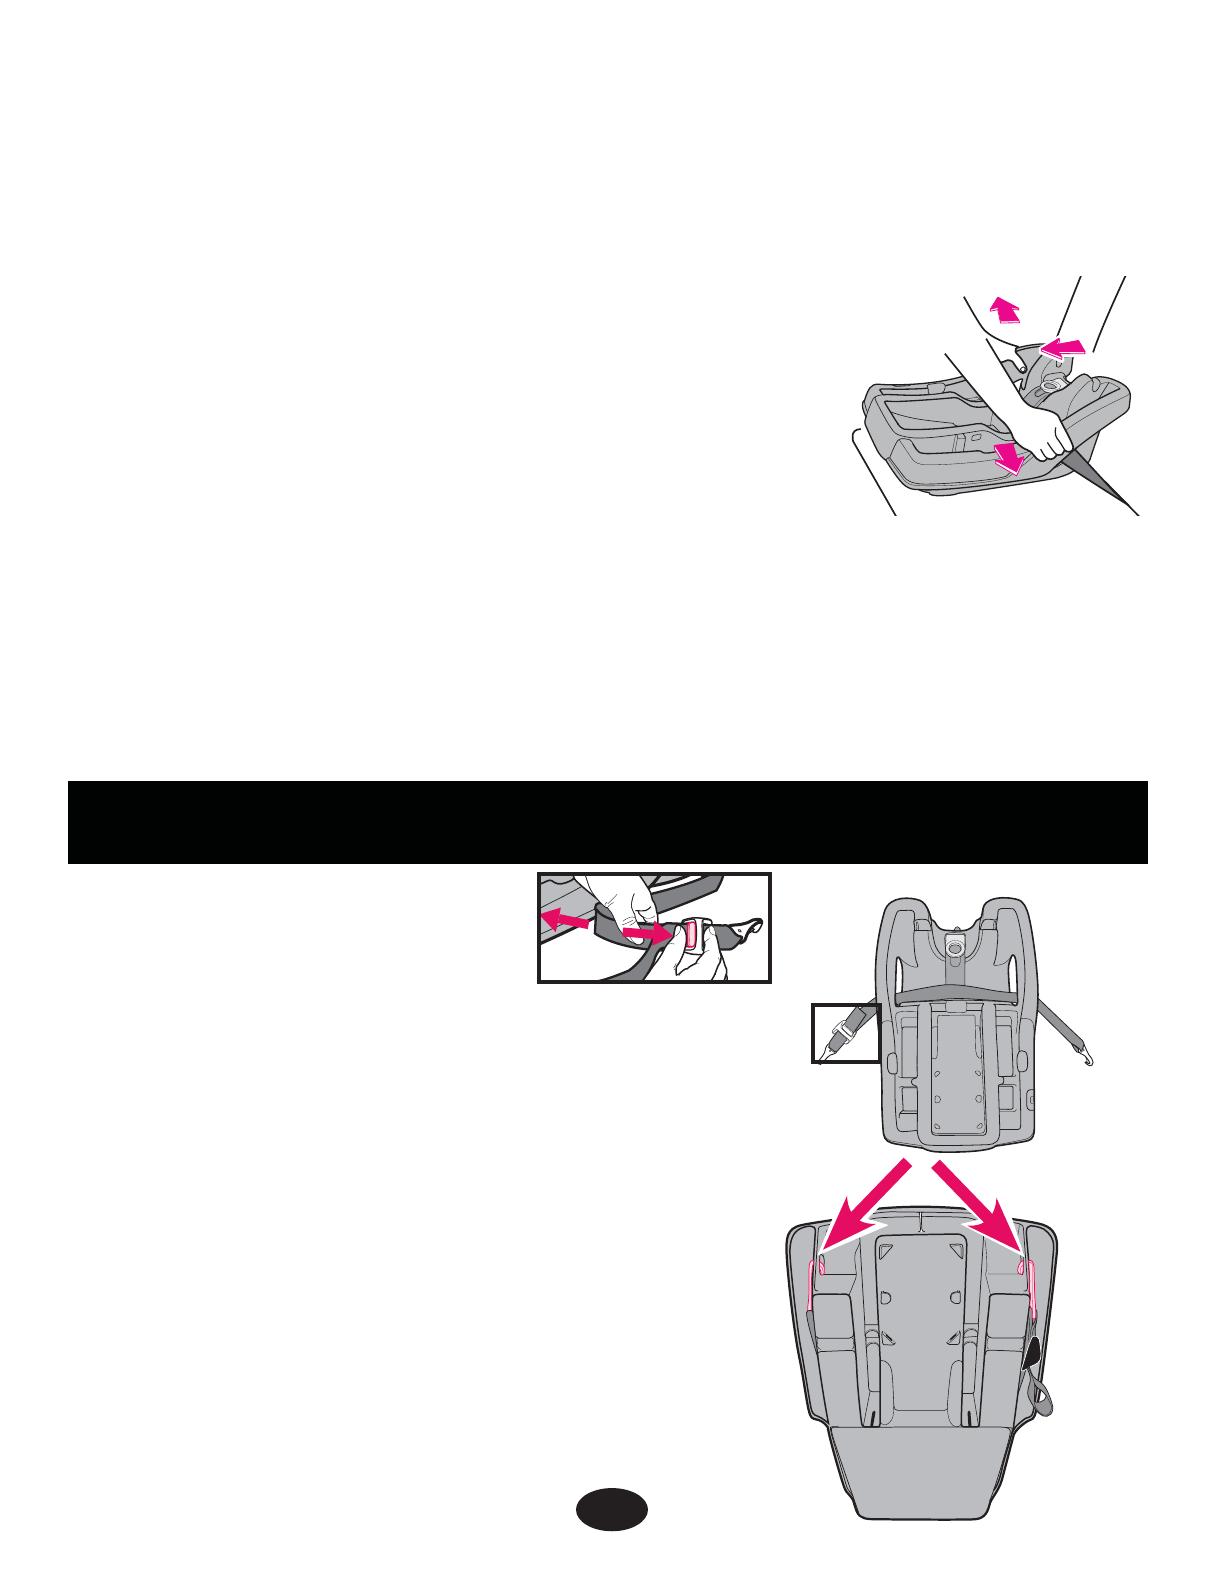
4. Make sure the buckle tongue goes into the
correct buckle
. The seat belt should
not be twisted or turned.
Lap Belt
Lap/Shoulder
Belt
Belts MUST go
under lock-off
Lock-off

4
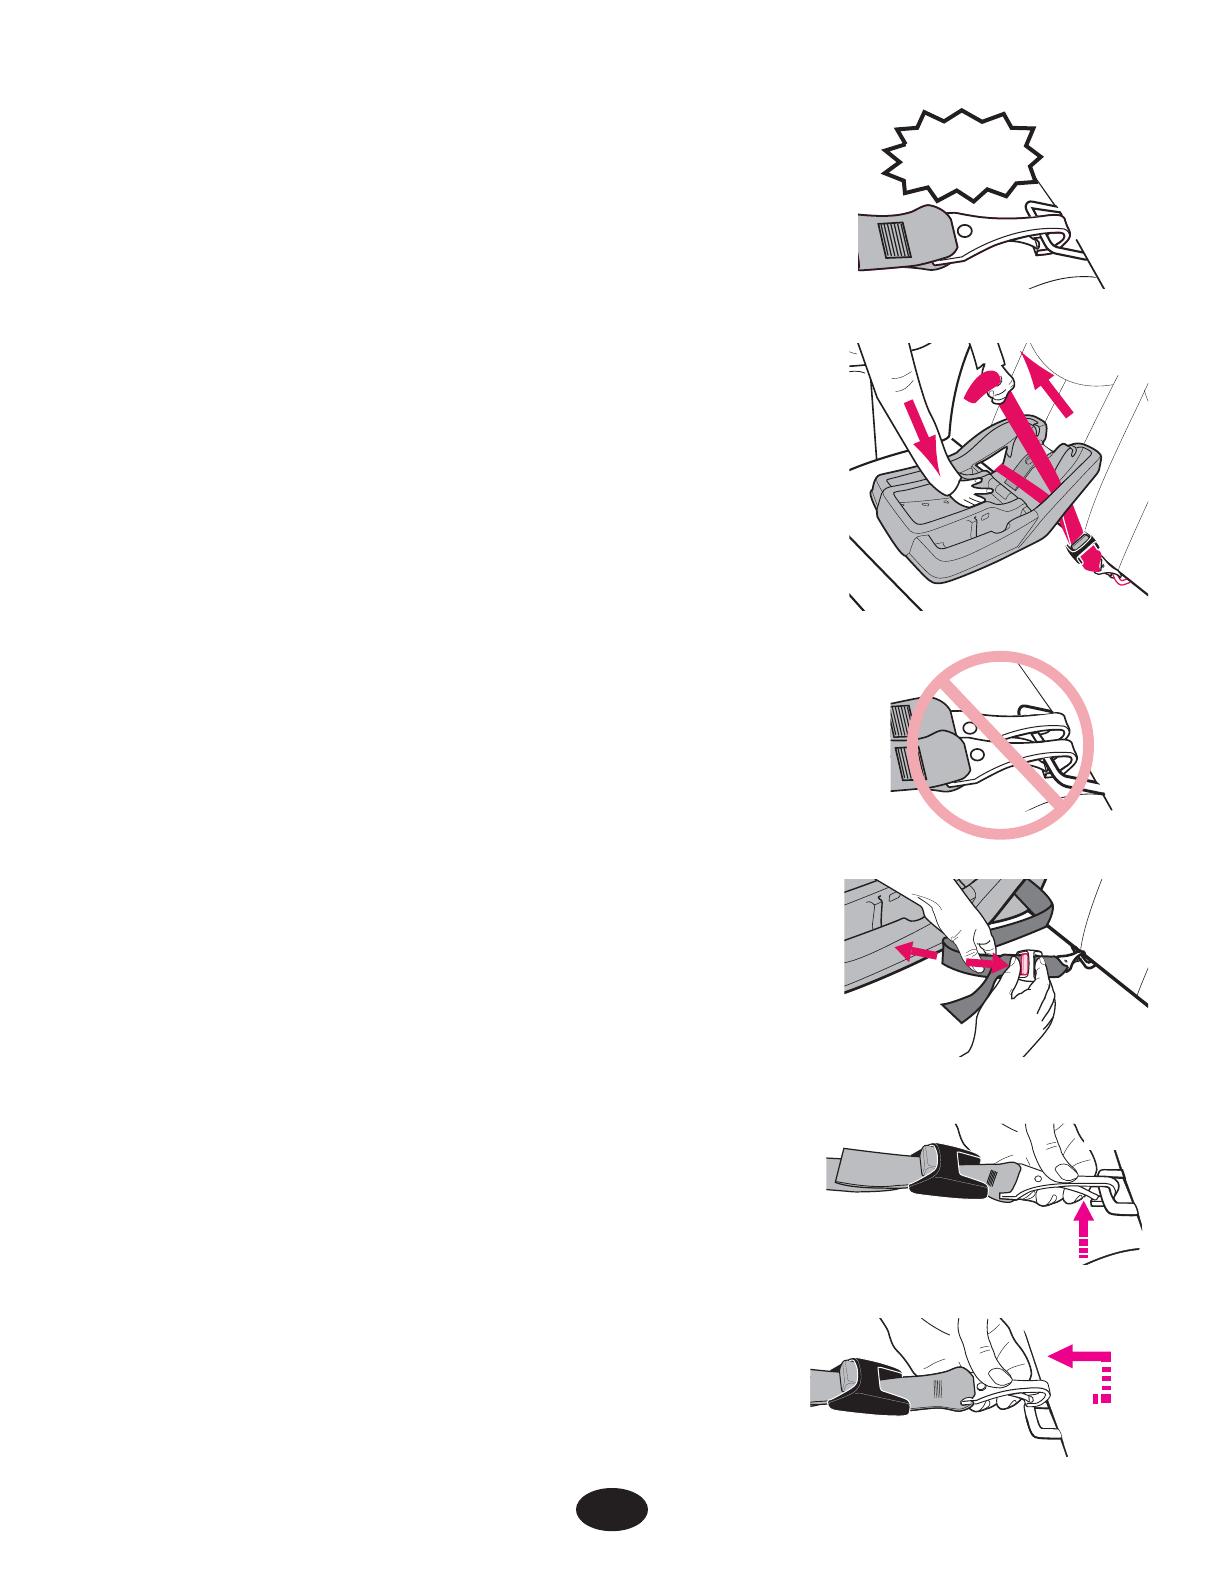
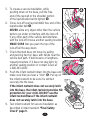
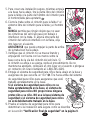
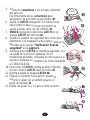
5. To create a secure installation, while
pushing down on the base, pull the free
end of the lap belt or the shoulder portion
of the lap/shoulder belt to tighten
.
6. Close lock-off over lap belt AND free end of the
lap/shoulder belt .
NEVER allow any object other than the vehicle
belts to go under or interfere with the lock-off.
If any other part of the vehicle belt interferes
with the lock-off choose another seating location.
MAKE SURE that you push the top of the
lock-off all the way down.
7. Check that belt does not move by pulling
and pushing hard on base with hands near the
vehicle belt path. If belt loosens or lengthens,
repeat procedure. If it does not stay tight, try
another seating position or contact Graco at
1-800-345-4109.
8. Push the infant restraint down into the base and
make sure that you hear a “click”
. Pull up on
the infant restraint to be sure it is latched
securely into the base.
If the infant restraint does not securely latch
into the base, the infant restraint provides NO
protection for your child. DO NOT use the
infant restraint/base if the infant restraint
does not securely latch into the base.
9. Test infant restraint for secure installation as
described in infant restraint “Final Safety
Check” page 9.
CLICK!
5
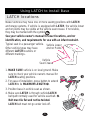
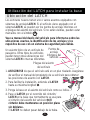
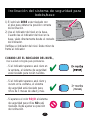
1. MAKE SURE vehicle is on level ground. Make
sure to check your vehicle owner's manual for
LATCH seating positions.
2. For ease of installation, press button to extend
LATCH
to its MAXIMUM LENGTH
.
3. Position base in vehicle seat as shown.
4. Make sure LATCH is through vehicle/LATCH
belt path normally used for vehicle seat belt.
.
Belt must lie flat and not be twisted.
LATCH belt must not go under lock-off.
Using LATCH to Install Base
Newer vehicles may have one or more seating positions with LATCH
anchorage systems. If vehicle is equipped with LATCH, the vehicle lower
anchor points may be visible at the vehicle seat crease. If not visible,
they may be marked with the symbol .
See your vehicle owner’s manual for exact locations, anchor
identification, and requirements for use with an infant restraint.
LATCH locations
Typical seat in a passenger vehicle.
Other vehicle types may have
different LATCH locations or
different markings.
Vehicle Lower
Anchor Points
Vehicle
Seat Crease
6
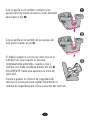
5. Attach connectors to vehicle lower anchors.
Pull firmly on connectors to be sure they
are attached .
6. Tighten LATCH by pushing down hard on
base and pulling the adjustment belt back
through belt path .
7. NEVER put two LATCH connectors on one
vehicle LATCH anchor
.
8. Test infant restraint for secure installation as
described in infant restraint “Final Safety
Check” page 9.
9. Check that the LATCH stays tight and does not
slip from the tightened position. If it does not stay
tight, try another seating position or contact
Graco at 1-800-345-4109.
10. To remove LATCH, push button while
pulling on the LATCH belt as shown
.
11. Press and hold LATCH release hinge
.
12. Push connector in, lift connector up and
pull out (away from anchor point)
.
13. Repeat steps 11 and 12 for other connector.
CLICK!
7
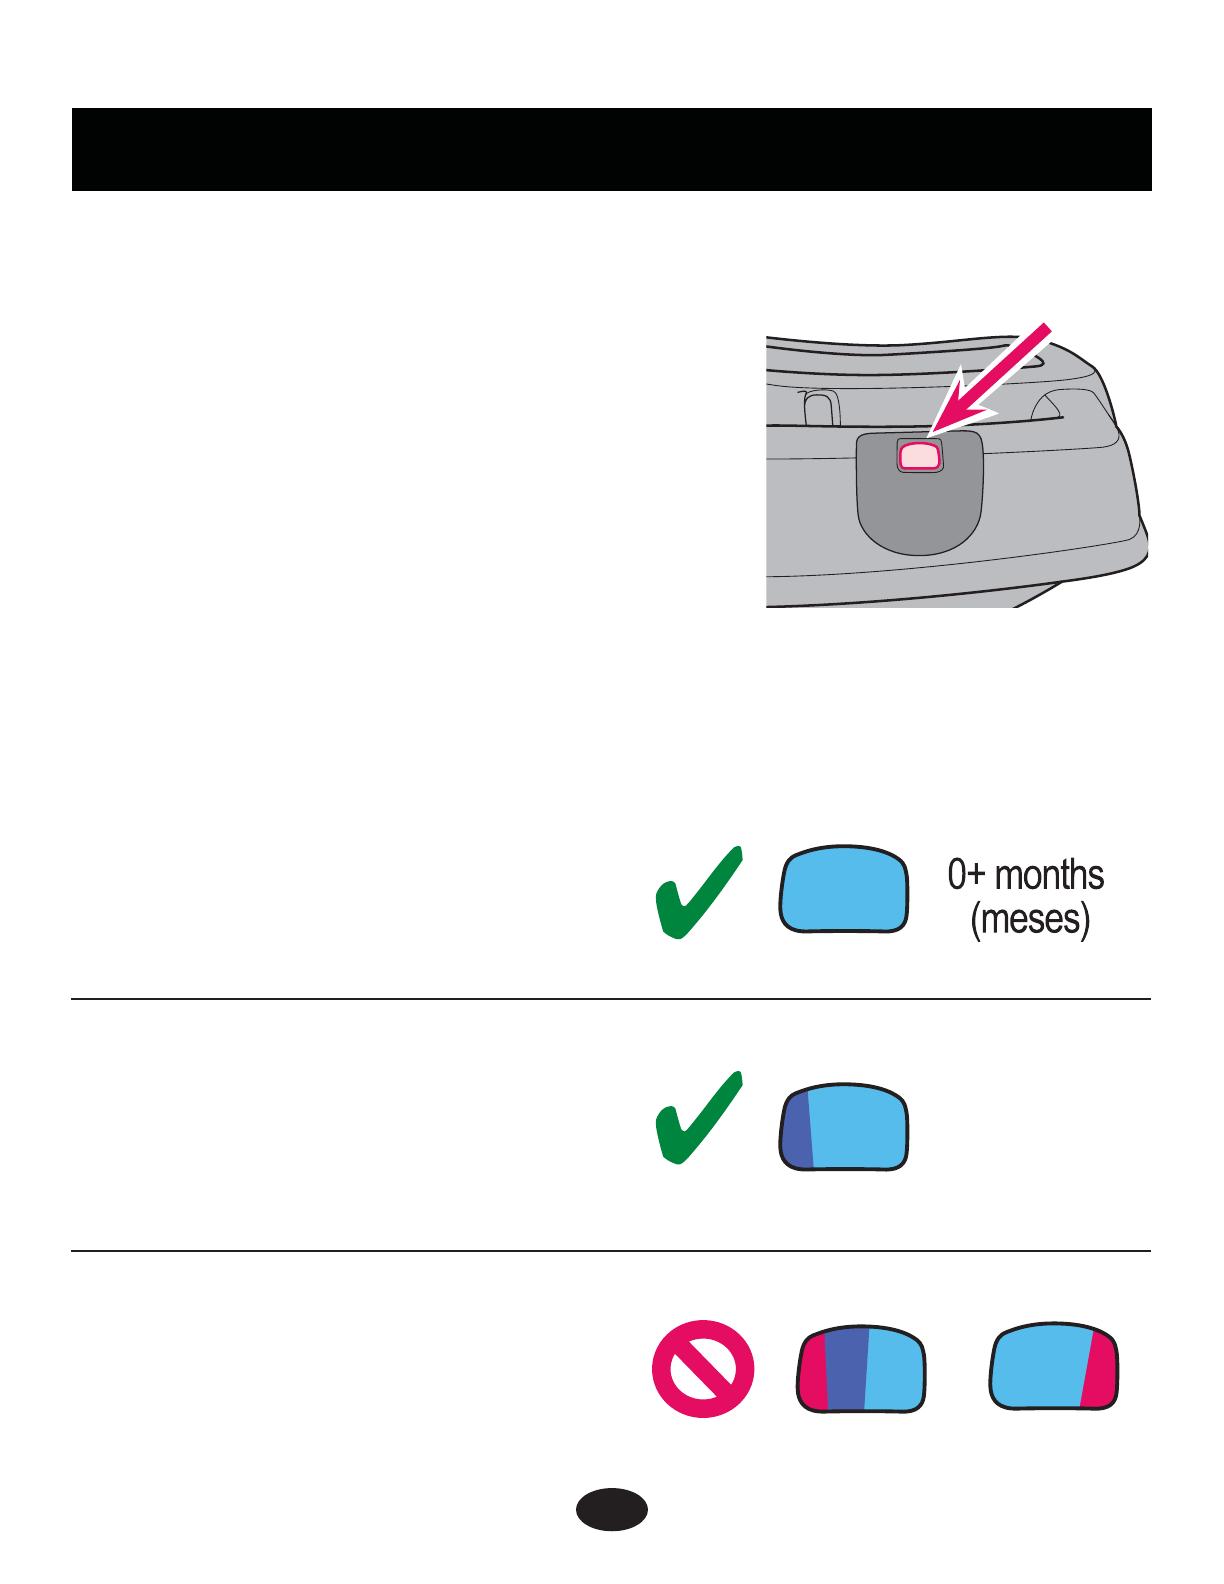
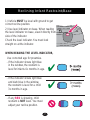
Reclining Infant Restraint/Base
1) Vehicle MUST be level with ground to get
correct recline position.
2) Use level indicator on base. When reading
the level indicator on base, view it directly from
side of the indicator.
Check the level indicator. You must look
straight on at the indicator.
WHEN READING THE LEVEL INDICATOR,
- If the indicator shows light blue
in the window, the restraint is
level for infants 0+ months in age.
- If the indicator shows light blue
and dark blue in the window,
the restraint is level for a child
3+ months in age.
- If any RED is showing, child
restraint is NOT level.
You must
adjust your recline position.
3+ months
(meses)
Use corrected age for preemies.
8
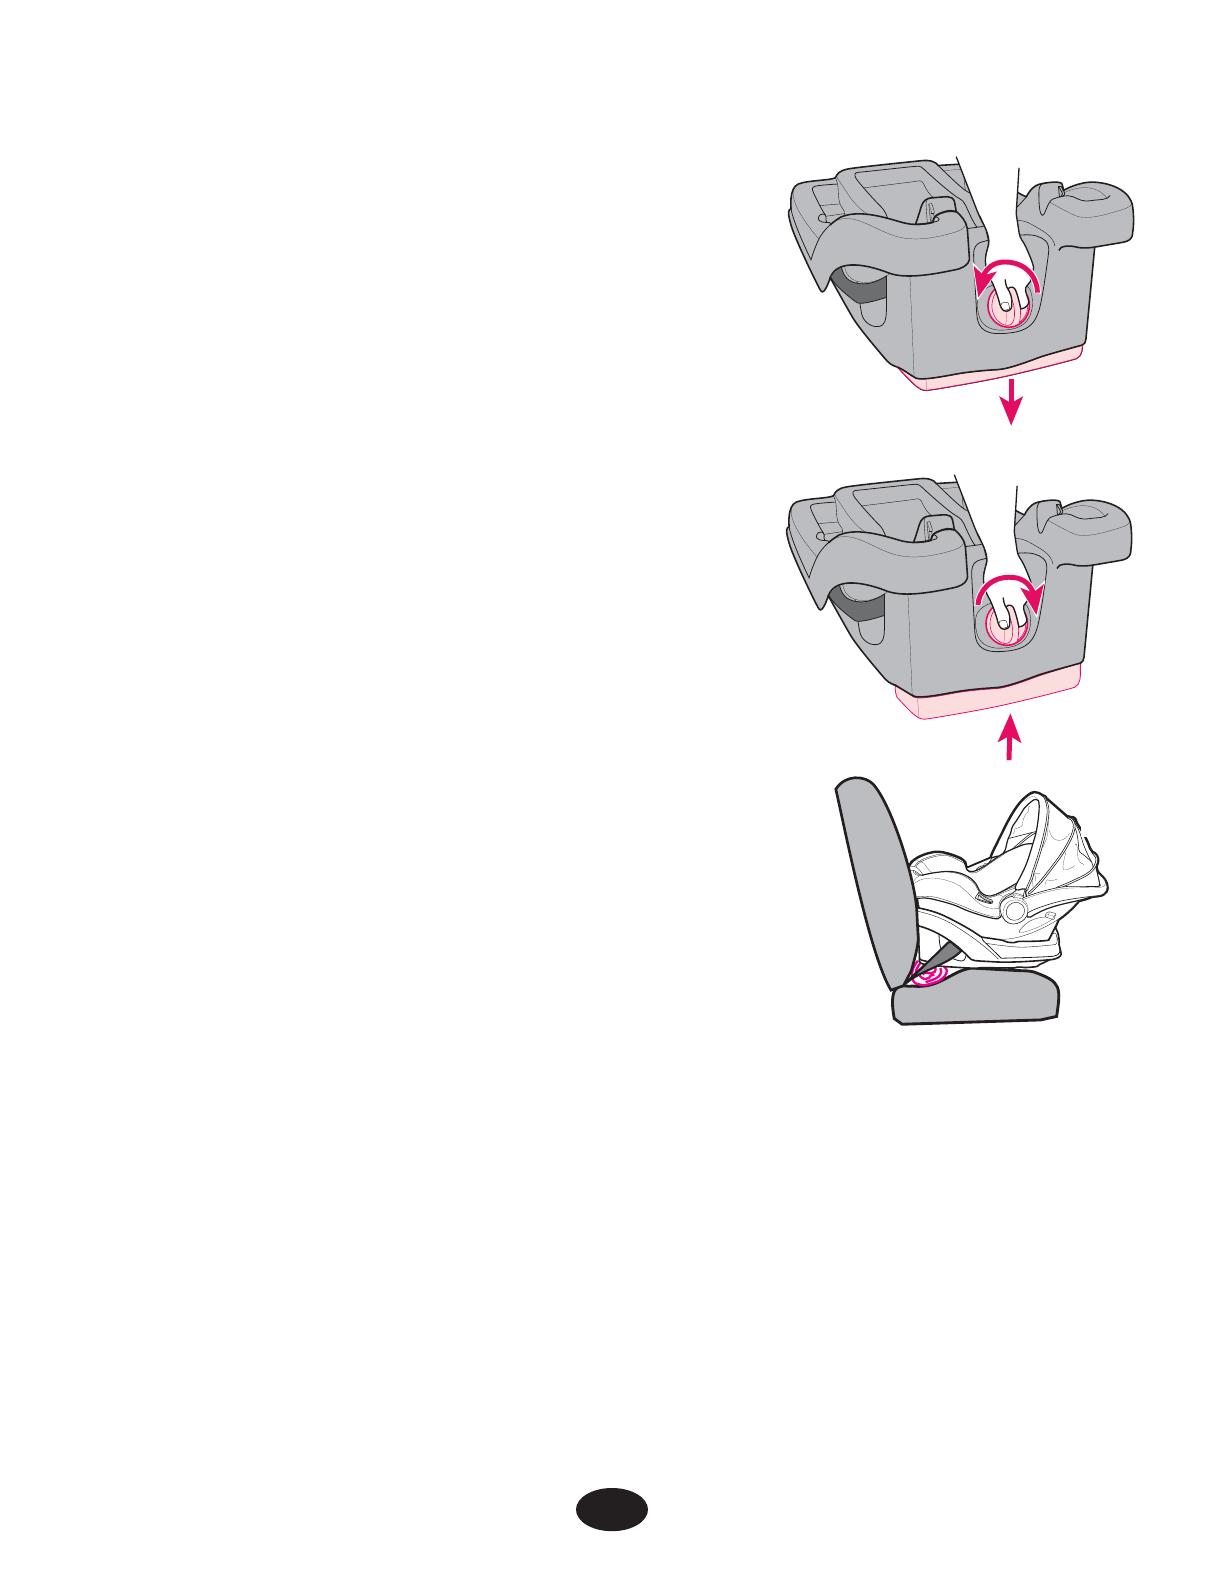
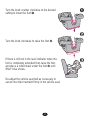
Turn the knob counter clockwise to the desired
setting to lower the foot .
Turn the knob clockwise to raise the foot .
If there is still red in the level indicator when the
foot is completely extended then raise the foot
and place a rolled towel under the foot until
ONLY blue shows.
Re-adjust the vehicle seat belt as necessary to
secure the infant restraint firmly in the vehicle seat.
9
1"
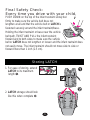
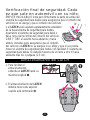
Final Safety Check:
Every time you drive with your child,
PUSH DOWN on the top of the infant restraint slowly but
firmly to make sure the vehicle belt does not
lengthen at all and that the vehicle belt or LATCH is
fastened securely around the infant restraint/base.
Holding the infant restraint
or base near the vehicle
belt path, TWIST AND PULL the infant restraint
forward and to both sides to make sure the vehicle
belt or LATCH does not lengthen or loosen and the infant restraint does
not easily move. The infant restraint should not move side to side or
forward more than 1 inch (2.5 cm).
1. For ease of storing, extend
LATCH
to its maximum
length .
2. LATCH storage should look
like this when complete .
Storing LATCH
10
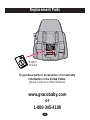
To purchase parts or accessories or for warranty
information in the United States,
please contact us at the following:
www.gracobaby.com
or
1-800-345-4109
Replacement Parts
Bottom
of Base
Page is loading ...
Page is loading ...
Page is loading ...
Page is loading ...
Page is loading ...
Page is loading ...
Page is loading ...
Page is loading ...
Page is loading ...
Page is loading ...
-
 1
1
-
 2
2
-
 3
3
-
 4
4
-
 5
5
-
 6
6
-
 7
7
-
 8
8
-
 9
9
-
 10
10
-
 11
11
-
 12
12
-
 13
13
-
 14
14
-
 15
15
-
 16
16
-
 17
17
-
 18
18
-
 19
19
-
 20
20


Ask a question and I''ll find the answer in the document
Finding information in a document is now easier with AI
in other languages
- español: Graco PD233684A Manual de usuario
Related papers
-
Graco Fast Action User manual
-
-
-
-
-
-
-
Graco 35 LX User manual
-
-