Excalibur RF-30-EDP Owner's manual
- Category
- Remote starters
- Type
- Owner's manual
This manual is also suitable for

ULTIMATE-30-EDP
Deluxe OEM Upgrade & Range Extender
March 6, 2013
Operation Guide
UltiMate Vehicle Systems

Table Of Contents
Transmitter Overview ............................................................................3
The Transmitter .................................................................................3
Transmitter Functions ............................................................................4
Other Remote Start Features ................................................................8
Low Battery/Low Temp Automatic Starting ........................................8
Pit-Stop Feature ................................................................................8
Security System Features .....................................................................9
Last Door Locking/Arming .................................................................9
Automatic Re-locking ........................................................................9
Using The Valet Switch ........................................................................10
Emergency Override .......................................................................10
The Status Light ..................................................................................10
Programming Transmitters ..................................................................12
Programming Features ........................................................................13
Programmable Features ......................................................................13
Programmable Features Matrix ...........................................................15

3
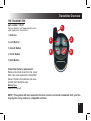
Transmitter Overview
THE TRANSMITTER
1) Antenna
2) Lock Button
3) Unlock Button
4) Trunk Button
5) Start Button
1
5
23
4
part number: 147-07
Call your dealer or visit www.caralarm.com to
order replacement transmitters.
Transmitter battery replacement:
Remove the small screw from the lower
back case, and separate the transmitter
halves. Replace the batteries and reas-
semble the transmitter case.
Battery Type:
CR2016 (2 required)
NOTE: This system will also respond to the lock, unlock, and trunk commands from your fac-
tory keyless entry remote on compatible vehicles.

4
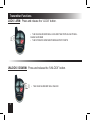
LOCK / ARM: Press and release the “LOCK” button.
Transmitter Functions
UNLOCK / DISARM: Press and release the “UNLOCK” button.
THE VEHICLE DOORS WILL LOCK AND THE STATUS LIGHTS WILL •
FLASH SLOW RED
THE SYSTEM IS NOW MONITORING ENTRY POINTS •
THE VEHICLE DOORS WILL UNLOCK•

5
TRUNK RELEASE: Press & hold the “TRUNK” button for 3 seconds.
Transmitter Functions (cont’d)
REMOTE START: Press and release the “START” button twice within 5 sec-
onds. (see programmable feature #5 for additional options)
THE VEHICLE’S ENGINE WILL START AND THE STATUS LIGHTS WILL FLASH •
SLOW GREEN.
Each time you park, set the climate controls to give you the desired •
interior temperature when you use the remote start.
x2
THE TRUNK WILL OPEN & THE DOORS WILL UNLOCK•
6
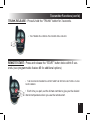
Transmitter Functions (cont’d)
PANIC: Press & hold the “LOCK” or “UNLOCK” button for 3 seconds.
THE HORN WILL SOUND AND THE DOORS WILL LOCK OR UNLOCK •
DEPENDING WHICH BUTTON IS PRESSED.
NOTE: PANIC MAY NOT BE AVAILABLE ON ALL VEHICLES
PRESS LOCK OR UNLOCK AGAIN TO CANCEL PANIC MODE•
OR
LOW VOLTAGE/TEMP AUTO START: Press and release the “START” button
within 5 seconds of locking/arming the system.
THE ANTENNA WILL GIVE ONE BEEP TO INDICATE THE LOW VOLT/•
LOW TEMP(15 DEGREE) AUTO-START IS ACTIVATED. SEE PAGE 8 FOR
MORE INFO.
2
1

7
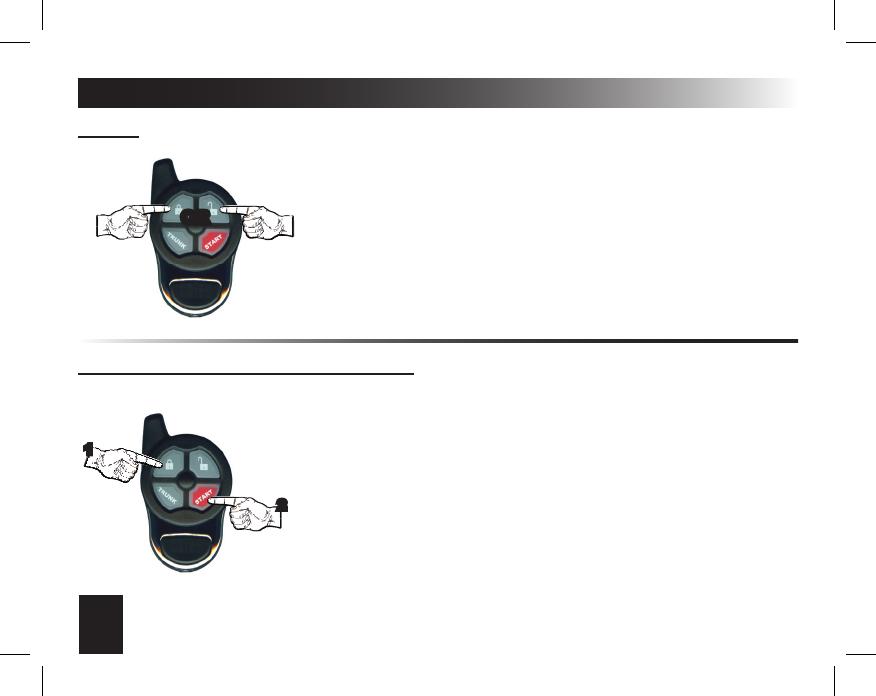
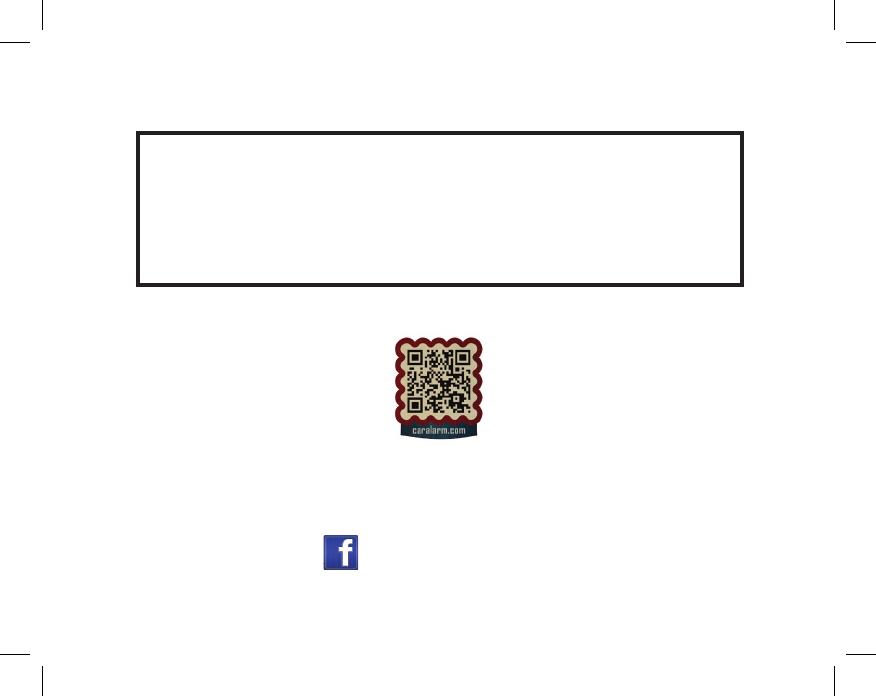
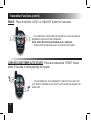
Transmitter Functions (cont’d)
AUXILIARY FUNCTIONS 1-4:
The actual operation of these functions will vary from car to car. They are designed to operate extra
vehicle functions like automatic sliding doors or motorized hatches. Aux 1-4 are virtual outputs only
available on certain vehicles when this system is integrated with the vehicle’s data network. Consult
with your installer to nd out if any of these functions are available for your vehicle. If so, conrm each
operation with the controller and write each function in the blank spaces provided below.
- Auxiliary 1 Function (___________________): To activate this function, press and release the
“trunk” and “start” buttons simultaneously for 1 second).
- Auxiliary 2 Function (___________________): To activate this function, press and release the
“lock” and “trunk” buttons simultaneously for 1 second).
- Auxiliary 3 Function (___________________): To activate this function, press and release the
“unlock” and “start” buttons simultaneously for 1 second).
- Auxiliary 4 Function (___________________): To activate this function, press and release
the “unlock” and “trunk” buttons simultaneously for 1 second).

8
LOW BATTERY/LOW TEMP AUTOMATIC STARTING
Other Remote Start Features
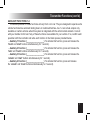
PIT-STOP FEATURE
This feature allows you to leave your engine running for making quick errands. To use this feature,
have the engine running normally from the ignition switch and your foot off the brake pedal. Press the
Valet Switch twice; the antenna will beep 5 times. Turn the key off and the engine will remain running
for the programmed run time. You can lock your vehicle with the transmitter to keep it secure while
away.
This feature will automatically start the engine if the vehicle battery drops below 11 volts or the
interior temperature drop to 15 (or 32) degrees fahrenheit. You must activate these features each time
you park your car to use them. They can be activated one of two ways:
Method 1 - Valet Switch
• Turn the ignition switch “on”, then “off” (engine not running), and within 7 seconds press the valet
switch twice. If there is a 2 second delay without additional valet button presses, the antenna will
beep 2 times activating low voltage start mode.
• To activate low temp starting, enter low voltage start mode as described above but, after the anten-
na beeps twice, press the valet switch 1 time (15 degrees) or 2 times (32 degrees) within 5 seconds.
The antenna will beep to conrm your selection.
Method 2 - With The Transmitter
• Within 5 seconds of pressing LOCK, press the START button. You will hear one beep from the
antenna.
NOTE: When low temp start mode is activated, low voltage start is also activated. These features will
operate once every two hours until the ignition key is turned “ON”.

9
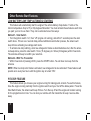
LAST DOOR LOCKING/ARMING
This system can be congured to arm automatically when all the vehicle’s doors are closed (see
programmable feature #2). When all of the doors are closed after driving the vehicle, it will start a 30
second countdown (indicated by a fast ashing status light). After 30 seconds, the system will arm
(and lock the doors if congured to do so). During the 30 second arming delay, if a point of entry is
opened, the countdown will pause until all entry points are closed again. Turning ON the ignition key
will cancel the last door arming sequence until the key is turned off and the doors are all closed once
again.
Security System Features
AUTOMATIC RE-LOCKING
This automatically re-locks the doors if the system is disarmed from the remote. (see program-
mable feature #3). When unlocked by remote, the system will start a 90 second countdown (fast
ashing red status light) to re-lock the system. This is useful if the controller accidentally disarms the
system when it’s kept in a purse or pocket where other items could potentially press the buttons. EN-
HANCED AUTO RE-LOCK allows you to cancel the countdown by pressing UNLOCK a second time
within 5 seconds.

10
Using The Valet Switch
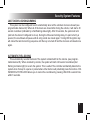
EMERGENCY OVERRIDE
If you were to lose or break your controller, you’d need to perform an emergency override to disarm
the system. To do so, use the following steps:
STEP 1 - Enter the vehicle (the alarm may sound)
STEP 2 - Turn the ignition key to the “ON” position
STEP 3 - Press the valet switch (located in the window-mount antenna) once
STEP 4 - Turn the ignition “OFF”.
The valet switch is a push button built into the window mount antenna. It is used to perform emer-
gency override and system programming (see inside of back cover for programming).
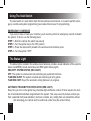
The Status Light
The status lights, located in the window-mount antenna, provide a visual indication of the system’s
status via GREEN (remote start status) and RED (alarm status) lights.
SECURITY SYSTEM STATUS (RED LIGHT):
OFF: The system is unlocked and not performing any automatic functions.
FLASHING SLOW: The system is locked and monitoring all entry points.
FLASHING FAST: One of the automatic arming features is in progress.
AUTOMATIC TRANSMITTER VERIFICATION (RED LIGHT):
Every time you turn on the ignition key, the status light will ash a number of times equal to the num-
ber of controllers/transmitters programmed to the system. This unique security feature protects you
from a potential thief (valet attendant, mechanic, installer, etc.) adding their own transmitter without
and accessing your vehicle and it’s contents at a later time (the perfect crime!).

11
ZONE VIOLATION RECALL (RED LIGHT):
If a zone is violated while the system is locked/armed, the RED status lights will ash a number of
times to indicate exactly which zone(s), has been violated. It will store the last 2 violated circuits and
continually repeat the ash pattern until the system is disarmed & the ignition key is turned ON.
2 FLASHES: Hood trigger
3 FLASHES: Door trigger
REMOTE START STATUS (GREEN LIGHT):
OFF: The remote start is off and in standby mode.
FLASHING SLOW: Remote start is activated.
COMBINATION INDICATIONS:
This indication reect combinations of functions involving the security system AND remote start.
FAST ALTERNATES GREEN/RED: System locked w/ remote start activated.
The Status Light (cont’d)

12
Standard Programming: Before you begin, have all transmitters which are to operate the system at
hand and make sure the correct vehicle prole (see page 11) is selected on the controller(s).
Step 1 Then, turn the ignition “on”.
Step 2 Within 5 seconds of Step 1, press the Valet Switch 5 times. The antenna will beep, conrming
that the system is ready to learn a transmitter code.
Step 3 Press the “lock” button on each transmitter one at a time. The antenna will beep once to
conrm that each controller was learned. If a code is not received within 10 seconds of Step 2, the
learning process will automatically exit.
Programming Transmitters

13
Step 1 Turn the ignition key “ON”, then “OFF”
Step 2 Within 5 seconds of step 1, press the valet switch 5 times to access user features (10 times
to access installer features).
~ The antenna will beep and the status light will turn on.
Step 3 Within 10 seconds of step 2, press the valet switch the number of times corresponding with
the desired feature’s number.
~ The antenna will beep, equal to the selected feature.
Step 4 Change the feature by pressing the transmitter button that corresponds with the desired set-
ting. The antenna will beep to correspond with the chosen setting.
Programming Features
Feature #2 - Last Door Locking
On (press “lock” button to program)
Off (press “unlock” button to program) - DEFAULT
“Last Door Locking” has the system automatically lock itself every time you exit the vehicle (the com-
plete operation is described on page 9).
Feature #1 - Ignition Controlled Lock/Unlock
Lock And Unlock w/ Ignition (press “lock” button to program)
Lock w/ Ignition On (press “unlock” button to program)
Unlock w/ Ignition Off (press “trunk” button to program)
Off (press “start” button to program) - DEFAULT
This feature controls the lock/unlock operations when the ignition key is turned on/off,
Programmable Features

14
Feature #3 - Automatic Re-locking
On (press “lock” button to program)
Off (press “unlock” button to program) - DEFAULT
Enhanced (press “trunk” button to program)
“Automatic Re-locking”, described on page 9, re-locks the alarm if accidentally unlocked. Enhanced
auto re-lock allows you to cancel the rearming sequence by pressing unlock a 2nd time within 5
seconds.
User Programmable Features (cont’d)
Feature #4 - Trunk Release Also Unlocks The Doors
On (press “lock” button to program) - DEFAULT
Off (press “unlock” button to program)
When turned on, congures the system to also unlock the doors when trunk release is used.
Feature #5 - Remote Start Activation
Press “start” button 1 time (press “lock” button to program)
Press “start” button 2 times (press “unlock” button to program) - DEFAULT
Press “start” button 3 times (press “trunk” button to program)
Press “start” button 4 times (press “start” button to program)
This feature changes how the remote start feature is activated using the transmitter.

15
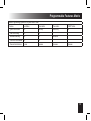
Feature Programming: Ignition on, off, press valet 5 times
# Feature Lock Button Unlock button Trunk button ”START” button
1 Ignition Lock/Unlock On Lock only Unlock only Off
2 Last Door Locking On Off
3 Automatic Relocking On Off Enhanced
4 Unlock w/ Trunk Release On Off
5 Remote Start Activation 1 press 2 presses 3 presses 4 presses
Programmable Features Matrix
This device complies with FCC Rules part 15. Operation is subject to the following
two conditions, (1) This device may not cause harmful interference and, (2) This
device must accept any interference that may be received, including interference
that may cause undesired operation.
The manufacturer is not responsible for any radio or TV interference caused by
unauthorized modi cations to this equipment. Such modi cations could void the
user’s authority to operate the equipment.
www.caralarm.com | 800.554.4053
www.facebook.com/omegard
www.facebook.com/omegard
-
 1
1
-
 2
2
-
 3
3
-
 4
4
-
 5
5
-
 6
6
-
 7
7
-
 8
8
-
 9
9
-
 10
10
-
 11
11
-
 12
12
-
 13
13
-
 14
14
-
 15
15
-
 16
16


Excalibur RF-30-EDP Owner's manual
- Category
- Remote starters
- Type
- Owner's manual
- This manual is also suitable for
Ask a question and I''ll find the answer in the document
Finding information in a document is now easier with AI
Related papers
Other documents
-
Omega RS-360-EDP+ v2.0 Owner's manual
-
-
-
 Crime Guard 850i4e User manual
-
 Scytek electronic GALAXY 5100RS SERIES User manual
-
 Scytek electronic Vectra X5 Series User manual
-
 Scytek electronic Precision 200 series User manual
-
 Scytek electronic ASTRA 777 Mobile User manual
-
 Scytek electronic 5500 User manual
-
 Scytek electronic 5000RS User manual


