GE GXMH31H Troubleshooting guide
- Category
- Sanitary ware
- Type
- Troubleshooting guide
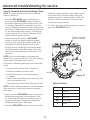
The GE GXMH31H water softener is a high-efficiency water softener that uses a demand-based regeneration system to provide a continuous supply of soft water. It features a large digital display that shows the system status, remaining days until empty, and error codes. The GXMH31H also has a programmable hardness setting, a salt-level indicator, and a vacation mode for when you're away from home. With its advanced features and ease of use, the GE GXMH31H is an ideal choice for providing soft water for your home.
The GE GXMH31H water softener is a high-efficiency water softener that uses a demand-based regeneration system to provide a continuous supply of soft water. It features a large digital display that shows the system status, remaining days until empty, and error codes. The GXMH31H also has a programmable hardness setting, a salt-level indicator, and a vacation mode for when you're away from home. With its advanced features and ease of use, the GE GXMH31H is an ideal choice for providing soft water for your home.


-
 1
1
-
 2
2
-
 3
3
-
 4
4
-
 5
5
-
 6
6


GE GXMH31H Troubleshooting guide
- Category
- Sanitary ware
- Type
- Troubleshooting guide
The GE GXMH31H water softener is a high-efficiency water softener that uses a demand-based regeneration system to provide a continuous supply of soft water. It features a large digital display that shows the system status, remaining days until empty, and error codes. The GXMH31H also has a programmable hardness setting, a salt-level indicator, and a vacation mode for when you're away from home. With its advanced features and ease of use, the GE GXMH31H is an ideal choice for providing soft water for your home.
Ask a question and I''ll find the answer in the document
Finding information in a document is now easier with AI
Related papers
Other documents
-
Kenmore 100 User manual
-
EcoWater ESD 518 Owner's manual
-
State Water Heaters BTP(V)-540A User manual
-
American Water Heater AHCG/HCG3 60T 120 - AHCG3/HCG3 100T 250 User manual
-
Maxx Ice MIM1000B User manual
-
 Kenmore Elite 31433 Owner's manual
-
Hoshizaki KM-61BAH User manual
-
Premier RO-PURE Plus Installation, Operation and Maintenance Manual
-
Maxx Ice MIM130 Installation guide
-
