Samsung Galaxy J2 Pure User manual
- Category
- Smartphones
- Type
- User manual

Samsung Galaxy J2 Pure
User manual

Table of contents
Device features 1
Learn more 2
Getting started 3
Device layout 4
Assemble your device 6
Remove the back cover 6
Install a SIM card and memorycard 7
Replace the battery 9
Charge the battery 9
Start using your device 11
Use the Setup Wizard 11
Lock or unlock your device 12
Accounts 12
Transfer data from your old device 13
Set up voicemail 14
Navigation 15
Navigation bar 20
i
CKT_J260AZ_EN_UM_TN_RJA_011719_FINAL

Customize the home screen 22
Bixby 29
Multi window 30
Enter text 32
Emergency mode 35
Apps 37
Using apps 38
Add an apps shortcut 38
Search for apps 38
Uninstall or disable apps 38
Sort apps 39
Create and use folders 39
Apps settings 40
Samsung apps 42
Galaxy Essentials 42
Galaxy Apps 42
Samsung+ 42
Samsung Health 43
Samsung Notes 45
Table of contents
ii

Calculator 47
Calendar 48
Camera 50
Clock 54
Contacts 60
Email 63
Gallery 66
Internet 71
Messages 74
Phone 77
Google apps 85
Chrome 85
Drive 85
Duo 85
Gmail 85
Google 85
Maps 86
Photos 86
Play Movies and TV 86
Table of contents
iii

Play Music 86
Play Store 86
YouTube 86
Carrier apps 87
myCricket 87
Visual Voicemail 87
Additional apps 88
Amazon Shopping 88
Facebook 88
Settings 89
Access Settings 90
Search for Settings 90
Connections 91
Wi-Fi 91
Bluetooth 93
Data usage 94
Mobile networks 96
Location 96
Mobile hotspot 97
Table of contents
iv

Nearby device scanning 100
Connect to a printer 100
MirrorLink 100
Virtual Private Networks 101
Sounds and vibration 102
Sound mode 102
Vibrations 102
Volume 103
Ringtone 104
Notification sounds 104
Do not disturb 104
System sounds 105
Key-tap feedback 105
Dolby Atmos 105
Equalizer 105
Headset audio options 106
Adapt sound 106
Notifications 107
Customize app notifications 107
Table of contents
v

Block app notifications 107
Display 108
Screen off settings 108
Screen brightness 108
One-handed mode 109
Device maintenance 109
Quick optimization 109
Battery 110
Storage and memory card 110
Language and input 112
Date and time 114
Report diagnostic information 115
Reset 115
Factory data reset 115
Auto restart 116
Software update 116
Lock screen and security 117
Screen lock types 117
Clock and information 118
Table of contents
vi

Google Play Protect 118
Find My Mobile 118
Security update 119
Install unknown apps 119
Secure Folder 120
App permission monitor 120
Secure startup 120
Encrypt SD card 120
Factory data reset password 121
Set up SIM card lock 121
View passwords 121
Security update service 122
Device administration 122
Credential storage 122
Advanced security settings 123
Accounts 124
Samsung Cloud 124
Add an account 124
Account settings 124
Table of contents
vii

Synchronize accounts 125
Remove an account 125
Backup and restore 125
Google settings 126
Accessibility 127
Vision 127
Hearing 128
Dexterity and interaction 129
Accessibility services 130
Other settings 130
Help 130
Device assistance app 131
Dual messenger 131
About phone 131
Legal information 132
Intellectual property 133
Open source software 134
Disclaimer of warranties; exclusion ofliability 134
Modification of software 135
Table of contents
viii

Notice from Cricket 135
Samsung Knox 135
Restricting children’s access to your mobile device 136
Samsung Electronics America, Inc. 136
Table of contents
ix

Device features
Meet Bixby
Bixby frees you to focus on what matters most. It learns what you like to do
and works with your favorite apps and services to help you get more done. See
Bixby on page29.
Direct Share
Share content with specific people directly. See Direct share on page62.
Media volume limiter
Limit the maximum output of the device’s volume. See Media volume limiter on
page103.
Multi window
Multitask by using two applications at the same time. See Multi window on
page30.
1

Learn more
Videos
samsung.com/us/support/videos
Smart Simulator
samsungsimulator.com
Tips
samsung.com/us/support/tips
Samsung Care
samsung.com/us/support
2

Getting started
Device layout
Assemble your device
Start using your device
3

Device layout
Front camera
Power key
Proximity sensor
Volume keys
Getting started
4
Devices and software are constantly evolving — the illustrations you see here are for reference only.

Speaker
Rear camera
USB charger/
Accessory port
Flash
Headset jack
Microphone
Microphone
5
Getting started
Devices and software are constantly evolving — the illustrations you see here are for reference only.

Assemble your device
Your SIM card may be preinstalled.
Small components such as a SIM and memory card can pose a choking risk.
Use only charging devices and batteries (if applicable) that are approved by
Samsung. Samsung charging devices and batteries are designed for your device
to maximize battery life. Using other charging devices and batteries may void
your warranty and may cause damage.
Remove the back cover
◌
Lift the cover up and to the left of the device.
To replace the back cover:
1. Place the back cover onto the back of the device and press down.
2. Press along the edge of the back cover until you have a secure seal.
Getting started
6
Devices and software are constantly evolving — the illustrations you see here are for reference only.

Install a SIM card and memorycard
When you subscribe to a cellular network, you are provided with a SIM card. You may
be able to use your previous SIM card.
You can install an optional microSD
™
memory card (notincluded) to add more
memory space to your device. A memory card can be installed at any time. It is not
necessary to install it prior to using the device.
1. Carefully slide the SIM card into the SIM card slot. Make sure that the card’s gold
contacts face down into the device and that the card is positioned as shown.
7
Getting started
Devices and software are constantly evolving — the illustrations you see here are for reference only.

2. Slide the memory card into the slot with the gold contacts facing down.
8
Getting started
Devices and software are constantly evolving — the illustrations you see here are for reference only.

Replace the battery
The battery is installed in the back of the device.
1. Insert the battery into the opening on the back of the device, making sure the
connectors align.
2. Gently press down to secure the battery.
Charge the battery
Your device is powered by a rechargeable battery. Acharger (charging head and USB
cable) is included with the device for charging the battery from any standard outlet.
The battery comes partially charged. You can use the device while charging.
Use only charging devices and batteries that are approved by Samsung. Samsung
charging devices and batteries are designed for your device to maximize battery
life. Using other charging devices and batteries may void your warranty and may
cause damage.
9
Getting started
Devices and software are constantly evolving — the illustrations you see here are for reference only.
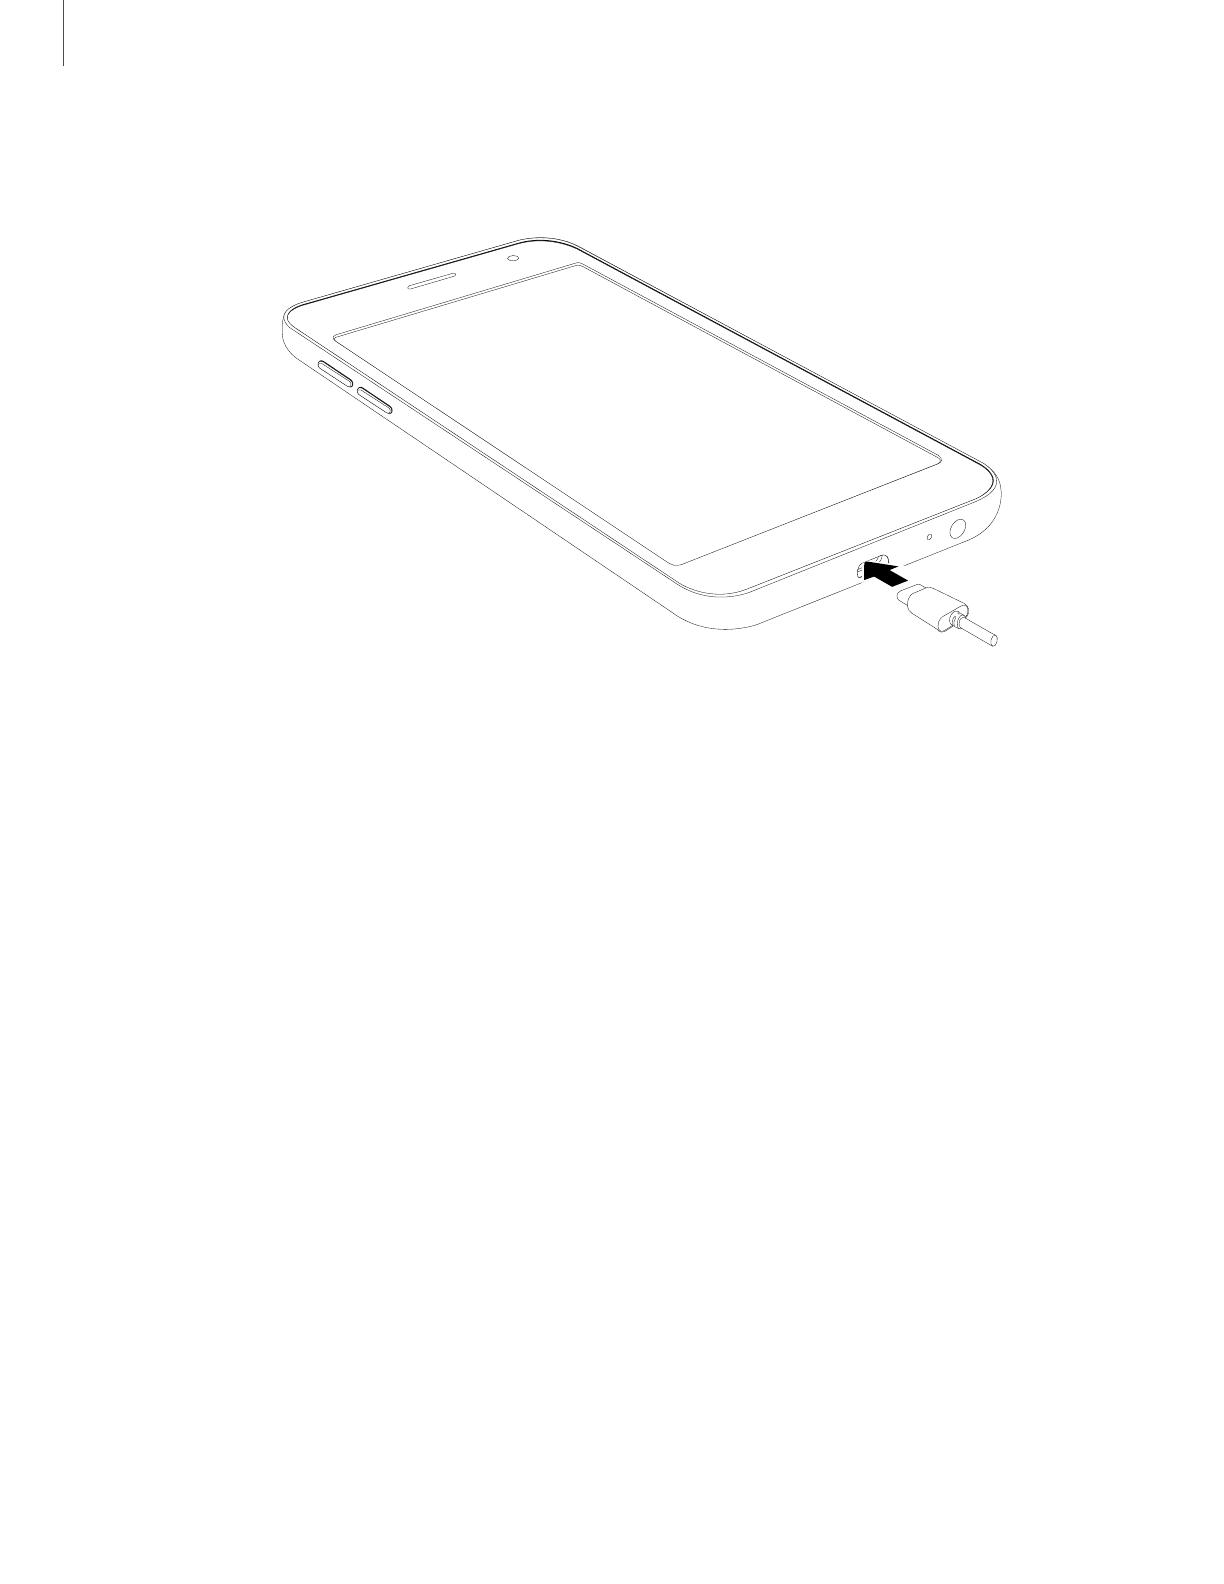
1. Insert the USB cable into the USB charger/Accessory port.
2. Connect the USB cable to the charging head, and then plug the charging head
into a standard outlet.
3. Unplug the charging head from the outlet and remove the USB cable from the
device when charging is complete.
While charging, the device and the charger may become hot and stop charging. This
usually does not affect the device’s lifespan or performance and is in the device’s
normal range of operation.
Disconnect the charger from the device and wait for the device to cool down. For
more information, visit samsung.com/us/support/answer/ANS00076952.
10
Getting started
Devices and software are constantly evolving — the illustrations you see here are for reference only.
Page is loading ...
Page is loading ...
Page is loading ...
Page is loading ...
Page is loading ...
Page is loading ...
Page is loading ...
Page is loading ...
Page is loading ...
Page is loading ...
Page is loading ...
Page is loading ...
Page is loading ...
Page is loading ...
Page is loading ...
Page is loading ...
Page is loading ...
Page is loading ...
Page is loading ...
Page is loading ...
Page is loading ...
Page is loading ...
Page is loading ...
Page is loading ...
Page is loading ...
Page is loading ...
Page is loading ...
Page is loading ...
Page is loading ...
Page is loading ...
Page is loading ...
Page is loading ...
Page is loading ...
Page is loading ...
Page is loading ...
Page is loading ...
Page is loading ...
Page is loading ...
Page is loading ...
Page is loading ...
Page is loading ...
Page is loading ...
Page is loading ...
Page is loading ...
Page is loading ...
Page is loading ...
Page is loading ...
Page is loading ...
Page is loading ...
Page is loading ...
Page is loading ...
Page is loading ...
Page is loading ...
Page is loading ...
Page is loading ...
Page is loading ...
Page is loading ...
Page is loading ...
Page is loading ...
Page is loading ...
Page is loading ...
Page is loading ...
Page is loading ...
Page is loading ...
Page is loading ...
Page is loading ...
Page is loading ...
Page is loading ...
Page is loading ...
Page is loading ...
Page is loading ...
Page is loading ...
Page is loading ...
Page is loading ...
Page is loading ...
Page is loading ...
Page is loading ...
Page is loading ...
Page is loading ...
Page is loading ...
Page is loading ...
Page is loading ...
Page is loading ...
Page is loading ...
Page is loading ...
Page is loading ...
Page is loading ...
Page is loading ...
Page is loading ...
Page is loading ...
Page is loading ...
Page is loading ...
Page is loading ...
Page is loading ...
Page is loading ...
Page is loading ...
Page is loading ...
Page is loading ...
Page is loading ...
Page is loading ...
Page is loading ...
Page is loading ...
Page is loading ...
Page is loading ...
Page is loading ...
Page is loading ...
Page is loading ...
Page is loading ...
Page is loading ...
Page is loading ...
Page is loading ...
Page is loading ...
Page is loading ...
Page is loading ...
Page is loading ...
Page is loading ...
Page is loading ...
Page is loading ...
Page is loading ...
Page is loading ...
Page is loading ...
Page is loading ...
Page is loading ...
Page is loading ...
Page is loading ...
Page is loading ...
Page is loading ...
-
 1
1
-
 2
2
-
 3
3
-
 4
4
-
 5
5
-
 6
6
-
 7
7
-
 8
8
-
 9
9
-
 10
10
-
 11
11
-
 12
12
-
 13
13
-
 14
14
-
 15
15
-
 16
16
-
 17
17
-
 18
18
-
 19
19
-
 20
20
-
 21
21
-
 22
22
-
 23
23
-
 24
24
-
 25
25
-
 26
26
-
 27
27
-
 28
28
-
 29
29
-
 30
30
-
 31
31
-
 32
32
-
 33
33
-
 34
34
-
 35
35
-
 36
36
-
 37
37
-
 38
38
-
 39
39
-
 40
40
-
 41
41
-
 42
42
-
 43
43
-
 44
44
-
 45
45
-
 46
46
-
 47
47
-
 48
48
-
 49
49
-
 50
50
-
 51
51
-
 52
52
-
 53
53
-
 54
54
-
 55
55
-
 56
56
-
 57
57
-
 58
58
-
 59
59
-
 60
60
-
 61
61
-
 62
62
-
 63
63
-
 64
64
-
 65
65
-
 66
66
-
 67
67
-
 68
68
-
 69
69
-
 70
70
-
 71
71
-
 72
72
-
 73
73
-
 74
74
-
 75
75
-
 76
76
-
 77
77
-
 78
78
-
 79
79
-
 80
80
-
 81
81
-
 82
82
-
 83
83
-
 84
84
-
 85
85
-
 86
86
-
 87
87
-
 88
88
-
 89
89
-
 90
90
-
 91
91
-
 92
92
-
 93
93
-
 94
94
-
 95
95
-
 96
96
-
 97
97
-
 98
98
-
 99
99
-
 100
100
-
 101
101
-
 102
102
-
 103
103
-
 104
104
-
 105
105
-
 106
106
-
 107
107
-
 108
108
-
 109
109
-
 110
110
-
 111
111
-
 112
112
-
 113
113
-
 114
114
-
 115
115
-
 116
116
-
 117
117
-
 118
118
-
 119
119
-
 120
120
-
 121
121
-
 122
122
-
 123
123
-
 124
124
-
 125
125
-
 126
126
-
 127
127
-
 128
128
-
 129
129
-
 130
130
-
 131
131
-
 132
132
-
 133
133
-
 134
134
-
 135
135
-
 136
136
-
 137
137
-
 138
138
-
 139
139
-
 140
140
-
 141
141
-
 142
142
-
 143
143
-
 144
144
-
 145
145
-
 146
146
-
 147
147


Samsung Galaxy J2 Pure User manual
- Category
- Smartphones
- Type
- User manual
Ask a question and I''ll find the answer in the document
Finding information in a document is now easier with AI
Related papers
-
Samsung Galaxy S 20 5G SM-G981U User manual
-
-
-
-
-
-
-
-
-
Other documents
-
Samsung Electronics SM-N975UZKIXAA User manual
-
 Tracfone TFSAS727VCP User manual
-
LG LM LM-K300AM4 Cricket Wireless User guide
-
-
 LG M X Charge Cricket Wireless Operating instructions
-
-
-
-
Alcatel Streak Owner's manual
-

