StarTech.com ARMPIVOTE User manual
- Category
- Flat panel desk mounts
- Type
- User manual
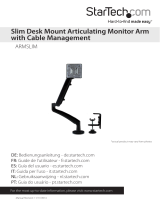
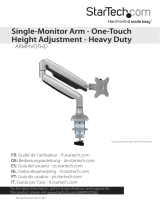
StarTech.com ARMPIVOTE is an articulating monitor arm that allows you to mount your display on your desk or through a grommet hole, providing flexible positioning and ergonomic comfort. It supports displays up to 24 inches in size and 11 lbs in weight, with VESA compatibility for 75x75mm and 100x100mm mounting patterns. The gas spring arm offers adjustable resistance, enabling smooth and effortless movement of your display. Cable management channels keep your workspace organized and free of clutter.
StarTech.com ARMPIVOTE is an articulating monitor arm that allows you to mount your display on your desk or through a grommet hole, providing flexible positioning and ergonomic comfort. It supports displays up to 24 inches in size and 11 lbs in weight, with VESA compatibility for 75x75mm and 100x100mm mounting patterns. The gas spring arm offers adjustable resistance, enabling smooth and effortless movement of your display. Cable management channels keep your workspace organized and free of clutter.


-
 1
1
-
 2
2
-
 3
3
-
 4
4
-
 5
5
-
 6
6
-
 7
7
-
 8
8
-
 9
9
-
 10
10
-
 11
11
-
 12
12
-
 13
13
-
 14
14
-
 15
15


StarTech.com ARMPIVOTE User manual
- Category
- Flat panel desk mounts
- Type
- User manual
StarTech.com ARMPIVOTE is an articulating monitor arm that allows you to mount your display on your desk or through a grommet hole, providing flexible positioning and ergonomic comfort. It supports displays up to 24 inches in size and 11 lbs in weight, with VESA compatibility for 75x75mm and 100x100mm mounting patterns. The gas spring arm offers adjustable resistance, enabling smooth and effortless movement of your display. Cable management channels keep your workspace organized and free of clutter.
Ask a question and I''ll find the answer in the document
Finding information in a document is now easier with AI
Related papers
-
StarTech.com ARMDUAL User manual
-
 StarTech.com ARMSLIM User manual
-
 StarTech.com VESA LCD Monitor Mounting Bracket User manual
-
 StarTech.com DuraRak 12U Beige Wall Mount Cabinet User manual
-
 StarTech.com ST121MOUNT User manual
-
StarTech.com HSFPHASECM Owner's manual
-
 StarTech.com 24 Outlets Rack-Mountable Power Strip User manual
-
 StarTech.com ARMPIVOTHD Owner's manual
-
 StarTech.com 4POSTRACK42 User manual
-
StarTech.com RKLCDBKT User manual


Other documents
-
CTA ADD-MAAVFL User manual
-
StarTech com LAPTOP-SIT-STAND User guide
-
-
 StarTech com ADJ-TABLET-STAND-W User guide
-
StarTech STSMATC User guide
-
Atdec A-HDA-0818 Installation guide
-
Bauhn AMAB-0619-D User manual
-
-
HP Pavilion Dual Display Stand Installation guide
-
 StarTech com A-LAPTOP-DESK-MOUNT User manual

