Samsung T23D310LH: Experience Stunning Visuals, Versatile Connectivity, and User-Friendly Features
With its sleek design and advanced capabilities, the Samsung T23D310LH TV offers an immersive viewing experience. Enjoy crystal-clear visuals with a resolution of 1920 x 1080 pixels. Connect effortlessly to various devices through its multiple ports, including HDMI, USB, and VGA. Personalize your viewing preferences by creating and editing your favorite channel list, setting parental controls, and adjusting various picture and sound settings.

❑
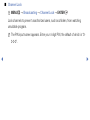
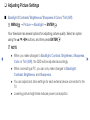
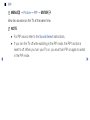
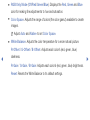
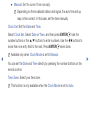
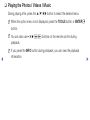
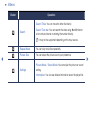
Using the INFO button (Now & Next guide)
The display identifies the current channel and the status of certain audio-video
settings.
The Now & Next guide shows daily TV program information for each channel
according to the broadcasting time.
N
When you press the INFO button, a channel information banner will appear on
the top of the screen. And then press the ENTER
E
button, you can see the
details of the program.
●
Scroll
l
r
to view information for a desired program while watching the current
channel.
Channel Setting
◀

❑
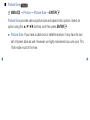
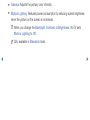
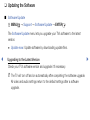
Memorizing channels
Your TV memorizes channels and adds the memorized channels to the Channel
List with the Auto Program function. Before your TV can memorize channels, you
must specify the signal source Both, Air, or Cable.
◀ ▶

■
Auto Program
O
MENU
m
→
Broadcasting
→
Auto Program
→
ENTER
E
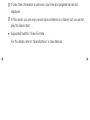
Scans for channels automatically and stores them in the TV’s memory.
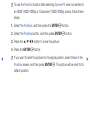
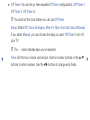
To start Auto Program, follow these steps:
1 Select Auto Program, and then press ENTER
E
.
2. Press the ENTER
E
button to select Start.
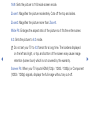
3. Select Air or Cable or Both by highlighting and then pressing ENTER
E
.
◀ ▶

4. Select Scan, and then press ENTER
E
. Auto Program starts.
N
After all the available channels are stored, Auto Program removes scrambled
channels. When done, the Auto Program menu then reappears. This process
can take up to 30 minutes.
N
Automatically allocated program numbers may not correspond to actual
or desired program numbers. If a channel is locked, the PIN input window
appears.
◀ ▶

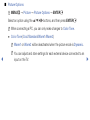
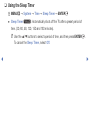
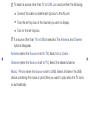
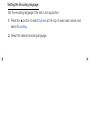
How to Stop Auto Programming
1. Press the ENTER
E
button to select Stop.
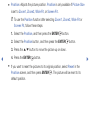
2. A message will ask Stop Auto Program?. Select Yes by pressing the
l
or
r
button.
3. Press the ENTER
E
button.
N
When you select Change Settings, antenna setting screen appears. You
can set antenna settings and start channel search again.
N
Press the Scan Again to restart channel search.
◀ ▶

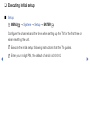
■
Antenna
O
MENU
m
→
Broadcasting
→
Antenna
→
ENTER
E
To begin the memorizing procedure, follow these steps:
1. Select Antenna, and then press ENTER
E
.
2. Select the source of your TV signal, Air or Cable.
N
Selecting Air or Cable also changes the actual signal input from Air to Cable
or Cable to Air.
◀ ▶

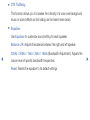
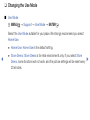
❑
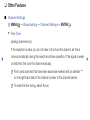
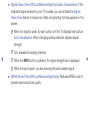
Using the Channel menu
■
Channel List
O
MENU
m
→
Broadcasting
→
Channel List
→
ENTER
E
The Channel List contains the channels your TV displays (added channels) when
you press the channel button. You can view channel information, Added Ch.,
Edit Favorites, Favorites 1 - Favorites 5. Press
r
(Mode) button to change the
channel mode.
N
When you press the CH LIST button, Channel List screen is displayed at
once.
◀ ▶

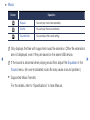
Mode
●
Antenna: Switch between Air and Cable.
●
Edit Favorites: Set channels you watch frequently as favorites. Add or delete
the selected channel in Favorites 1 - Favorites 5.
N
For detailed information about using Edit Favorites, refer to “Edit
Favorites”.
●
Favorites 1 - Favorites 5: Show all favorite channels, arranged in up to five
groups. Each group has a separate screen.
N
The TV displays Favorites 1 - Favorites 5 only if you have added favorites
using Edit Favorites.
●
Added Ch.: Show all added channels.
◀ ▶

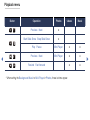
■
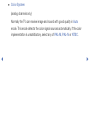
Guide
N
MENU
m
→
Broadcasting
→
Guide
→
ENTER
E
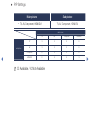
The EPG (Electronic Program Guide) information is provided by broadcasters.
Using program schedules provided by broadcasters, you can specify programs
you want to watch in advance so that the channel automatically changes to the
selected program channel at the specified time. Program entries may appear blank
or out of date depending on a channel status.
●
a
Red (Quick Nav): Viewing the TV programs on the list quickly using
l
/
r
buttons.
●
b
Green (Channel category): Select the type of channels you want to display.
●
{
Yellow (Schedule Manager): Moves to the reserved programs in Schedule
Manager.
◀ ▶

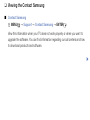
■
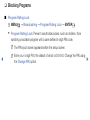
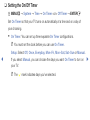
Schedule Manager
O
MENU
m
→
Broadcasting
→
Schedule Manager
→
ENTER
E
You can set a desired channel to be displayed automatically at the intended time.
In addition, you can view, modify or delete a channel you have reserved to watch.
N
You must set the current time first using the Time
→
Clock function in the
System menu to use this function.
1. Press the Schedule on the Schedule Manager screen. The Schedule
Viewing menu appears.
2. Press the
u
/
d
/
l
/
r
buttons to set each option menu.
●
Antenna: Select the desired broadcasting signal.
●
Channel: Select the desired channel.
◀ ▶

●
Repeat: Select Once, Manual, Sat~Sun, Mon~Fri or Everyday. If you
select Manual, you can set the day you want.
N
A check (
c
) mark indicates a day you selected.
●
Date: You can set a desired date.
N
Date is available only when you select Once in Repeat.
●
Start Time: You can set the start time you want.
N
If you want to edit or cancel a reserved schedule, select the reserved schedule
on Schedule Manager. Then press the ENTER
E
button and select the Edit
or Delete.
◀ ▶

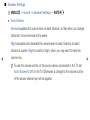
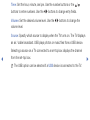
■
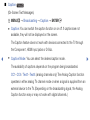
Edit Channel
O
MENU
m
→
Broadcasting
→
Edit Channel
→
ENTER
E
You can add or delete channels.
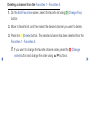
Deleting a channel from the channel list
1. Go to Edit Channel screen.
2. Press the
u
/
d
buttons to select the desired channel, and then press
ENTER
E
button. The (
c
) mark indicates the channel you’ve selected.
N
You can select more than one channel.
N
Press ENTER
E
button again to deselect the channel.
3. Press
{
(Delete) button. The selected channel has been deleted from the
channel list.
◀ ▶

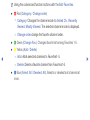
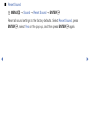
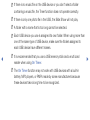
Adding a channel to the channel list
1. On the Edit Channel screen, press the TOOLS button, and then select the
Category.
2. Select All and press the OK button. A deleted channel appears in All channel
list.
N
Your TV will display all channels, including channels you deleted from the
channel list, on the All.
N
A gray-colored channel indicates the channel has been deleted.
3. Select a deleted channel, and then press the
{
(Add) button.
◀ ▶

N
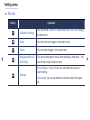
Using the colored and function buttons with the Edit Channel.
●
b
Green (Lock / Unlock): Lock a channel so that the channel cannot be
selected and viewed.
N
This function is available only when the Channel Lock is set to On.
N
The PIN input screen appears. Enter your 4-digit PIN, the default of
which is “0-0-0-0”. Change the PIN using the Change PIN option.
●
{
Yellow (Delete / Add)
–
Delete: Deletes a channel from the channel list.
–
Add: Adds a deleted channel. It only appears when you select the
deleted channel in All.
◀ ▶

●
}
Blue (Select All / Deselect All): Selects or deselects all channels at
once.
●
Ÿ
(Go To): Goes to channel directly by pressing numbers (0~9).
●
k
(Page): Moves to next or previous page.
◀ ▶

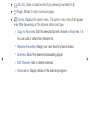
●
T
(Tools): Displays the option menu. The option menu items that appear
may differ depending on the channel status and type.
–
Antenna: Select the desired broadcasting signal.
–
Category: Change the channel mode to All, Added Ch.. The selected
channel mode is displayed.
–
Edit Favorites: Go to Edit Favorites screen directly.
–
Rename Channel (analog channels only): Assign a name of up to five
characters to a channel. For example, Food, Golf, etc. This makes it
easier to find and select the channel.
–
Information: Display details of the selected program.
◀ ▶

■
Edit Favorites
t
O
MENU
m
→
Broadcasting
→
Edit Favorites
→
ENTER
E
You can add, edit or delete favorite channels.
Adding a channel to the Favorites 1 - Favorites 5
1. Go to Edit Favorites screen.
2. Press the
u
/
d
buttons to select the desired channel, and then press
ENTER
E
button.
3. Choose a specific favorite list among Favorites 1 - Favorites 5 using
b
(Change Fav.) button, and then press the
{
(Add) button. The selected
channel has been added in Favorites 1 - Favorites 5.
N
One favorites channel can be added in several of favorites among Favorites
1 - Favorites 5.
◀ ▶

Deleting a channel from the Favorites 1 - Favorites 5
1. On the Edit Favorites screen, select the favorite list using
b
(Change Fav.)
button.
2. Move to favorite list, and then select the desired channel you want to delete.
3. Press the
{
(Delete) button. The selected channel has been deleted from the
Favorites 1 - Favorites 5.
N
If you want to change the favorite channel order, press the
a
(Change
order) button and change the order using
u
/
d
buttons.
◀ ▶

N
Using the colored and function buttons with the Edit Favorites.
●
a
Red (Category / Change order)
–
Category: Changes the channel mode to Added Ch., Recently
Viewed, Mostly Viewed. The selected channel mode is displayed.
–
Change order:change the favorite channel order.
●
b
Green (Change Fav.): Changes favorite list among Favorites 1-5.
●
{
Yellow (Add / Delete)
–
Add: Adds selected channels to Favorites1-5.
–
Delete: Delete a favorite channel from Favorites1-5.
●
}
Blue (Select All / Deselect All): Selects or deselects all channels at
once.
◀ ▶

●
Ÿ
(Go To): Goes to channel directly by pressing numbers (0~9).
●
k
(Page): Moves to next or previous page.
●
T
(Tools): Displays the option menu. The option menu items that appear
may differ depending on the channel status and type.
–
Copy to Favorites: Edit the selected favorite channel in Favorites 1-5.
You can add or delete from favorite list.
–
Rename Favorites: Assign your own favorite channel name.
–
Antenna: Select the desired broadcasting signal.
–
Edit Channel: Add or delete channels.
–
Information: Display details of the selected program.
◀ ▶


 1
1
 2
2
 3
3
 4
4
 5
5
 6
6
 7
7
 8
8
 9
9
 10
10
 11
11
 12
12
 13
13
 14
14
 15
15
 16
16
 17
17
 18
18
 19
19
 20
20
 21
21
 22
22
 23
23
 24
24
 25
25
 26
26
 27
27
 28
28
 29
29
 30
30
 31
31
 32
32
 33
33
 34
34
 35
35
 36
36
 37
37
 38
38
 39
39
 40
40
 41
41
 42
42
 43
43
 44
44
 45
45
 46
46
 47
47
 48
48
 49
49
 50
50
 51
51
 52
52
 53
53
 54
54
 55
55
 56
56
 57
57
 58
58
 59
59
 60
60
 61
61
 62
62
 63
63
 64
64
 65
65
 66
66
 67
67
 68
68
 69
69
 70
70
 71
71
 72
72
 73
73
 74
74
 75
75
 76
76
 77
77
 78
78
 79
79
 80
80
 81
81
 82
82
 83
83
 84
84
 85
85
 86
86
 87
87
 88
88
 89
89
 90
90
 91
91
 92
92
 93
93
 94
94
 95
95
 96
96
 97
97
 98
98


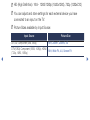
Samsung T28D310LB User manual
Samsung T22C301LB User manual
Samsung UN32JH4205G User manual
Samsung UN32FH4005G User manual
Samsung UN46JH5005H User manual
Samsung UN50F5000AG User manual
Samsung UN32K4100AG User manual