

2
Table of Contents
Getting started
5 Device layout and functions
11 Charging the battery
16 Nano-SIM card and eSIM
18 Turning the device on and off
19 Initial setup
20 Samsung account
21 Transferring data from your previous
device (Smart Switch)
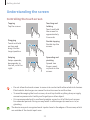
23 Understanding the screen
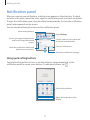
31 Notification panel
33 Screen capture and screen record
34 Entering text
Apps and features
37 Installing or uninstalling apps
38 S Pen (Galaxy S23 Ultra)
54 Phone
57 Contacts
59 Messages
60 Camera
78 Gallery
82 AR Zone
88 Bixby
89 Bixby Vision
90 Multi window (Using multiple apps
at once)
93 Samsung Internet
94 Samsung Wallet
96 Samsung Pay
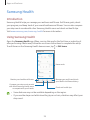
98 Samsung Health
99 Samsung Notes
104 Samsung Members
104 Samsung Kids
105 Samsung Global Goals
105 Samsung TV Plus
105 Galaxy Shop
105 Galaxy Wearable
106 PENUP (Galaxy S23 Ultra)
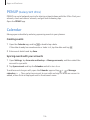
106 Calendar
107 Reminder (Receiving notifications
for to-do items)
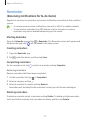
108 Voice Recorder
110 My Files (Checking and managing
the files)
110 Clock
110 Calculator
111 Game Launcher
112 Game Booster (Configuring your
gaming environment)
113 SmartThings
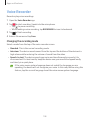
113 Sharing content
115 Music Share
116 Smart View (Mirroring on a TV
screen)
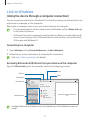
117 Link to Windows (Using the device
through a computer connection)

Table of Contents
3
142 Security and privacy
143 Face recognition
145 Fingerprint recognition
148 Samsung Pass
150 Secure Folder
153 Secure Wi-Fi
154 Location
155 Safety and emergency
155 Accounts and backup
156 Samsung Cloud
157 Google
157 Advanced features
158 Motions and gestures
159 Video call effects
160 Dual Messenger
161 Digital Wellbeing and parental
controls
161 Battery and device care
161 Optimising your device
162 Battery
162 Storage
162 Memory
163 Device protection
163 Auto optimisation
163 Software update
163 Diagnostics
163 Maintenance mode
163 Apps
164 General management
165 Accessibility
165 Software update
166 About phone
118 Samsung DeX
122 Google apps
Settings
123 Introduction
123 Samsung account
123 Connections
125 Wi-Fi
126 Bluetooth
127 NFC and contactless payments
129 Data saver
129 Mobile data only apps
130 Mobile Hotspot
130 More connection settings
132 Connected devices
133 Modes and Routines
133 Using modes
133 Using routines
134 Sounds and vibration
135 Sound quality and effects
135 Separate app sound
136 Notifications
136 Display
138 Motion smoothness
138 Changing the screen mode or
adjusting the display colour
139 Wallpaper and style
139 Themes
139 Home screen
140 Lock screen
140 Smart Lock
141 Always On Display (Displaying
information when the screen is
turned off)


5
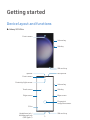
Getting started
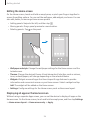
Device layout and functions
▶
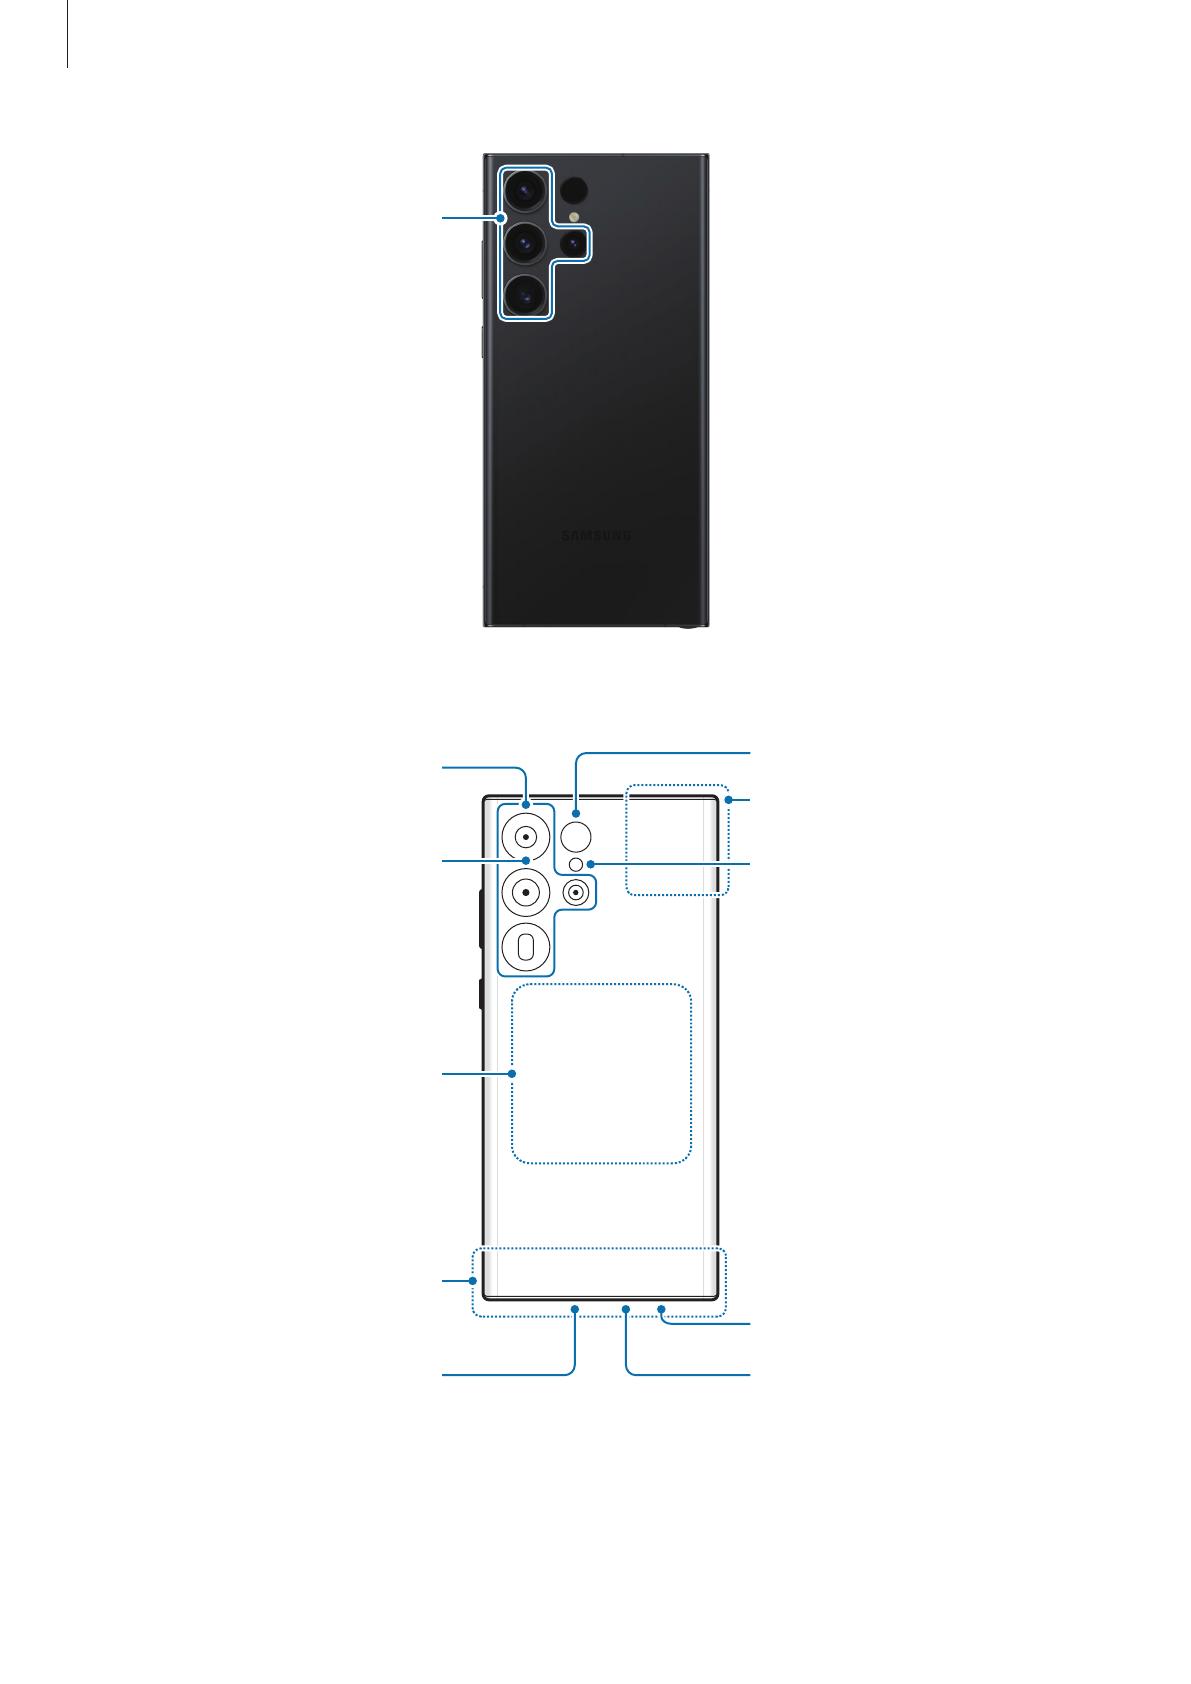
Galaxy S23 Ultra:
Front camera
Volume key
Side key
SIM card tray
Speaker
Fingerprint
recognition sensor
Side key
Volume key
Touch screen
Edge screen Edge screen
Front camera
Headphone jack /
Multipurpose jack
(USB Type-C)
S Pen
SIM card tray
Proximity/Light sensor
Microphone
Getting started
6
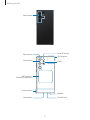
Rear camera
NFC antenna /
Wireless charging coil
Rear camera
GPS antenna
Laser AF sensor
Main antenna
Speaker
Microphone Air vent hole
Flash
Microphone
Getting started
7
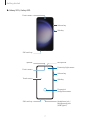
▶
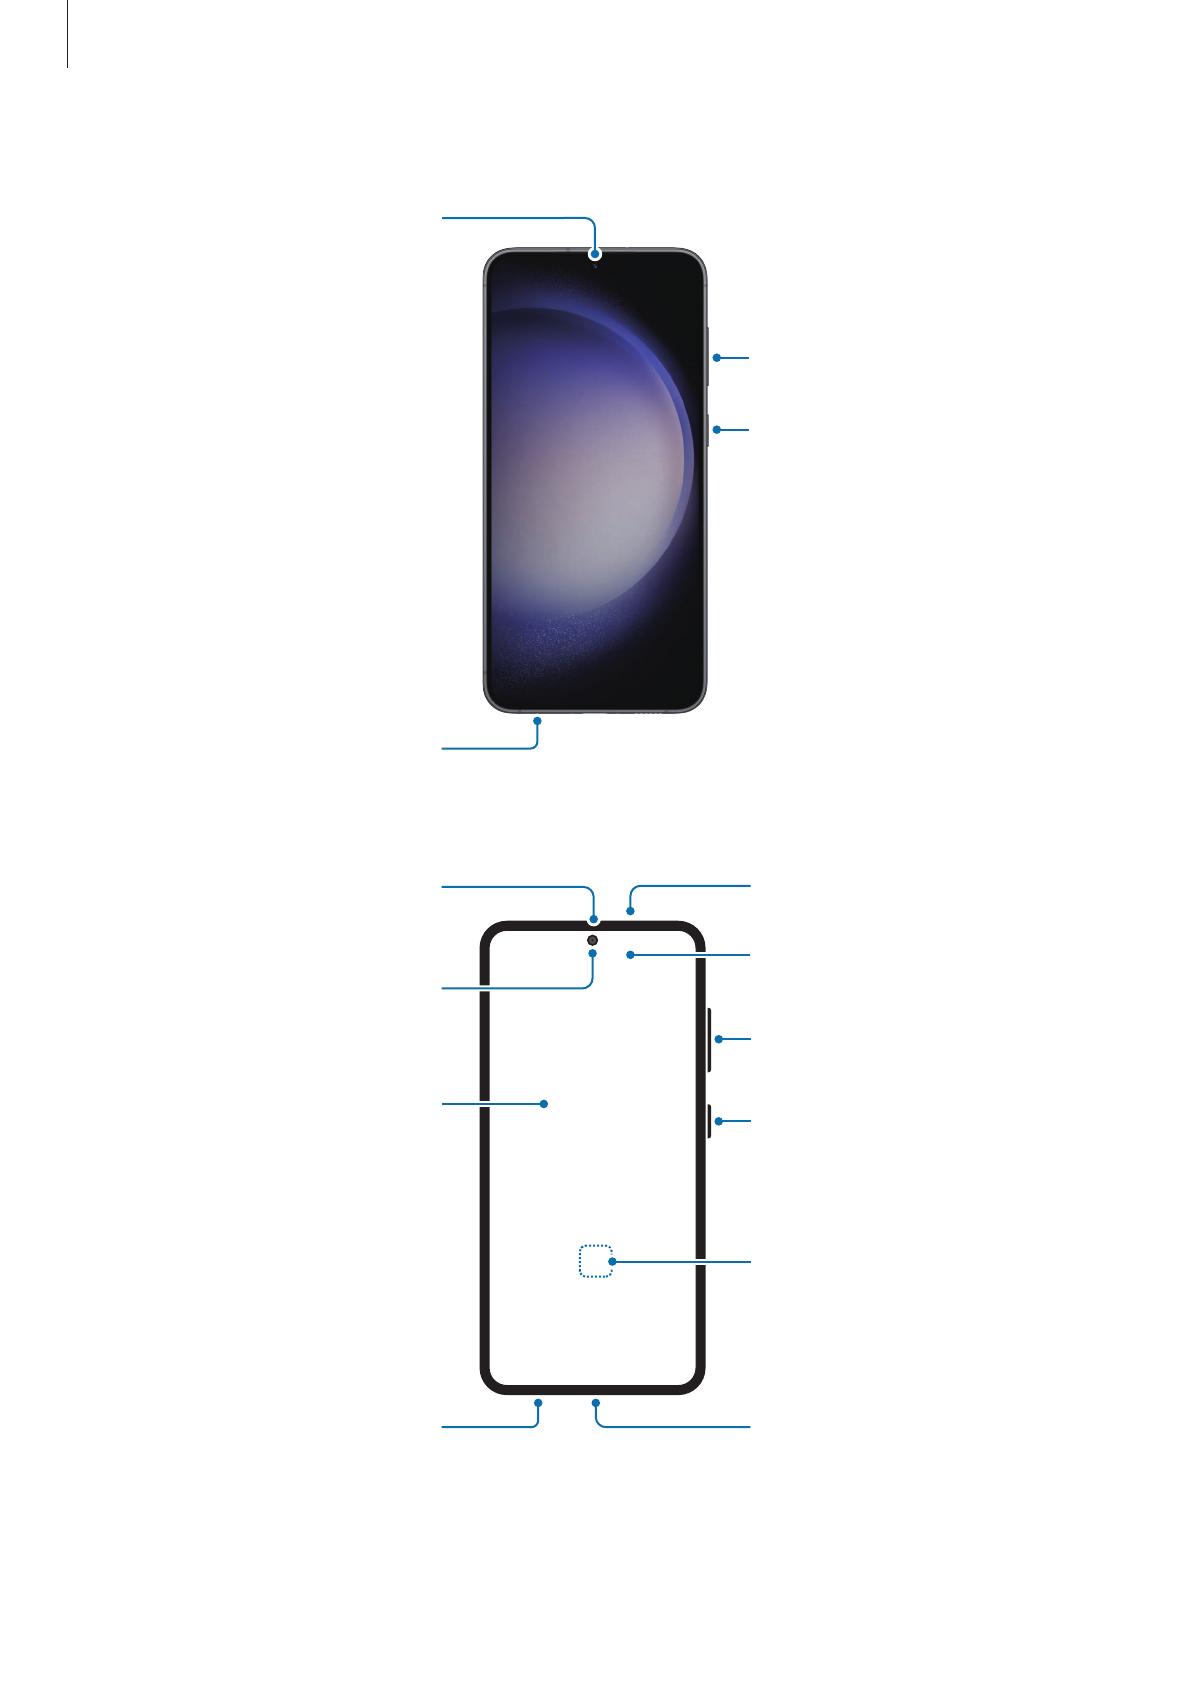
Galaxy S23+, Galaxy S23:
Front camera
Volume key
Side key
SIM card tray
Speaker
Fingerprint
recognition sensor
Side key
Volume key
Touch screen
Front camera
Proximity/Light sensor
Headphone jack /
Multipurpose jack
(USB Type-C)
SIM card tray
Microphone
Getting started
8
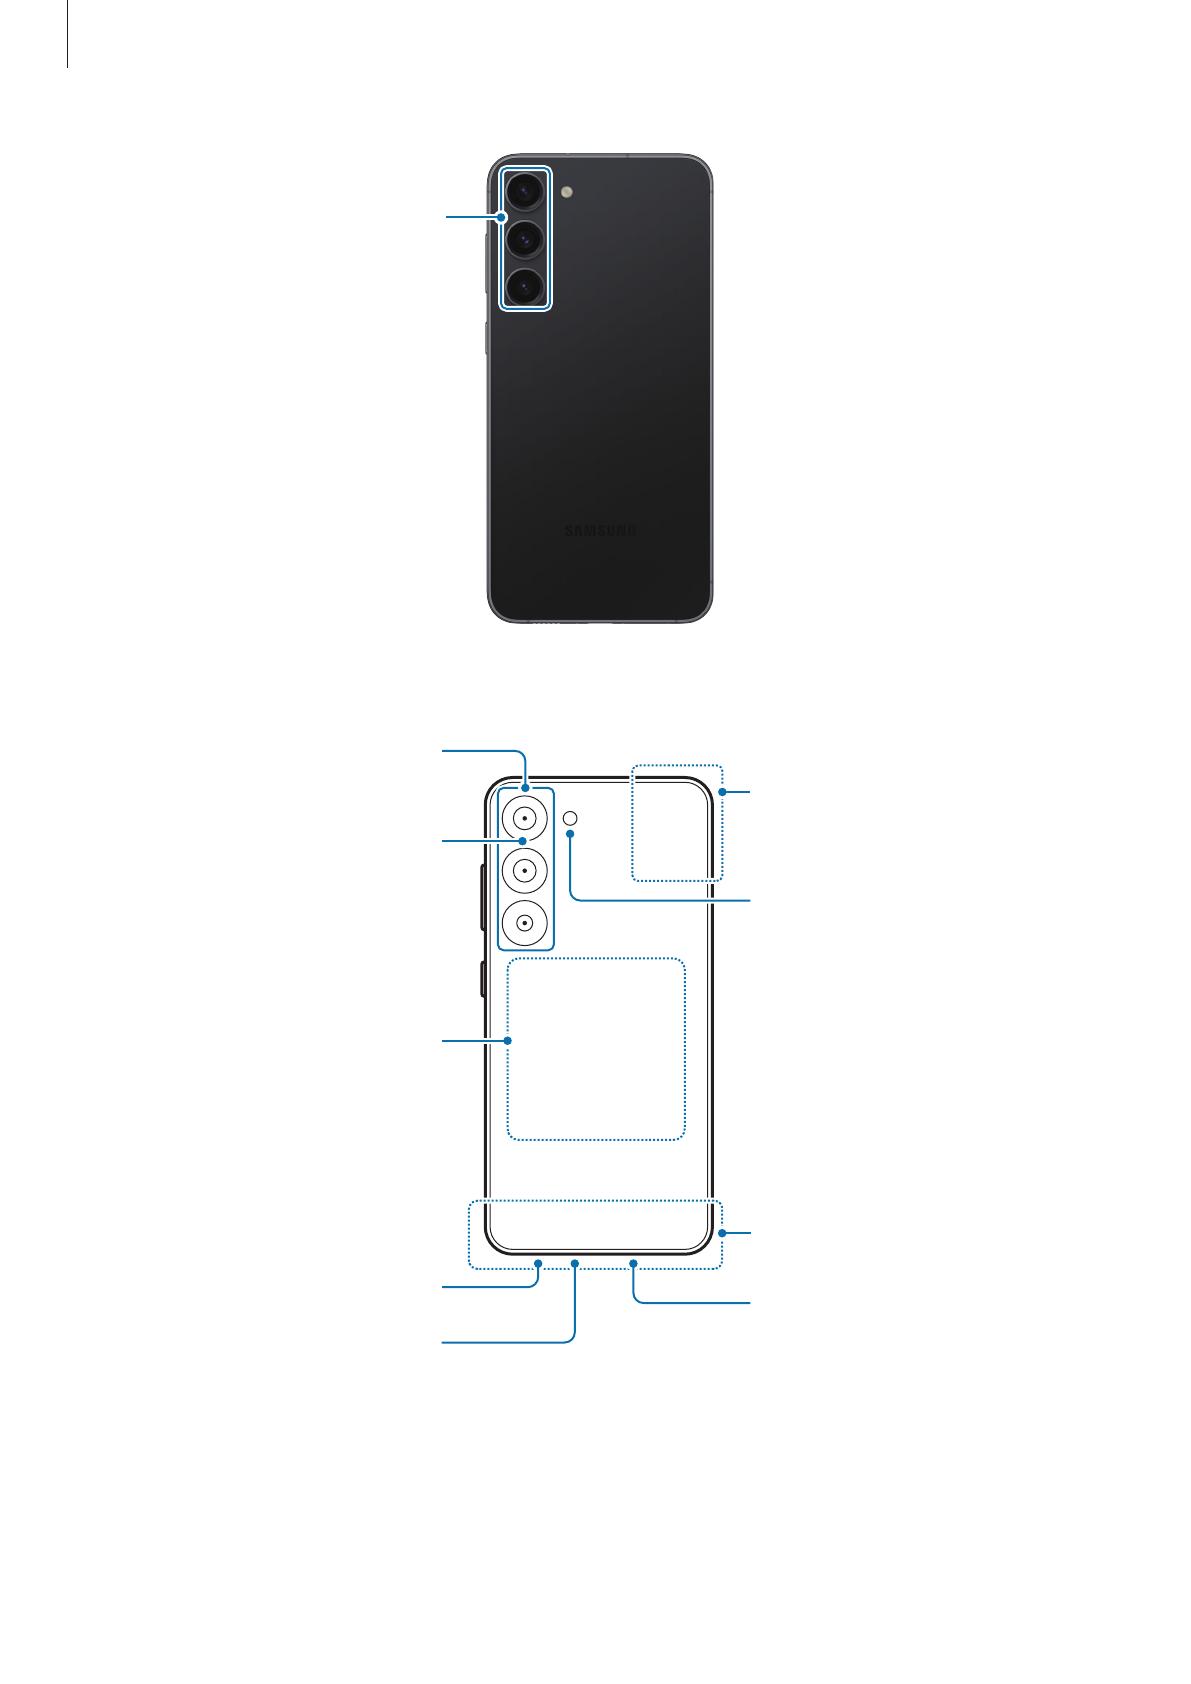
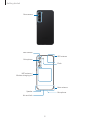
Rear camera
NFC antenna /
Wireless charging coil
Main antenna
Microphone
Speaker
Microphone
Flash
GPS antenna
Air vent hole
Rear camera

Getting started
9
•
When using the speakers, such as when playing media files or using
speakerphone, do not place the device close to your ears.
•
Be careful not to expose the camera lens to a strong light source, such as direct
sunlight. If the camera lens is exposed to a strong light source, such as direct
sunlight, the camera image sensor may be damaged. A damaged image sensor is
irreparable and will cause dots or spots in pictures.
•
If you use the device with its glass or acrylic body broken, there may be a risk
of injury. Use the device only after it has been repaired at a Samsung Service
Centre or an authorised service centre.
•
If dust or foreign materials enter the microphone, speaker, or receiver, or if these
parts are covered, the device’s sound may become quiet or certain features may
not work. If you attempt to remove the dust or foreign materials with a sharp
object, the device may be damaged and its appearance may be affected.
•
Connectivity problems and battery drain may occur in the following situations:
‒
If you attach metallic stickers on the antenna area of the device
‒
If you attach a device cover made with metallic material to the device
‒
If you cover the device’s antenna area with your hands or other objects while
using certain features, such as calls or the mobile data connection
•
If the air vent hole is covered by an accessory, such as a protective film or sticker,
unwanted noises may occur during calls or media playback.
•
Do not cover the proximity/light sensor area with accessories, such as stickers or
a cover. Doing so may cause the sensor to malfunction.
•
The light may flicker at the top of the device during calls because of proximity
sensor operation.
•
The colours on the Edge screen may look different depending on your viewing
position. (Galaxy S23 Ultra)

Getting started
10
Hard keys
Key Function
Side key
•
When the device is off, press and hold to turn it on.
•
Press to turn on or lock the screen.
•
Press and hold to start a conversation with Bixby. Refer to
Using Bixby for more information.
•
Press twice or press and hold to open the app or feature you
set.
Side key +
Volume Down
key
•
Press simultaneously to capture a screenshot.
•
Press and hold simultaneously to turn off the device.
Setting the Side key
Select an app or feature to launch by pressing the Side key twice or pressing and holding
the Side key.
Open
Settings
, tap
Advanced features
→
Side key
, and then select an option you want.
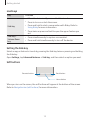
Soft buttons
Back button
Home button
Recents button
When you turn on the screen, the soft buttons will appear at the bottom of the screen.
Refer to Navigation bar (soft buttons) for more information.
Getting started
11
Charging the battery
Charge the battery before using it for the first time or when it has been unused for
extended periods.
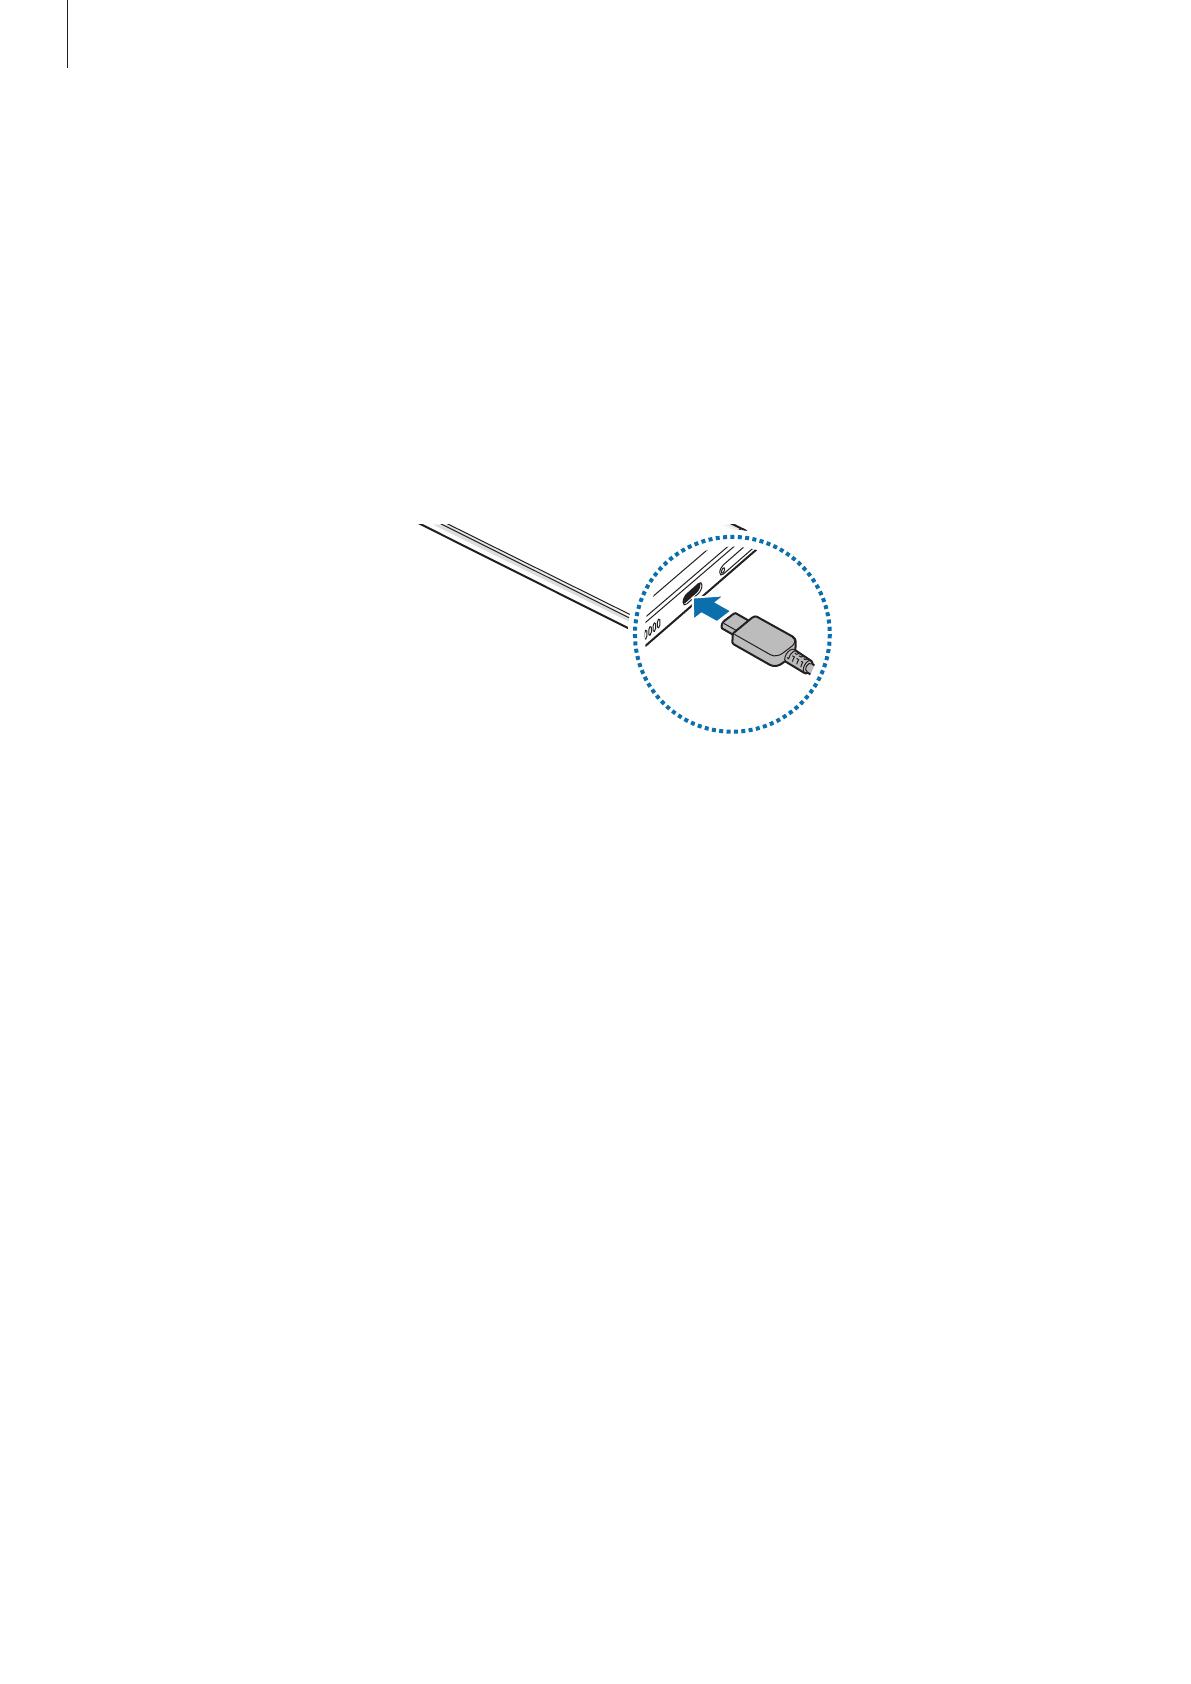
Wired charging
Connect the USB cable to the USB power adapter and plug the cable into the device’s
multipurpose jack to charge the battery. After fully charging, disconnect the charger
from the device.
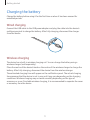
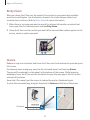
Wireless charging
The device has a built-in wireless charging coil. You can charge the battery using a
wireless charger (sold separately).
Place the centre of the device’s back on the centre of the wireless charger to charge the
battery. After fully charging, disconnect the device from the wireless charger.
The estimated charging time will appear on the notification panel. The actual charging
time assumes that the device is not in use, and it may vary depending on the charging
conditions. Wireless charging may not work smoothly depending on the type of
accessory or cover. For stable wireless charging, it is recommended to separate the cover
or accessory from the device.

Getting started
12
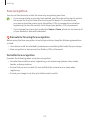
Precautions for wireless charging
If you do not follow the precautions, the device may not charge properly or may
overheat, or the device and any cards may be damaged.
•
Do not place the device on the wireless charger with a credit card or
radio-frequency identification (RFID) card (such as a transportation card or a key
card) placed between the back of the device and the device cover.
•
Do not place the device on the wireless charger when conductive materials, such
as metal objects and magnets, are placed between the device and the wireless
charger.
•
If you use the wireless charger in areas with weak network signals, you may lose
network reception.
•
Use Samsung-approved wireless chargers. If you use other wireless chargers,
the battery may not charge properly.
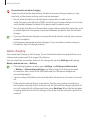
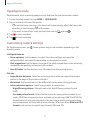
Quick charging
Use a super fast charger or fast charger. To use the fast wireless charging feature, use a
charger and components that support the feature.
You can check the connection status of the charger by opening
Settings
and tapping
Battery and device care
→
Battery
.
•
If fast charging does not work, open
Settings
, tap
Battery and device care
→
Battery
→
More battery settings
, and then check if the feature you want
is turned on. Also, check if the USB cable and the USB power adapter are
connected properly.
•
You can charge the battery more quickly while the device or its screen is turned
off.
•
If the wireless charger has an internal fan, the fan may produce noise during
fast wireless charging. Add a routine to set the fast wireless charging feature to
turn off automatically at the preset time using
Routines
. When the fast wireless
charging feature turns off, the charger’s fan noise and the indicator light will be
reduced.

Getting started
13
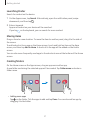
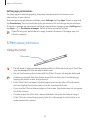
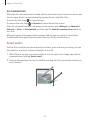
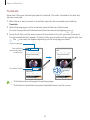
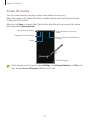
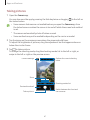
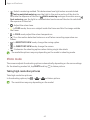
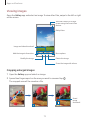
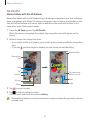
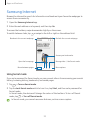
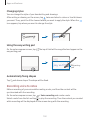
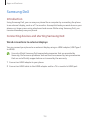
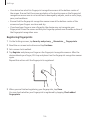
Wireless power sharing
You can charge another device with your phone’s battery. You can still charge another
device even while charging your phone. Depending on the type of accessories or
cover being used, the Wireless power sharing feature may not work properly. It is
recommended to remove any accessories and cover being used before using this feature.
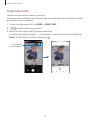
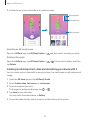
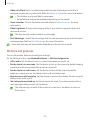
1 Open the notification panel, swipe downwards, and then tap (
Wireless power
sharing
) to turn it on. If you cannot find (
Wireless power sharing
) on the quick
panel, tap and drag the button over to add it.
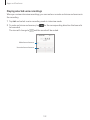
2 Place the other device on the centre of your phone, with their backs facing.
Phone Galaxy Watch Galaxy Buds
3 When you are finished charging, disconnect the other device from your phone.
Do not use headphones while sharing power. Doing so may affect nearby devices.
•
The location of the wireless charging coil may vary by device model. Adjust the
devices to connect with each other properly.
•
Some features are not available while sharing power.
•
Only devices that support the wireless charging feature can be charged using
this feature. Some devices may not be charged. To check out devices that
support the Wireless power sharing feature, visit the Samsung website.
•
To charge properly, do not move or use either device while charging.
•
The power charged to the other device may be less than the amount shared to it
by your phone.
•
If you charge the other device while charging your phone, the charging speed
may decrease or the device may not charge properly depending on the charger
type.
•
The charging speed or efficiency may vary depending on the phone’s condition or
the surrounding environment.

Getting started
14
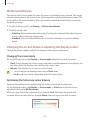
Setting the limit for power sharing
You can set the device to stop power sharing when the remaining battery power drops
below a certain level.
Open
Settings
, tap
Battery and device care
→
Battery
→
Wireless power sharing
→
Battery limit
, and then set the limit.
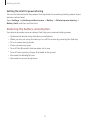
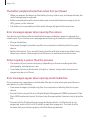
Reducing the battery consumption
Your device provides various options that help you conserve battery power.
•
Optimise the device using the device care feature.
•
When you are not using the device, turn off the screen by pressing the Side key.
•
Turn on power saving mode.
•
Close unnecessary apps.
•
Turn off the Bluetooth feature when not in use.
•
Turn off auto-syncing of apps that need to be synced.
•
Decrease the backlight time.
•
Decrease the screen brightness.

Getting started
15
Battery charging tips and precautions
Use only Samsung-approved battery, charger, and cable specifically designed for
your device. Incompatible battery, charger, and cable can cause serious injuries or
damage to your device.
•
Connecting the charger improperly may cause serious damage to the device. Any
damage caused by misuse is not covered by the warranty.
•
Use only USB Type-C cable supplied with the device. The device may be
damaged if you use Micro USB cable.
•
If you charge the device while the multipurpose jack is wet, the device may be
damaged. Thoroughly dry the multipurpose jack before charging the device.
•
To save energy, unplug the charger when not in use. The charger does not have a
power switch, so you must unplug the charger from the electric socket when not
in use to avoid wasting power. The charger should remain close to the electric
socket and easily accessible while charging.
•
When using a charger, it is recommended to use an approved charger that
guarantees the charging performance.
•
If the battery is completely discharged, the device cannot be turned on
immediately when the charger is connected. Allow a depleted battery to charge
for a few minutes before turning on the device.
•
If you use multiple apps at once, network apps, or apps that need a connection
to another device, the battery will drain quickly. To avoid losing power during a
data transfer, always use these apps after fully charging the battery.
•
Using a power source other than the charger, such as a computer, may result in a
slower charging speed because of a lower electric current.
•
The device can be used while it is charging, but it may take longer to fully charge
the battery.
•
If the device receives an unstable power supply while charging, the touch screen
may not function. If this happens, unplug the charger from the device.
•
While charging, the device and the charger may heat up. This is normal and
should not affect the device’s lifespan or performance. If the battery gets hotter
than usual, the charger may stop charging.
•
If the device is not charging properly, take the device and the charger to a
Samsung Service Centre or an authorised service centre.

Getting started
16
Nano-SIM card and eSIM
Insert the SIM or USIM card provided by your carrier.
To have two phone numbers or carriers for a single device, activate the eSIM or insert
two SIM cards. Differing from a physical nano-SIM card, an eSIM is an embedded digital
SIM. Using both the nano-SIM card and the eSIM may result in slower data transfer
speeds in some areas.
•
eSIM may not be available depending on the region, carrier, or model.
•
Some services that require a network connection may not be available
depending on the carrier.
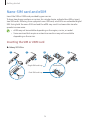
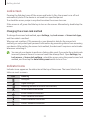
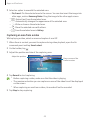
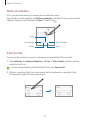
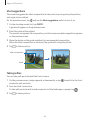
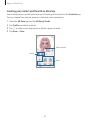
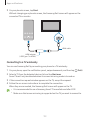
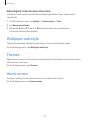
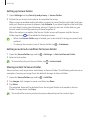
Inserting the SIM or USIM card
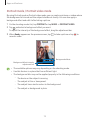
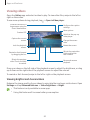
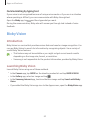
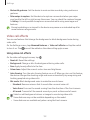
▶
Galaxy S23 Ultra:
2
1 3 4
<Underside>
Single SIM card tray
Dual SIM card tray
Getting started
17
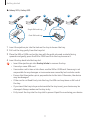
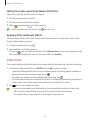
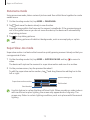
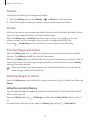
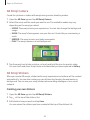
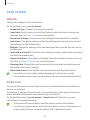
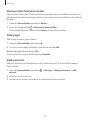
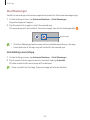
▶
Galaxy S23+, Galaxy S23:
21 3 4
<Underside>
Single SIM card tray
Dual SIM card tray
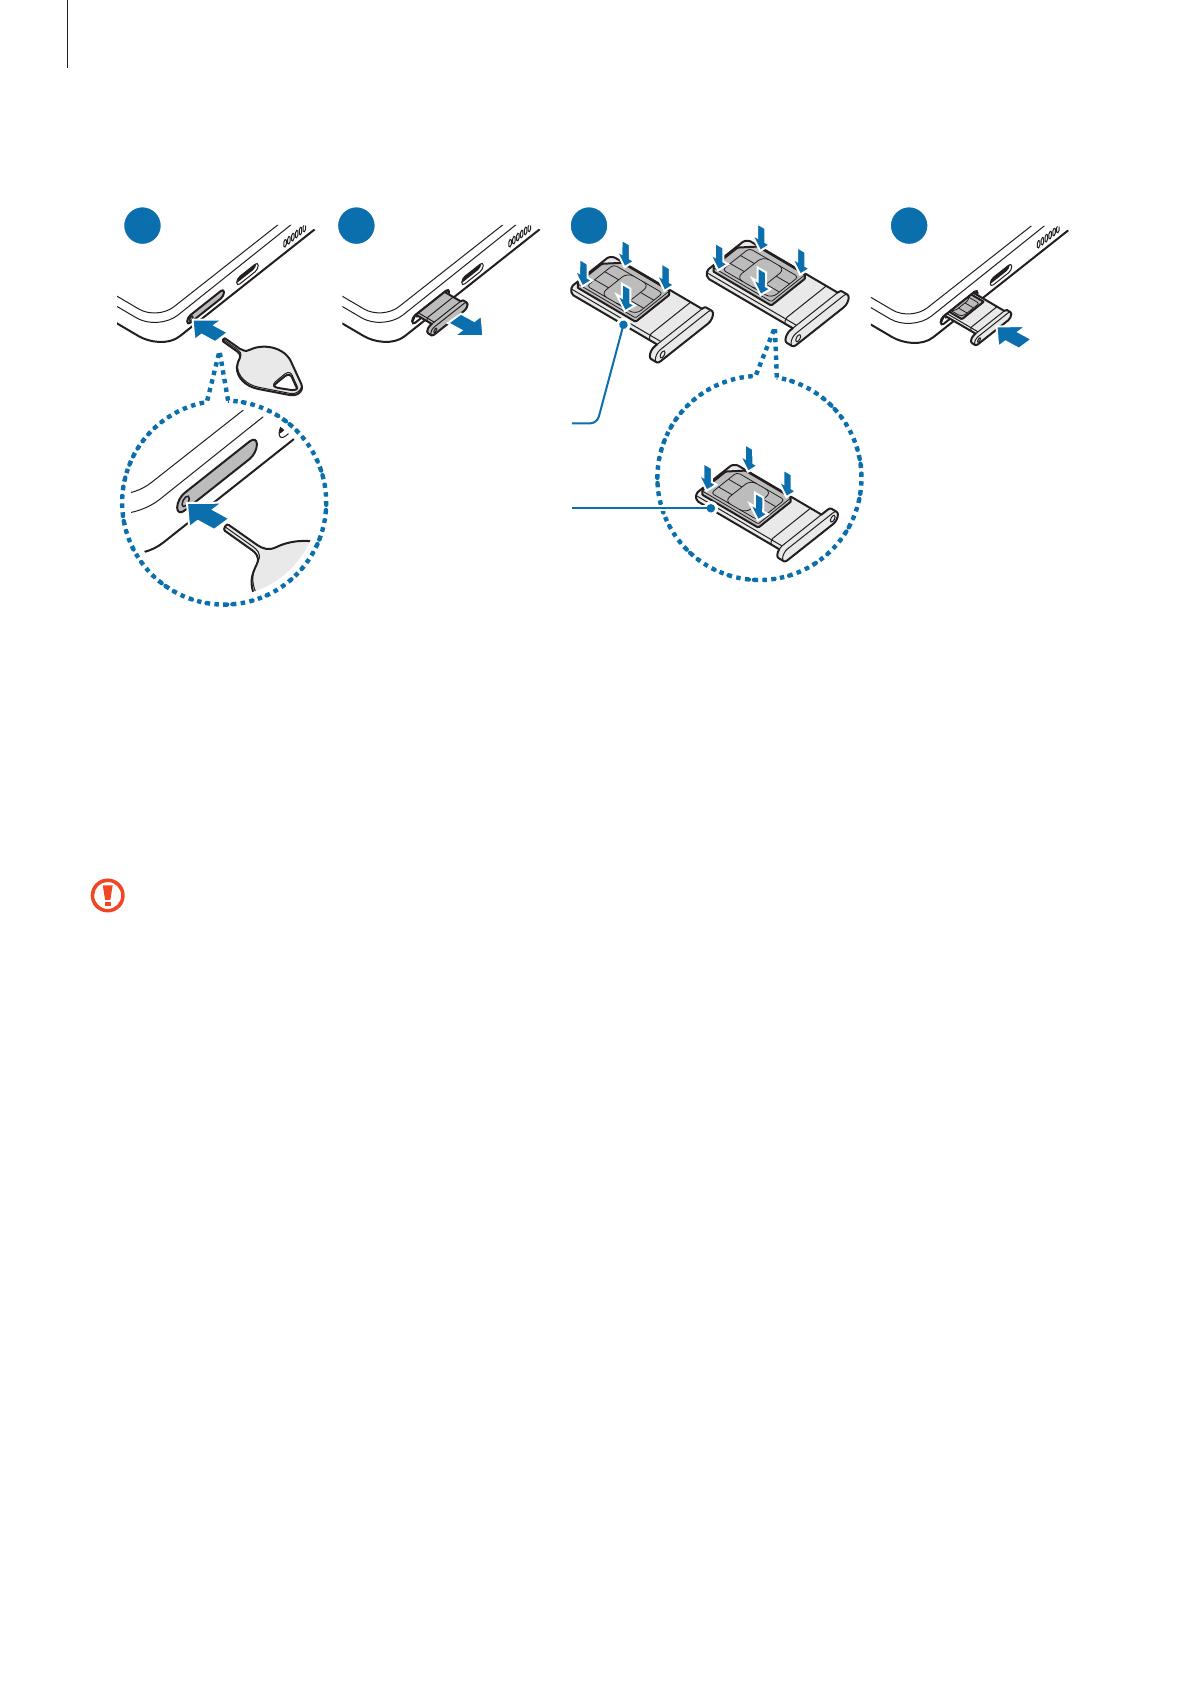
1 Insert the ejection pin into the hole on the tray to loosen the tray.
2 Pull out the tray gently from the tray slot.
3 Place the SIM or USIM card on the tray with the gold-coloured contacts facing
upwards and gently press the SIM or USIM card into the tray to secure it.
4 Insert the tray back into the tray slot.
•
Insert the ejection pin into the tray’s hole to remove the tray.
•
Use only a nano-SIM card.
•
Use caution not to lose or let others use the SIM or USIM card. Samsung is not
responsible for any damages or inconveniences caused by lost or stolen cards.
•
Ensure that the ejection pin is perpendicular to the hole. Otherwise, the device
may be damaged.
•
If the card is not fixed firmly into the tray, the SIM card may leave or fall out of
the tray.
•
If you insert the tray into your device while the tray is wet, your device may be
damaged. Always make sure the tray is dry.
•
Fully insert the tray into the tray slot to prevent liquid from entering your device.

Getting started
18
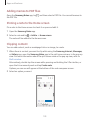
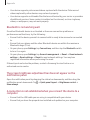
Activating an eSIM
Open
Settings
and tap
Connections
→
SIM manager
→
Add eSIM
. When a mobile plan is
found, follow the on-screen instructions to activate the eSIM.
If you have a QR code provided by your carrier, open
Settings
, tap
Connections
→
SIM
manager
→
Add eSIM
→
Scan QR code from service provider
, and then scan the QR
code.
SIM manager (dual SIM models)
Open
Settings
and tap
Connections
→
SIM manager
.
•
SIM cards
: Activate the SIM card to use and customise the SIM card settings.
•
eSIMs
: Activate the eSIM.
•
Preferred SIMs
: Select to use specific SIM cards for some features, such as voice
calls, when two cards are activated.
•
Data switching
: Set the device to use another SIM card for data services if the
preferred SIM card cannot connect to the network.
You may incur additional charges when using this feature.
•
More SIM settings
: Customise the call or eSIM settings.
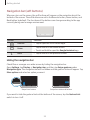
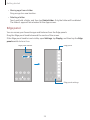
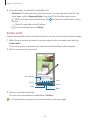
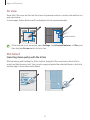
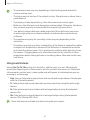
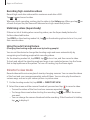
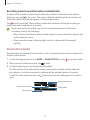
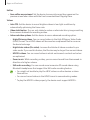
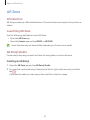
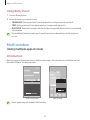
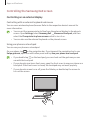
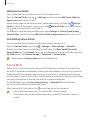
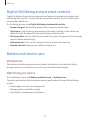
Turning the device on and off
Follow all posted warnings and directions from authorised personnel in areas
where the use of wireless devices is restricted, such as aeroplanes and hospitals.
Side key
Volume Down key
Turning the device on
Press and hold the Side key for a few seconds to turn on the device.

Getting started
19
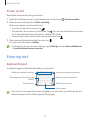
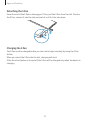
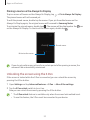
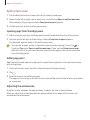
Turning the device off
1 To turn off the device, press and hold the Side key and the Volume Down key
simultaneously. Alternatively, open the notification panel, swipe downwards, and
then tap .
2 Tap
Power off
.
To restart the device, tap
Restart
.
You can set the device to turn off when you press and hold the Side key. Open
Settings
, tap
Advanced features
→
Side key
, and then tap
Power off menu
under
Press and hold
.
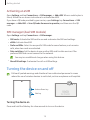
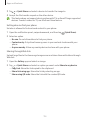
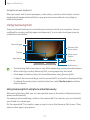
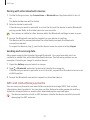
Forcing restart
If your device is frozen and unresponsive, press and hold the Side key and the Volume
Down key simultaneously for more than 7 seconds to restart it.
Emergency call
You can make an emergency call or check the medical information you saved.
Press and hold the Side key and the Volume Down key simultaneously, and then tap
Emergency call
. Alternatively, open the notification panel, swipe downwards, and then
tap
→
Emergency call
.
To manage your medical information and emergency contacts, open
Settings
and
tap
Safety and emergency
.
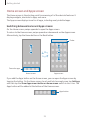
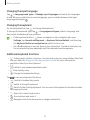
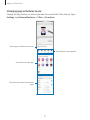
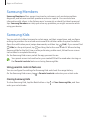
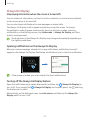
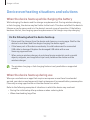
Initial setup
When you turn on your device for the first time or after performing a data reset, follow
the on-screen instructions to set up your device.
If you do not connect to a Wi-Fi network, you might not be able to set up some
device features during the initial setup.

Getting started
20
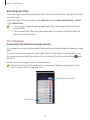
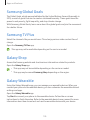
Samsung account
Using the Samsung account, you can use a variety of Samsung services that are provided
through mobile devices, TVs, and the Samsung website.
To check the list of services that can be used with your Samsung account, visit
account.samsung.com.
1 Open
Settings
and tap
Samsung account
.
Alternatively, open
Settings
and tap
Accounts and backup
→
Manage accounts
→
Add account
→
Samsung account
.
2 Sign in to your Samsung account. If you do not have a Samsung account, tap
Create
account
.
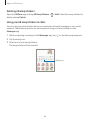
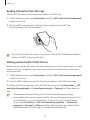
Finding your ID and resetting your password
If you forget your Samsung account ID or password, tap
Find ID
or
Forgot password?
on
the Samsung account sign-in screen. You can find your ID or reset your password after
you enter the required information.
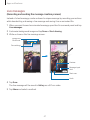
Signing out of your Samsung account
When you sign out of your Samsung account, your data, such as contacts or events, will
also be removed from your device.
1 Open
Settings
and tap
Accounts and backup
→
Manage accounts
.
2 Tap
Samsung account
→
My profile
and tap
Sign out
at the bottom of the screen.
3 Tap
Sign out
, enter your Samsung account password, and then tap
OK
.
Page is loading ...
Page is loading ...
Page is loading ...
Page is loading ...
Page is loading ...
Page is loading ...
Page is loading ...
Page is loading ...
Page is loading ...
Page is loading ...
Page is loading ...
Page is loading ...
Page is loading ...
Page is loading ...
Page is loading ...
Page is loading ...
Page is loading ...
Page is loading ...
Page is loading ...
Page is loading ...
Page is loading ...
Page is loading ...
Page is loading ...
Page is loading ...
Page is loading ...
Page is loading ...
Page is loading ...
Page is loading ...
Page is loading ...
Page is loading ...
Page is loading ...
Page is loading ...
Page is loading ...
Page is loading ...
Page is loading ...
Page is loading ...
Page is loading ...
Page is loading ...
Page is loading ...
Page is loading ...
Page is loading ...
Page is loading ...
Page is loading ...
Page is loading ...
Page is loading ...
Page is loading ...
Page is loading ...
Page is loading ...
Page is loading ...
Page is loading ...
Page is loading ...
Page is loading ...
Page is loading ...
Page is loading ...
Page is loading ...
Page is loading ...
Page is loading ...
Page is loading ...
Page is loading ...
Page is loading ...
Page is loading ...
Page is loading ...
Page is loading ...
Page is loading ...
Page is loading ...
Page is loading ...
Page is loading ...
Page is loading ...
Page is loading ...
Page is loading ...
Page is loading ...
Page is loading ...
Page is loading ...
Page is loading ...
Page is loading ...
Page is loading ...
Page is loading ...
Page is loading ...
Page is loading ...
Page is loading ...
Page is loading ...
Page is loading ...
Page is loading ...
Page is loading ...
Page is loading ...
Page is loading ...
Page is loading ...
Page is loading ...
Page is loading ...
Page is loading ...
Page is loading ...
Page is loading ...
Page is loading ...
Page is loading ...
Page is loading ...
Page is loading ...
Page is loading ...
Page is loading ...
Page is loading ...
Page is loading ...
Page is loading ...
Page is loading ...
Page is loading ...
Page is loading ...
Page is loading ...
Page is loading ...
Page is loading ...
Page is loading ...
Page is loading ...
Page is loading ...
Page is loading ...
Page is loading ...
Page is loading ...
Page is loading ...
Page is loading ...
Page is loading ...
Page is loading ...
Page is loading ...
Page is loading ...
Page is loading ...
Page is loading ...
Page is loading ...
Page is loading ...
Page is loading ...
Page is loading ...
Page is loading ...
Page is loading ...
Page is loading ...
Page is loading ...
Page is loading ...
Page is loading ...
Page is loading ...
Page is loading ...
Page is loading ...
Page is loading ...
Page is loading ...
Page is loading ...
Page is loading ...
Page is loading ...
Page is loading ...
Page is loading ...
Page is loading ...
Page is loading ...
Page is loading ...
Page is loading ...
Page is loading ...
Page is loading ...
Page is loading ...
Page is loading ...
Page is loading ...
Page is loading ...
Page is loading ...
Page is loading ...
Page is loading ...
Page is loading ...
Page is loading ...
Page is loading ...
Page is loading ...
Page is loading ...
Page is loading ...
Page is loading ...
Page is loading ...
Page is loading ...
Page is loading ...
Page is loading ...
Page is loading ...
Page is loading ...
Page is loading ...
Page is loading ...
Page is loading ...
Page is loading ...
Page is loading ...
Page is loading ...
Page is loading ...
Page is loading ...
Page is loading ...
-
 1
1
-
 2
2
-
 3
3
-
 4
4
-
 5
5
-
 6
6
-
 7
7
-
 8
8
-
 9
9
-
 10
10
-
 11
11
-
 12
12
-
 13
13
-
 14
14
-
 15
15
-
 16
16
-
 17
17
-
 18
18
-
 19
19
-
 20
20
-
 21
21
-
 22
22
-
 23
23
-
 24
24
-
 25
25
-
 26
26
-
 27
27
-
 28
28
-
 29
29
-
 30
30
-
 31
31
-
 32
32
-
 33
33
-
 34
34
-
 35
35
-
 36
36
-
 37
37
-
 38
38
-
 39
39
-
 40
40
-
 41
41
-
 42
42
-
 43
43
-
 44
44
-
 45
45
-
 46
46
-
 47
47
-
 48
48
-
 49
49
-
 50
50
-
 51
51
-
 52
52
-
 53
53
-
 54
54
-
 55
55
-
 56
56
-
 57
57
-
 58
58
-
 59
59
-
 60
60
-
 61
61
-
 62
62
-
 63
63
-
 64
64
-
 65
65
-
 66
66
-
 67
67
-
 68
68
-
 69
69
-
 70
70
-
 71
71
-
 72
72
-
 73
73
-
 74
74
-
 75
75
-
 76
76
-
 77
77
-
 78
78
-
 79
79
-
 80
80
-
 81
81
-
 82
82
-
 83
83
-
 84
84
-
 85
85
-
 86
86
-
 87
87
-
 88
88
-
 89
89
-
 90
90
-
 91
91
-
 92
92
-
 93
93
-
 94
94
-
 95
95
-
 96
96
-
 97
97
-
 98
98
-
 99
99
-
 100
100
-
 101
101
-
 102
102
-
 103
103
-
 104
104
-
 105
105
-
 106
106
-
 107
107
-
 108
108
-
 109
109
-
 110
110
-
 111
111
-
 112
112
-
 113
113
-
 114
114
-
 115
115
-
 116
116
-
 117
117
-
 118
118
-
 119
119
-
 120
120
-
 121
121
-
 122
122
-
 123
123
-
 124
124
-
 125
125
-
 126
126
-
 127
127
-
 128
128
-
 129
129
-
 130
130
-
 131
131
-
 132
132
-
 133
133
-
 134
134
-
 135
135
-
 136
136
-
 137
137
-
 138
138
-
 139
139
-
 140
140
-
 141
141
-
 142
142
-
 143
143
-
 144
144
-
 145
145
-
 146
146
-
 147
147
-
 148
148
-
 149
149
-
 150
150
-
 151
151
-
 152
152
-
 153
153
-
 154
154
-
 155
155
-
 156
156
-
 157
157
-
 158
158
-
 159
159
-
 160
160
-
 161
161
-
 162
162
-
 163
163
-
 164
164
-
 165
165
-
 166
166
-
 167
167
-
 168
168
-
 169
169
-
 170
170
-
 171
171
-
 172
172
-
 173
173
-
 174
174
-
 175
175
-
 176
176
-
 177
177
-
 178
178
-
 179
179
-
 180
180
-
 181
181
-
 182
182
-
 183
183
-
 184
184
-
 185
185
-
 186
186
-
 187
187
-
 188
188
-
 189
189
-
 190
190
-
 191
191
-
 192
192
-
 193
193
-
 194
194
-
 195
195
-
 196
196


Ask a question and I''ll find the answer in the document
Finding information in a document is now easier with AI
Related papers
-
Samsung SM-F926B/DS User manual
-
-
Samsung SM-F721B User manual
-
-
-
-
-
Samsung SM-F900F User manual
-
-