Huskie Tools REC-530Y Operating Instructions Manual
- Category
- Rechargeable batteries
- Type
- Operating Instructions Manual


1http://www.huskietools.com [email protected]
REC-530Y SPECIFICATIONS
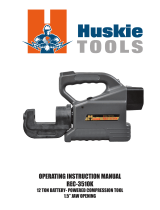
CRIMPING TOOL (REC-530Y)
BATTERY CARTRIDGE (BP-70E)
BATTERY CHARGER (CH-35R)
OPTIONAL ACCESSORIES
STANDARD ACCESSORIES
BATTERY POWERED
SCISSOR-TYPE CUTTER
1-3/16” JAW OPENING
•Cuts ACSR up to 336
•1-3/16” Jaw Opening
•Cuts up to 500 MCM CU
•Open Scissor Jaw for Easy Cable
Insertion
•One Hand Operation
Battery Cartridge: BP-70EI
BP-70MH
DC Charger: CH-70DCH
Battery Cartridge: BP-70E
Battery Charger: CH-35R
Carrying Case: REC-458CASE
Shoulder Strap: ROB-S01
Output: 6.6 Tons
Weight: 11.4 lbs. w/ battery
Size: 15"L x 12”H x 2.5”W
Jaw Opening: 1-3/16”
Battery type: Sealed nickel cadmium
Voltage: 14.4V DC
Rated current: 2.0 Ah
Charge time: 25 min.
Dimensions: 3.5"L x 2.7"W x 5.3"H
Weight: 1.6 lbs.
Input voltage: 120V AC single phase
Charging Capacity: 20VA
Dimensions: 7.5"L x 4.5"W x 3.7"H
Weight: 2 lbs.

2http://www.huskietools.com [email protected]
STANDARD ACCESSORIES
OPTIONAL ACCESSORIES
BATTERY CARTRIDGE
BP-70E
BATTERY CHARGER
CH-35R
CARRYING CASE
REC-458CASE
SHOULDER STRAP
ROB-S01
DC CHARGER
CH-70DCH
BATTERY CARTRIDGE
BP-70EI
GUIDE TO CUTTING CYCLES
This guide indicates the number of cutting cycles that the REC-530Y can be expected to perform when the battery is fully
charged. These figures are approximately and will vary according to the charging and other operating operating conditions, such
as temperature, humidity, and battery condition.
LED INDICATOR:
Green Complete Compression
Red Incomplete Compression
Orange Complete Compression, Low Battery
Conductor Size Average Cuts per Charge
BP-70E
500 MCM AL 100
500 MCM CU 90
750 MCM CU 75
BATTERY CARTRIDGE
BP-70MH

3http://www.huskietools.com [email protected]
1. Select only the appropriate material to be cut. Cutting materials other than those specified will result in severe
tool damage and may cause personal injury. Consult factory if you have any questions about cutting capacities.
2. Always cut the material at the 90°degree angle to the blades. Trying to cut at any other angle will cause the
blades to spread apart and possibly break.
3. Always point the tool away from other people.
4. If the tool is stored for an extended period at a temperature of less than 25º F (-5ºC), the tool should be allowed to
return to room temperature to ensure smooth operation Use the tool only after it has been at room temperature for
1 hour.
5. Do not drop the tool. Dropping the tool may damage the hydraulic circuit and result in the tool not functioning correctly.
6. Keep the head and ram clean and free of debris. Solvents can be used to clean the head, but should not be used on
the plastic body. Use soap and water to clean the body.
1. Do not short circuit the contacts or expose the cartridge to water, oil or solvents.
2. Do not disassemble or attempt to repair the battery cartridge or dispose of in a fire.
3. Do not drop or otherwise abuse the battery cartridge.
4. Do not leave the cartridge in locations where it will be exposed to a temperature greater than 140ºF (60ºC) for an
extended period.
5. The battery has a limited life. When the crimping capacity becomes about 1/2 that of the original capacity, the
battery should be replaced.
6. If the battery cartridge is stored without being charged, natural drainage will cause the power to be reduced. The
battery should be charged every 3 months if not in use.
1. The LED indicator lights up green and remains lit when the unit starts charging a battery cartridge. The indicator
turns orange when charging is completed.
2. This unit is for charging battery cartridges BP-70E, BP-70EI, BP-70R, BP-70I and BP-70MH only. Do not use
the charger for any other devices.
3. Allow battery cartridges to cool before charging. Allow at least 15 minutes between charges when charging several
cartridges in succession.
4. Charge batteries at an ambient temperature of 50º-95ºF (10º-35º C). Charging time is approximately 25 minutes
for the BP-70E and BP-70EI, 15 minutes for BP-70R and BP-70I, and 35 minutes for the BP-70MH.
5. Never short circuit the output terminals.
6. Do not expose the charger to water, oil or solvents.
7. Do not disassemble, attempt to modify, drop or otherwise abuse charger.
PRECAUTIONS FOR THE BATTERY CARTRIDGE:
PRECAUTIONS FOR THE TOOL:
PRECAUTIONS FOR THE CHARGER:
IMPORTANT OPERATING PRECAUTIONS

4http://www.huskietools.com [email protected]
OPERATING INSTRUCTIONS
1 Insert the plug end into a 120V power source. The LED indicator will
flash red indicating the charger is now in “stand-by” mode and ready to
charge the battery. Do not plug the charger into a generator as this will
likely cause the fuse in the charger to short, and will not operate.
2. To charge a drained battery, insert the battery into the charger until the
LED indicator shows a steady green. This indicates the battery is being
charged and will be completed in approximately 25 minutes. The LED
indicator will show orange when charging is completed.
3. If the indicator shows a steady red when the battery is inserted, the bat-
tery is too hot to be charged and must be cooled to room temperature before charging. Do not leave the battery in
the charger to cool as the charger will not recognize the battery is inserted and will not charge.
4. If the LED indicator goes out or is flashing quick red, this could be a possible short in the battery circuit, or a
problem with the charger itself. It is best to consult the factory at 1-800-860-6170 for service if such a condition occurs.
5. To recondition the battery, insert the battery into the charger and push the “R” button. The LED indicator should
be flashing green to indicate the discharge cycle is now in progress. The light will turn steady orange when complete
and the battery will have a full charge.
6. For technical questions or difficulty in operation, please call our customer service department at 1-800-860-6170.
1. While pressing the latch, pull out the battery cartridge. To replace the
battery cartridge, push the new cartridge firmly into place.
2. After inserting a battery cartridge, check that it is securely in place by pulling
gently. Do not press the latch when pulling the cartridge.
1. The ram advances when the trigger is pressed and stops when the trigger is released.
2. To retract the ram, press the release button. The ram continues to retract while
the release button is pressed.
ATTACHING THE BATTERY CARTRIDGE
TRIGGER AND RELEASE BUTTON
CHARGING THE BATTERY

5
http://www.huskietools.com [email protected]
OPERATING INSTRUCTIONS
CUTTING:
1. Retract blades by pressing the release button.
2. Make sure that material being cut is within the specified cutting capacity of the tool.
3. Place the material to be cut between the blades and press the advance trigger until blades hold the material in place.
4. Check material for proper alignment to the cutting blades. It should be at a 90° degree angle to the blades. Any
other angle will cause the blades to spread apart and possibly break.
5. Continue to advance the blades until the material is cut. If material is cut and tool has not yet bypassed, it may be
difficult to retract blades. If this occurs, continue to advance tool and build pressure. A series of clicks will be
heard while the tool running in a “neutral” mode. This indicates that the tool has built full pressure and bypassed
and can now be released.
RIGHT WRONG
MAINTENANCE AND INSPECTION
1. Daily maintenance is required to ensure that the tool is kept in good working condition.
2. Sharpen blades occasionally with a sharpening stone on the back side of the blades to remove any burrs that may occur.
3. Wipe away any excess oil with a soapy cloth.
4. Provided that maintenance of the tool is carried out regularly, the tool should provide many years of service.
5. Should you experience any difficulty with the operation and maintenance of this tool, contact Huskie’s technical
support department at 1-800-860-6170.


7http://www.huskietools.com [email protected]
MODEL REC-530Y PARTS LIST
1 M4 X 20 Screw 558-01 6 49 PS-8 Pent Seal 16-44 1
2 Housing ( R ) 558-02 1 50 P-8 Back-Up Ring (B.C.) 85-33 1
3 M3 X 6 Screw R150-02 1 51 Spring (590) R150-23 1
4 Top Cover 558-03 1 52 PS-20 Pent Seal R150-24 1
5 Switch Unit 558-04 1 53 P-20 Back-Up Ring (B.C.) 35-18 1
6 LED Harness 558-05 1 54 Pump Piston (1) 558-15 1
7 Circuit Board 558-06 1 55 P-5 O-Ring 5N-35 1
8 Strap 558-07 1 56 Pump Piston (2) 558-16 1
9 M3 X 5 Screw (T.P.) ROB-94 1 57 P-3 O-Ring 16-36 1
10 Retaining Plate 458-01 1 58 Release Valve Stem ROB-135 1
11 Spring (639) 458-02 1 59 Spring (678) 558-17 1
12 Lever Stopper 558-08 1 60 Spring (66) 85-40 1
13 3 X 16 Parallel Pin 558-09 1 61 9/32" Ball 16-40 2
14 Switch Knob 558-10 1 62 Spring (67) 85-39 2
15 Spring (599) R150-09 1 63 Valve Screw (10) 410-44 2
16 Housing (L) 558-11 1 64 P-28 O-Ring 300-21 1
17 Power Unit 558-12 1 65 P-28 Back-Up Ring (B.C.) 55D-03 1
18 M4 X 14 Screw (Ni)
ROB-128B
4 66 Ram Y30-36 1
19 Spring (598) R150-13 1 67 CE-8 Snap Ring 16-09 9
20 Push Pin R150-14 1 68 Pivot Pin Y30-18 1
21 Release Lever 558-13 1 69 Ram Spring (446) 20-76 1
22 4 X 16 Dowel Pin (G) 24-01 1 70 Body Head Y30-34 1
23 Reservoir Cap 410-55 1 71
M5 X 8 Nylock Screw (D.P.)
85F-03 1
24 Magnet ROB-25 1 72 Stud Bolt (20) Y30-14 2
25 Oil Reservoir (36) R4412-01 1 73 Link Head Y30-17 1
26 G-30 O-Ring 75-26 1 74 Link Y30-16 4
27 M3 X 16 Screw R150-16 2 75 Pin (108) Y30-15 4
28 Valve Block R150-17 1 76 M8 Hex. Nut Y30-28 4
29 Spring (371) 51-17 1 77 M8 Lock Washer 40-25 4
30 3/16" Ball 16-49 3 78 Shoulder Bolt Y30-11 1
31 SI-20 Ring 410-74 1 79 Support Plate Y30-10 2
32 Filter Screen 410-73 1 80 Collar Y30-09 1
33 Strainer R150-18 1 81 5 X 45 Drive Pin (AW) Y30-12 2
34 Valve Cartridge R150-19J 1 82 Blade (2) Ass'y Y30-20 1
35 S-8 O-Ring R510A-08 1 83 Blade (1) Ass'y Y30-19 1
36 P-7 O-Ring 16-60 1 84 AS1101 Thrust Washer 220-06 1
37 SEPN4 Retainer R150-21 1 85 ANO1 Nut Y30-41 2
38 Plug 51-21 1 821 M5 Hex. Nut RA-73 2
39 P-4 Back-Up Ring (B.C.) 410-47 1 822 M5 X 30 Screw EG-64 2
40 P-4 O-Ring 410-48 1 823 M5 Lock Washer 410-09 2
41 Spring (341) 51-20 1 824 Guide Support Y30-08 1
42 7/32" Ball 16-26 1 825 Blade (2) Y30-06 1
43 M4 X 4 Screw (F.P.) 85-47 3 826 M5 X 18 Screw Y30-05 2
44 1/8" Ball 40-20 2 827 Spacer Y30-07 2
45 M5 X 5 Screw (F.P.) 510A-05 1 828 Blade Guide (1) Y30-04 1
46 5/32" Ball 22-21 1 831 Blade (1) Y30-03 1
47 Body 530Y-01 1 832 Blade Guide (2) Y30-02 1
48 3 X 8 Dowel Pin (D) 610F-11 1 833 M5 X 10 Screw Y30-01 2
QTY.
NO.
DESCRIPTION
CODE
NO.
DESCRIPTION
CODE
QTY.

8http://www.huskietools.com [email protected]
PROBLEM CAUSE SOLUTION
MOTOR RUNS, BUT THE TOOL
JAWS WILL NOT ADVANCE
Insufficient Hydraulic Oil Consult Factory for Repair
Service
Air Block in Hydraulic System Invert tool to allow air to rise
towards the top of the oil bladder
Defective Hydraulic Circuit Consult Factory for Repair
Service
MOTOR RUNS, TOOL JAWS
ADVANCE BUT WILL NOT
BUILD PRESSURE
Insufficient Hydraulic Oil Consult Factory for Repair
Service
Defective Suction Valve or
Bypass Cartridge
Consult Factory for Repair
Service
MOTOR WILL NOT RUN AT ALL
Defective Battery Charge or Replace Battery
Bad Contact or Loose Battery
Connections
Check all Connections and
Wires
Misaligned Switch
Check to Make Sure that
Switch is Properly Aligned
with Trigger
Consult Factory for Repair
Service
TOOL JAWS WILL NOT
RELEASE
Tool Did Not Complete a Full
Cycle and Bypass
Press Trigger and allow Tool
to Bypass. Then Release Tool
Jaws.
Connector is Jammed in Tool
Jaws
Press and Hold Release Trigger
While Prying Tool Jaws Apart.
Release Trigger is Bent or
Misaligned
Consult Factory for Repair
Service
TROUBLESHOOTING GUIDE

All Huskie REC-Series battery driven products carry a 5 year warranty, and the ECO-Series
carry a 3 year warranty. The BP-70E, BP-70EI, and the BP-70MH batteries carry a 5 year
warranty from the date stamped on the battery. The LED indicator on the BP-70-EI battery
carries a 1 year warranty from purchase date. Hydraulic hammers carry a one year warranty
and all other Huskie products carry a 5 year warranty. Huskie reserves the right to determine
all warranty claims. Failure due to misuse, abuse or repairs attempted by anyone other than
Huskie Tools, Inc., or an authorized service center render this warranty null and void. Our
patented drop-out bypass cartridge can be re-calibrated or tested at no charge for the life
of the tool. All factory repaired or reconditioned hydraulic tools carry a one year warranty
on parts and labor.
REPAIR AND WARRANTY CLAIMS
All claims must be sent to Huskie for inspection and authorization. A Return Goods
Authorization is required before shipping tools to Huskie. Secure the authorization by
telephoning 1-800-860-6170 or writing to Huskie's main office with details of claim. Non-
warranty repairs are handled using the same procedure. Repairs exceeding 50% of the cost
of a new tool will be advised before repairs are made.
PLEASE RETAIN FOR YOUR RECORDS
Purchaser’s Name _____________________________________________________
Address _____________________________________________________
City, State, Zip _____________________________________________________
Tool Model Number _____________________________________________________
Serial Number _____________________________________________________
Date Purchased From _____________________________________________________
Purchased From _____________________________________________________
MODEL REC-530Y WARRANTY

HOW TO GET SERVICE UNDER THE TERMS OF THE LIMITED WARRANTY
Return your product directly to Huskie Tools, Inc. as our representative network is not
prepared to service the product under the terms of this warranty.
1. Write, call or fax Huskie stating the tool’s purchase date and problem. You will be
given a RGA # to assure that your merchandise will be properly handled upon its
receipt.
2. CAUTION: Make sure the product is packaged adequately so as to prevent damage
or loss during transit. The shipment must be prepaid and we recommend that it be
insured. A cover letter indicating the reason for the return should be included in
order to facilitate repairs.
SEND THIS PORTION WITH ANY TOOL WHEN REQUESTING REPAIRS,
WARRANTY OR RECONDITIONING WORK.
PLEASE CALL OR FAX HUSKIE FOR AN RGA#
Customer Job No. _______________________
Address________________________________
City___________________________________ State _____ Zip _____
Tool Model ____________________________
Warranty Claim _____ Repair Only ____
Customer Name:____________________
Phone ( _____ ) ________________________
City___________________________________ State _____ Zip _____
Serial No. _________________________
Estimate Required: Yes _____ No _____
MODEL REC-530Y WARRANTY

-
 1
1
-
 2
2
-
 3
3
-
 4
4
-
 5
5
-
 6
6
-
 7
7
-
 8
8
-
 9
9
-
 10
10
-
 11
11
-
 12
12


Huskie Tools REC-530Y Operating Instructions Manual
- Category
- Rechargeable batteries
- Type
- Operating Instructions Manual
Ask a question and I''ll find the answer in the document
Finding information in a document is now easier with AI
Related papers
-
 Huskie Tools REC-6510K Operating Instructions Manual
-
 Huskie Tools REC-S624H Operating instructions
-
 Huskie Tools CH-90DC User manual
-
 Huskie Tools REC-54ACM User manual
-
 Huskie Tools REC-MK754ACM User manual
-
 Huskie Tools SL-MK7ND User manual
-
 Huskie Tools REC-MKS724H User manual
-
 Huskie Tools IL-MK7ND User manual
-
 Huskie Tools REC-MK7430 User manual
-
 Huskie Tools SL-MKC7510 User manual


Other documents
-
 Loos & Co Locoloc HC-20 User manual
-
Pink Power HG2043 User manual
-
Cembre B54-YK Operation and Maintenance Manual
-
Fagor CNC 8055 for milling machines Owner's manual
-
Greenlee GATOR EK425LG Li-ion Battery CrimpingTool User manual
-
-
-
-
 GREENLINE E6CCXLX User manual
-

