gofanco CAT5E User manual
- Category
- Console extenders
- Type
- User manual
This manual is also suitable for

HDBaseT HDMI Extender
over CAT5e/6/7 with IR - 70m
G4-0018A
®
P/N: HDbaseT-Ext

2
Congratulations for owning a gofanco product. Our products
aim to meet all your connectivity needs wherever you go.
Have fun with our products!
Please read this manual carefully before first use.
If you need more information about our products, please
visit www.gofanco.com.
For technical support, please email us at support@gofanco.
com.
For drivers/manuals download, please go to http:// www.
gofanco.com/download.

3
Introduction
gofanco HDBaseT HDMI Extender over CAT5e/6/7 with IR -
70m (part# HDbaseT-Ext) extends HDMI signals over one
Cat5e/6/7 cable up to 70m (230ft) with bi-directional IR
support.
Specifications
Package Contents
• HDBaseT HDMI Extender over CAT5e/6/7 with IR - 70m
(TX & RX)
• Power adapter
• IR Blaster extension cable & IR Receiver extension cable
• Mounting ears & screw kit
• User's guide
Output Signal HDMI
Protocol HDBaseT
Resolution Up to 4K x 2K
Transmission
Distance
Up to 70m (1080p)
Up to 40m (4K x 2K)
Network Cable CAT5e/6/7
HDMI Cable Up to 5m (Input & Output)
Power Supply DC 12V/2A

4
Figure 1: Transmitter (TX) - HDMI Device Input
HDMI In
IR Out
• HDMI In: Connect your HDMI source here with an HDMI
cable (cable not included)
• IR In: Infrared 3.5mm socket. Plug IR Receiver extension
cable here. See instructions on page 7.
• IR Out: Infrared 3.5mm socket. Plug IR Blaster extension
cable here. See instructions on page 7.
Layout
Figure 2: Transmitter (TX) - RJ45 Output
IR In
Power Jack RJ45
1: Power LED
2: Link LED
3: LED Indicator
Note: With PoE technology, only one power adapter
is needed to power both the Transmitter and
Receiver.

5
• Power Jack: Connect the included 12V DC power adapter
here (or the Receiver's power jack)
• Power LED: On when the Transmitter is powered
• Link LED: On when the Cat5e/6/7 cable is connected/
linked properly between the Transmitter and Receiver
• LED Indicator: On when Receiver's HDMI out is connected
to an HDMI display and the HDMI signal is outputted
• RJ45: Link to the Receiver's RJ45 via a Cat5e/6 cable
• Power Jack: Connect the included 12V DC power adapter
here (or the Transmitter's power jack)
• Power LED: On when the Receiver is powered
• Link LED: On when the Cat5e/6/7 cable is connected/
linked properly between the Transmitter and Receiver
• LED Indicator: On when Receiver's HDMI out is connected
to an HDMI display and the HDMI signal is outputted
• RJ45: Link to the Transmitter's RJ45 via a Cat5e/6/7 cable
Figure 3: Receiver (RX) - RJ45 Input
Power Jack
RJ45
1: Power LED
2: Link LED
3: LED Indicator

6
Figure 4: Receiver (RX) - HDMI Display Output
• HDMI Out: Connect to your HDMI display here with an
HDMI cable (cable not included)
• IR In: Infrared 3.5mm socket. Plug IR Receiver extension
cable here. See instructions on page 7.
• IR Out: Infrared 3.5mm socket. Plug IR Blaster extension
cable here. See instructions on page 7.
IR Extenders (20~60kHz IR devices supported)
IR In
HDMI Out
IR Out
Figure 5: IR Blaster cable
(Connect to IR Out)
Figure 6: IR Receiver cable
(Connect to IR In)

7
• IR Blaster cable: Plug into the Transmitter's or Receiver's
IR Out to emit IR signals
• IR Receiver cable: Plug into the Receiver's or Transmitter's
IR In to receive IR signals
Control your media player (such as DVD) at the TV side using
the media player's remote controller
• Plug the IR Receiver cable to the Receiver's IR In port.
• Plug the IR Blaster cable to the Transmitter's IR Out port.
Control your TV at the media player side using the TV's
remote controller
• Plug the IR Receiver cable to the Transmitter's IR In port.
• Plug the IR Blaster cable to the Receiver's IR Out port.
Important Note: Incorrect placement of IR Receiver and
IR Blaster cables may result in cable failures. Please
check carefully before plugging in the IR cables to
proper IR sockets. The IR Receiver cable always plugs
into an IR In port & IR Blaster cable always plugs into
an IR Out port.

8
Hardware Installation
Note: To achieve optimal performance, a CAT6 or CAT7
cable is recommended.
1. Power off all devices including your HDMI source and
display.
2. Connect your HDMI source to the Transmitter's HDMI
IN connector with an HDMI cable (not included).
3. Optional: Connect the IR Receiver or Blaster extension
cable according to the instructions on page 7.
4. Connect your HDMI display to the Receiver's HDMI OUT
connector with an HDMI cable (not included).
5. Optional: Connect the IR Receiver or Blaster extension
cable according to the instructions on page 7.
6. Connect and link the Transmitter and Receiver by a
CAT5e/6/7 cable.
7. Plug the included power adapters into the Transmitter's
or Receiver's Power Jack, then plug the power adapter
into a reliable power outlet.
8. Power on your HDMI device and HDMI display.
9. The HDMI Extender is ready for use.
* When using the remote control, please make sure its
distance to the IR Receiver extension cable is within 5
meters (16.4 ft) and without obstructions.

9
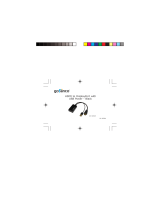
Application
Extend HDMI signals such as game consoles, DVD players
or computers up to 70m (230ft) and supports bi-directional
IR.
Figure 7: Application
DVD
IR OUT
IR OUT
IR IN IR IN
Receiver
Transmitter
TV

10
FAQ & Solutions
Q: The HDMI display doesn't display images:
A: Check the LED indicators' status to make sure all
connections are connected properly.
If the status is abnormal, check the followings:
1) Whether the power adapter is connected to the
Transmitter (TX) or Receiver (RX) securely.
2) Make sure the Network cable (CAT5e/6/7) is firmly
connected between TX and RX.
3) Make sure the HDMI cables are securely connected.
- Between the HDMI source and the TX.
- Between the HDMI display and the RX.
Q: The LED Indicator (3) is flashing and there is no image
on the HDMI display:
A: Check if the HDMI display has been switched to the right
HDMI input channel.
Q: The Link LED (2) is flashing and LED Indicator (3) is off:
A: 1) Check whether there is HDMI signal from HDMI source
2) Check whether the HDMI cable is securely connected
between the RX and HDMI display.
Q: The HDMI display is flashing and having disturbance.
A: Try other HDMI cables to connect the HDMI source
to the TX.

11
Blank Page

®
Thank you for choosing gofanco
www.gofanco.com
-
 1
1
-
 2
2
-
 3
3
-
 4
4
-
 5
5
-
 6
6
-
 7
7
-
 8
8
-
 9
9
-
 10
10
-
 11
11
-
 12
12


gofanco CAT5E User manual
- Category
- Console extenders
- Type
- User manual
- This manual is also suitable for
Ask a question and I''ll find the answer in the document
Finding information in a document is now easier with AI
Related papers
-
 gofanco HDbaseT-Ext Owner's manual
-
 gofanco G4-0145A 2-Port HDMI Extender/Splitter User guide
-
 gofanco AudioCATExt User manual
-
 gofanco HDMIDP User manual
-
 gofanco USBCLANHub Installation guide
-
 gofanco HDExt4K120 User guide
-
 gofanco PRO-HDbaseT-U User manual
-
 gofanco USBCgigabit User guide
-
 gofanco USB3gigabit User manual
-
gofanco Prophecy PRO-HDExtIP-RX User manual


Other documents
-
 StarTech.com WALLBOX1WH Datasheet
-
CYP PUV-1610TX User manual
-
CYP PUV-1710LTX-AVLC User manual
-
-
Comprehensive CHE-HDBT2020 User manual
-
CYP PUV-1530TX User manual
-
-
SIIG CE-H22611-S1 User manual
-
Vanco 280621 User manual
-
